Hands-On Review
Anycubic Photon M3
Up until recently, FDM (fused deposition modeling) 3D printers were the most accessible additive manufacturing machines available, both in price and ease of use. We’ve reviewed several FDM printers due to that accessibility, but times have changed. Prices for resin printers (SLA and DLP) have been falling steadily for years, to the point where some of the most popular resin printers are cheaper than popular FDM printers. So I’m stoked to do our first review of a resin printer, the just-released Anycubic Photon M3. If you’re familiar with the differences between FDM and resin, you can skip the next three paragraphs.


![]()

Comparing FDM and resin printers is very much an apples and oranges situation. While they’re both AM technologies, the only real similarity between them is that they build objects one layer at a time. With FDM, an extruder deposits molten plastic, drawing the cross-section of each layer. A minimum of four motors is required (one for the extruder to push the filament and one for each axis of motion) as well as precise heating and cooling hardware to melt and cool the plastic as it extrudes. In other words, there’s a LOT going on, and each component has to work perfectly in tandem with the others or none of it works.
Resin printers, on the other hand, have one moving part and a single motor. There are no heating or cooling systems (besides the small fan that all electronics have). Objects are built by using projected light to cure the photosensitive resin, one layer at a time, with each cross-section being cured all at once. The bottom of the resin vat is an FEP (Fluorinated Ethylene Propylene) film that allows light to pass through, and the light source is positioned under the vat, aiming up at it. The build plate is the only moving part of the printer, and its starting position is one layer from the bottom of the vat. When the first layer is projected onto the bottom of the vat, the resin between the bottom of the vat and the build plate cures into a solid and bonds to both, but the build plate is laser etched to have a micro-surface that causes the cured resin to bond more strongly to it than to the FEP film. So when the build plate moves up and into position for the next layer, the object sticks to the build plate and separates from the film. If we remove the magical chemistry of photopolymerization from the equation, resin printers are incredibly simple in their construction and operation; a light projects for a few seconds, the build plate moves up, the light projects, build plate moves up, light projects, etc for hundreds or thousands of layers. There’s far less overall motion, which is the primary reason they can be cheaper than FDM printers since they don’t need all those motors, rails, and rigid bodies required for lots of motion.

Beyond the huge differences in the underlying technology, the functionality of resin printers is also quite different from FDM printers. When it comes to print size, FDM is still way ahead of resin as few (affordable) resin printers can print larger than 200mm, which is common with FDM printing. As for print quality, resin is the undisputed champ because light is just so much more accurate than molten plastic. The standard layer thickness for the M3 is 50 microns (0.05mm), about four times better than the standard FDM layer thickness, and that’s just the Z resolution. The XY resolution on the M3 is a microscopic 0.039mm, whereas the smallest feature an FDM printer can produce is a dot the width of its nozzle, about 0.4mm. That’s ten times better! But enough technobabble, let’s see what it can actually do.
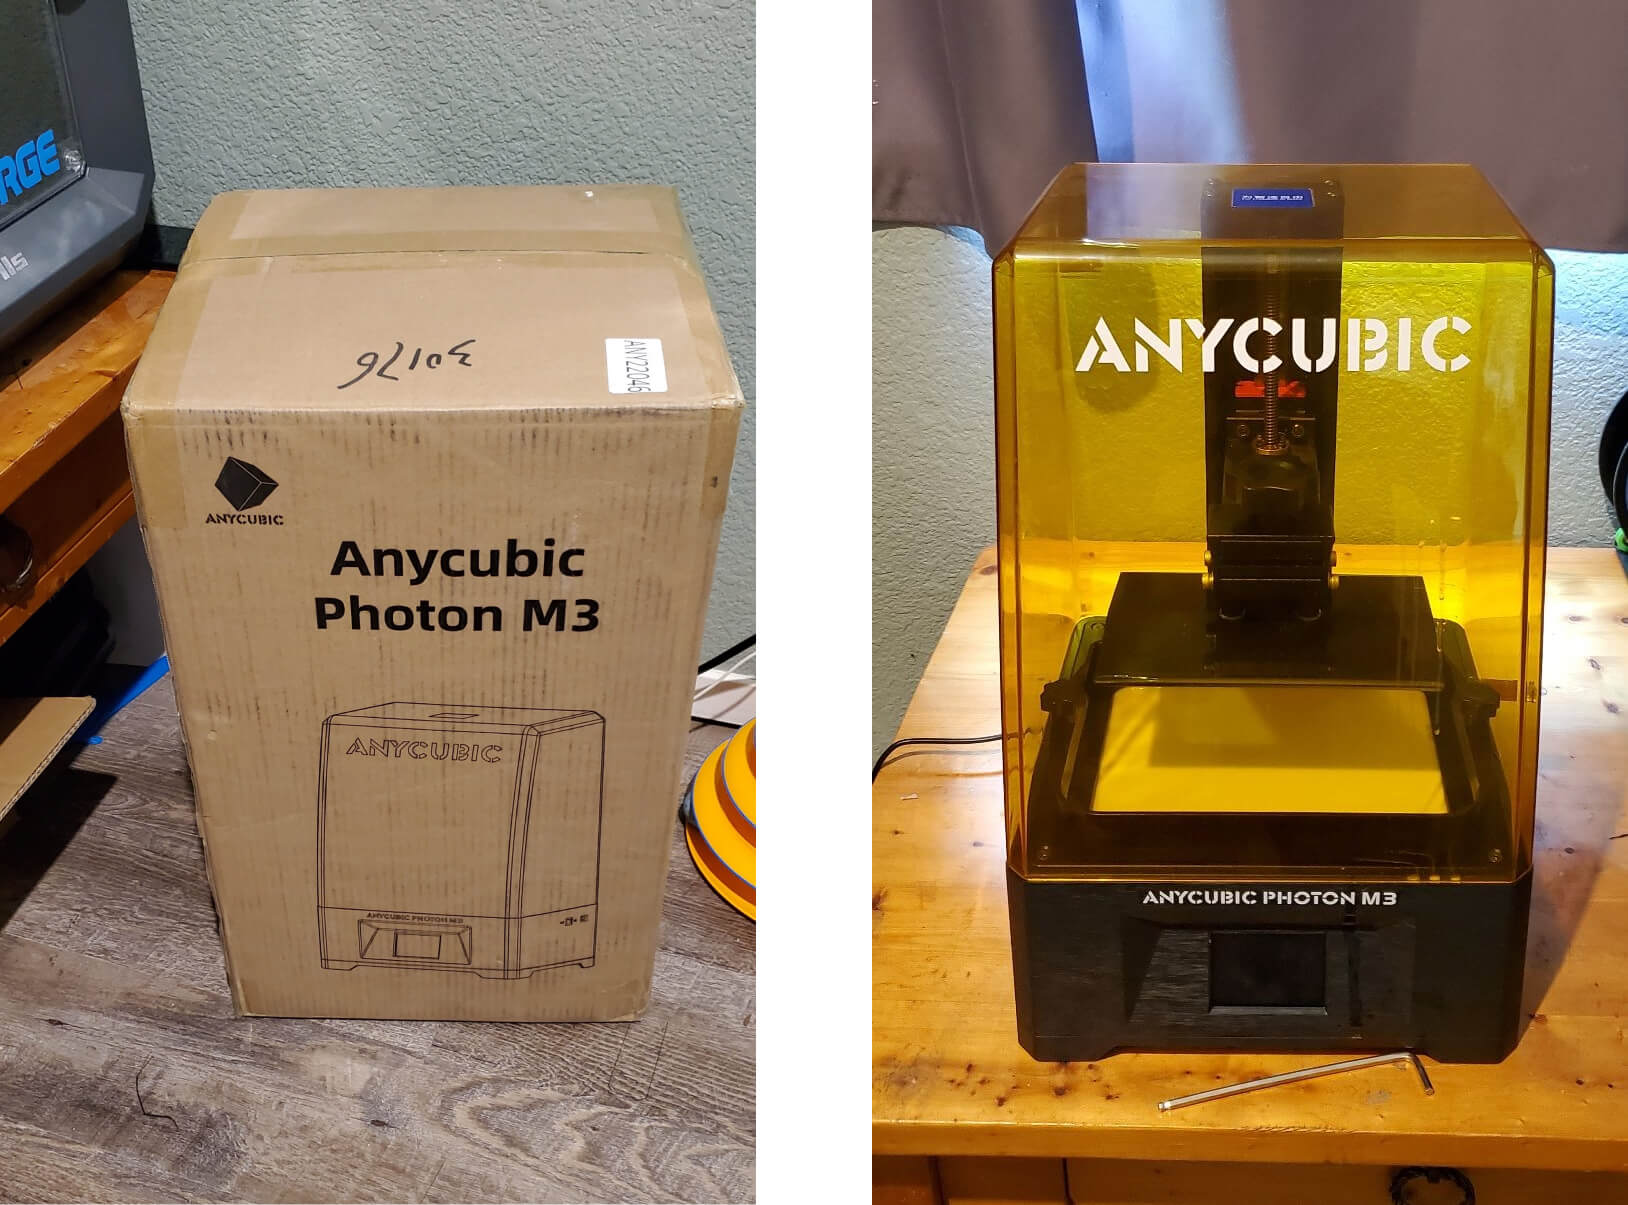
Resin printers should be very easy to unbox and set up because they’re quite light and fully assembled. I’m happy to report that that is true for the M3. Only the build plate has to be attached, which is easy because it’s designed to come off and on regularly during operation of the printer. The only calibration necessary is leveling the build plate; the printer prompts to add a piece of paper over the screen and then the plate lowers down onto it while the tension screws are still loose, then even pressure is applied down on the build plate while tightening the screws. It’s a simple and quick process with little room for user error, though I would like a tool that makes it easy to apply that pressure evenly. The unboxing and leveling took about five minutes, the fastest printer setup I’ve experienced by far.

The Tests
After that, it was time for the first print. I began with this AmeraLabs Town calibration part for resin 3D printers.
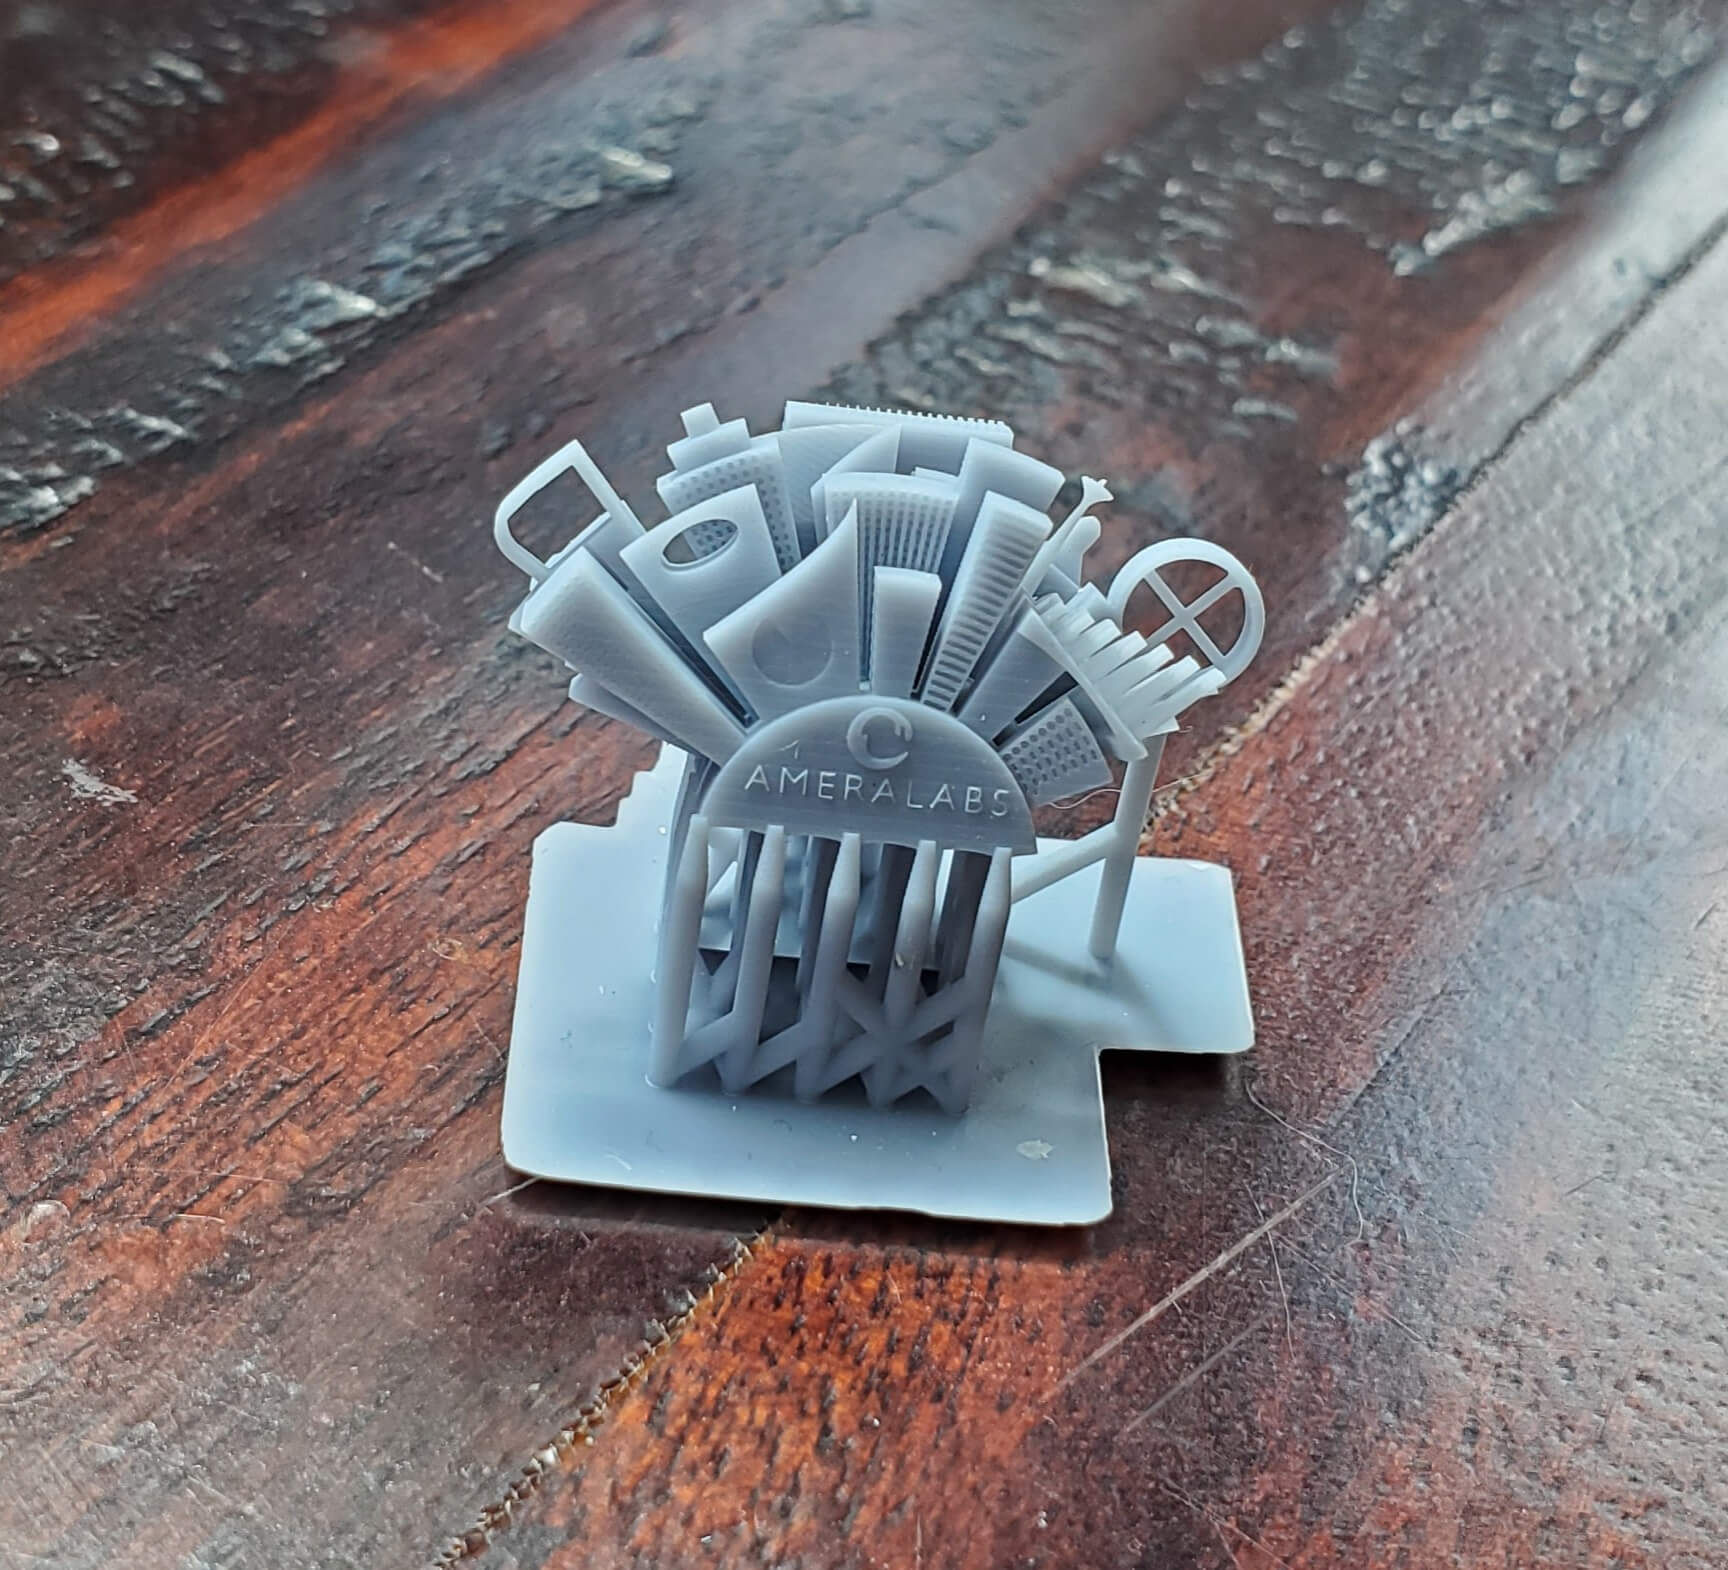

Wow. The detail on this print is superb. The overhangs are straight, the tiny voids are clear, the shapes retain their proper geometry, and the text is very legible. The supports come off all the prints well but I didn’t take pictures after removing them because my ability to remove supports should not detract from the quality of the prints. The grey resin does a wonderful job of showing detail; I’m sure that won’t come up later. I slowly moved to printing larger objects so next up was PolyPearl Tower.

This came out great as well. What looks like a print error on the front leg is actually part of the model, though a very small part of the corner is missing, likely because I didn’t orient it properly for the overhangs. The surfaces are incredibly smooth. It can clearly handle mechanical shapes so let’s test out its ability to produce organic shapes with this Xenomorph from Alien, one of my favorite movies.
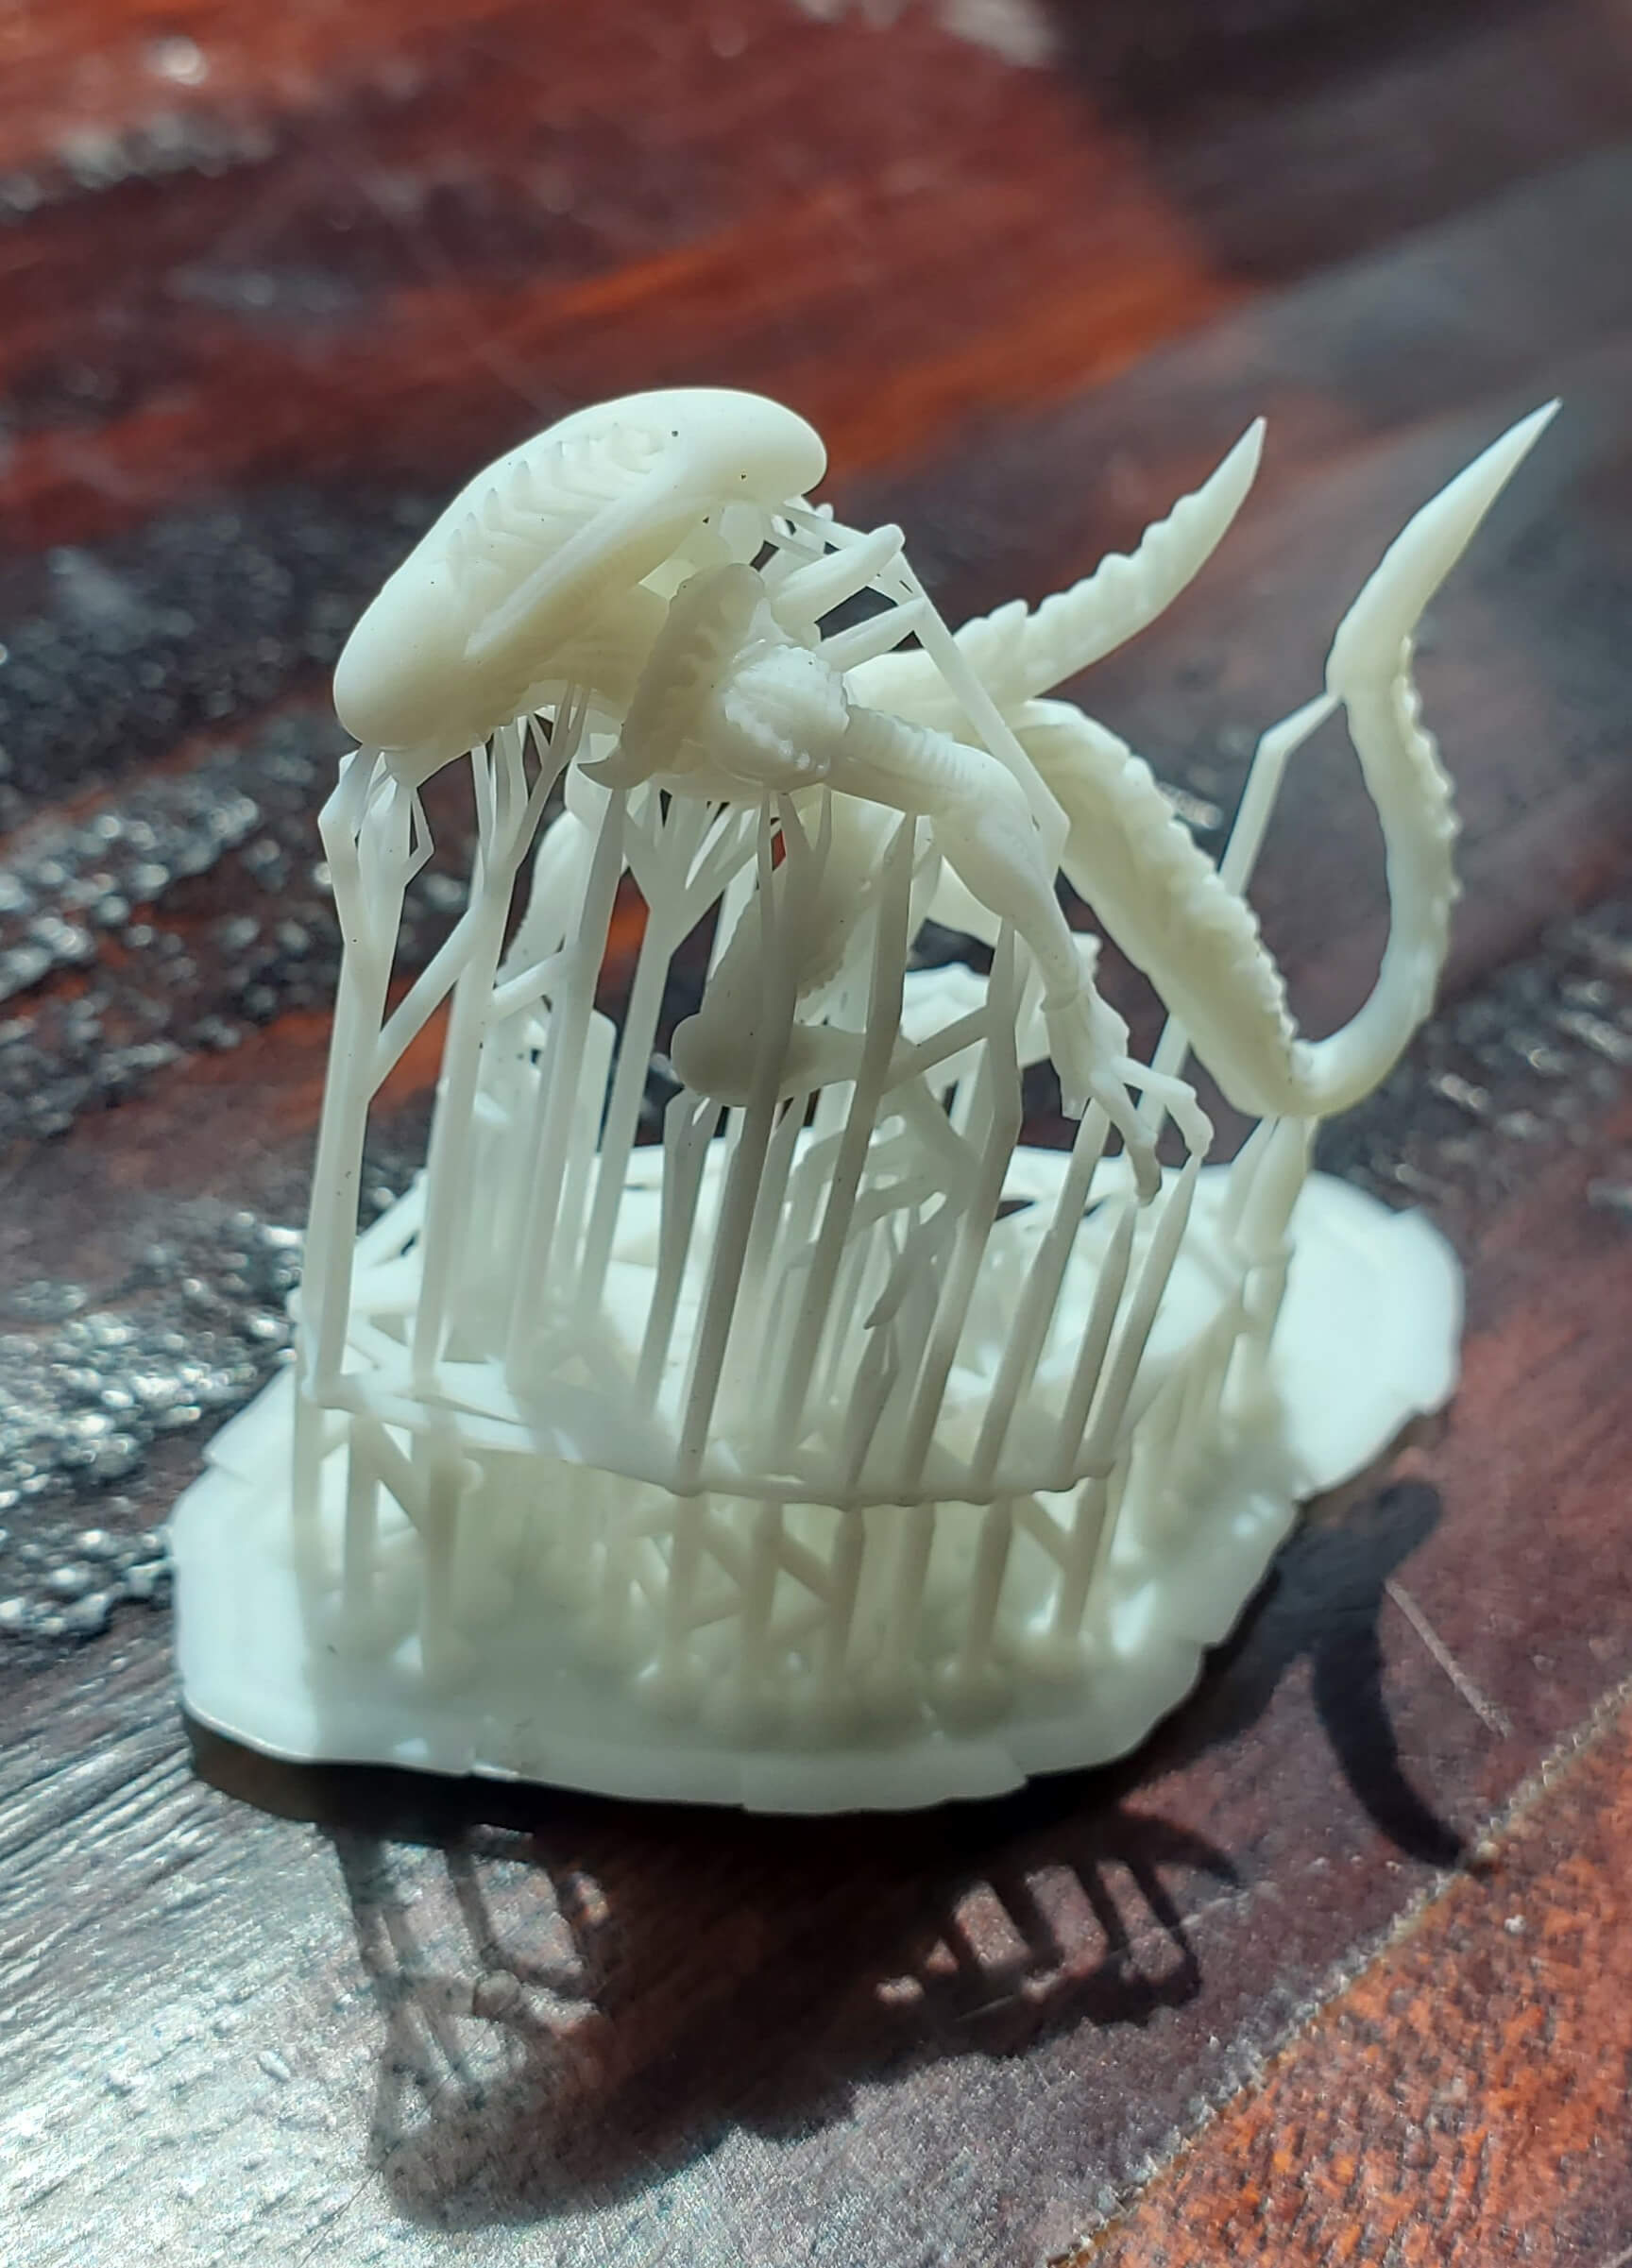

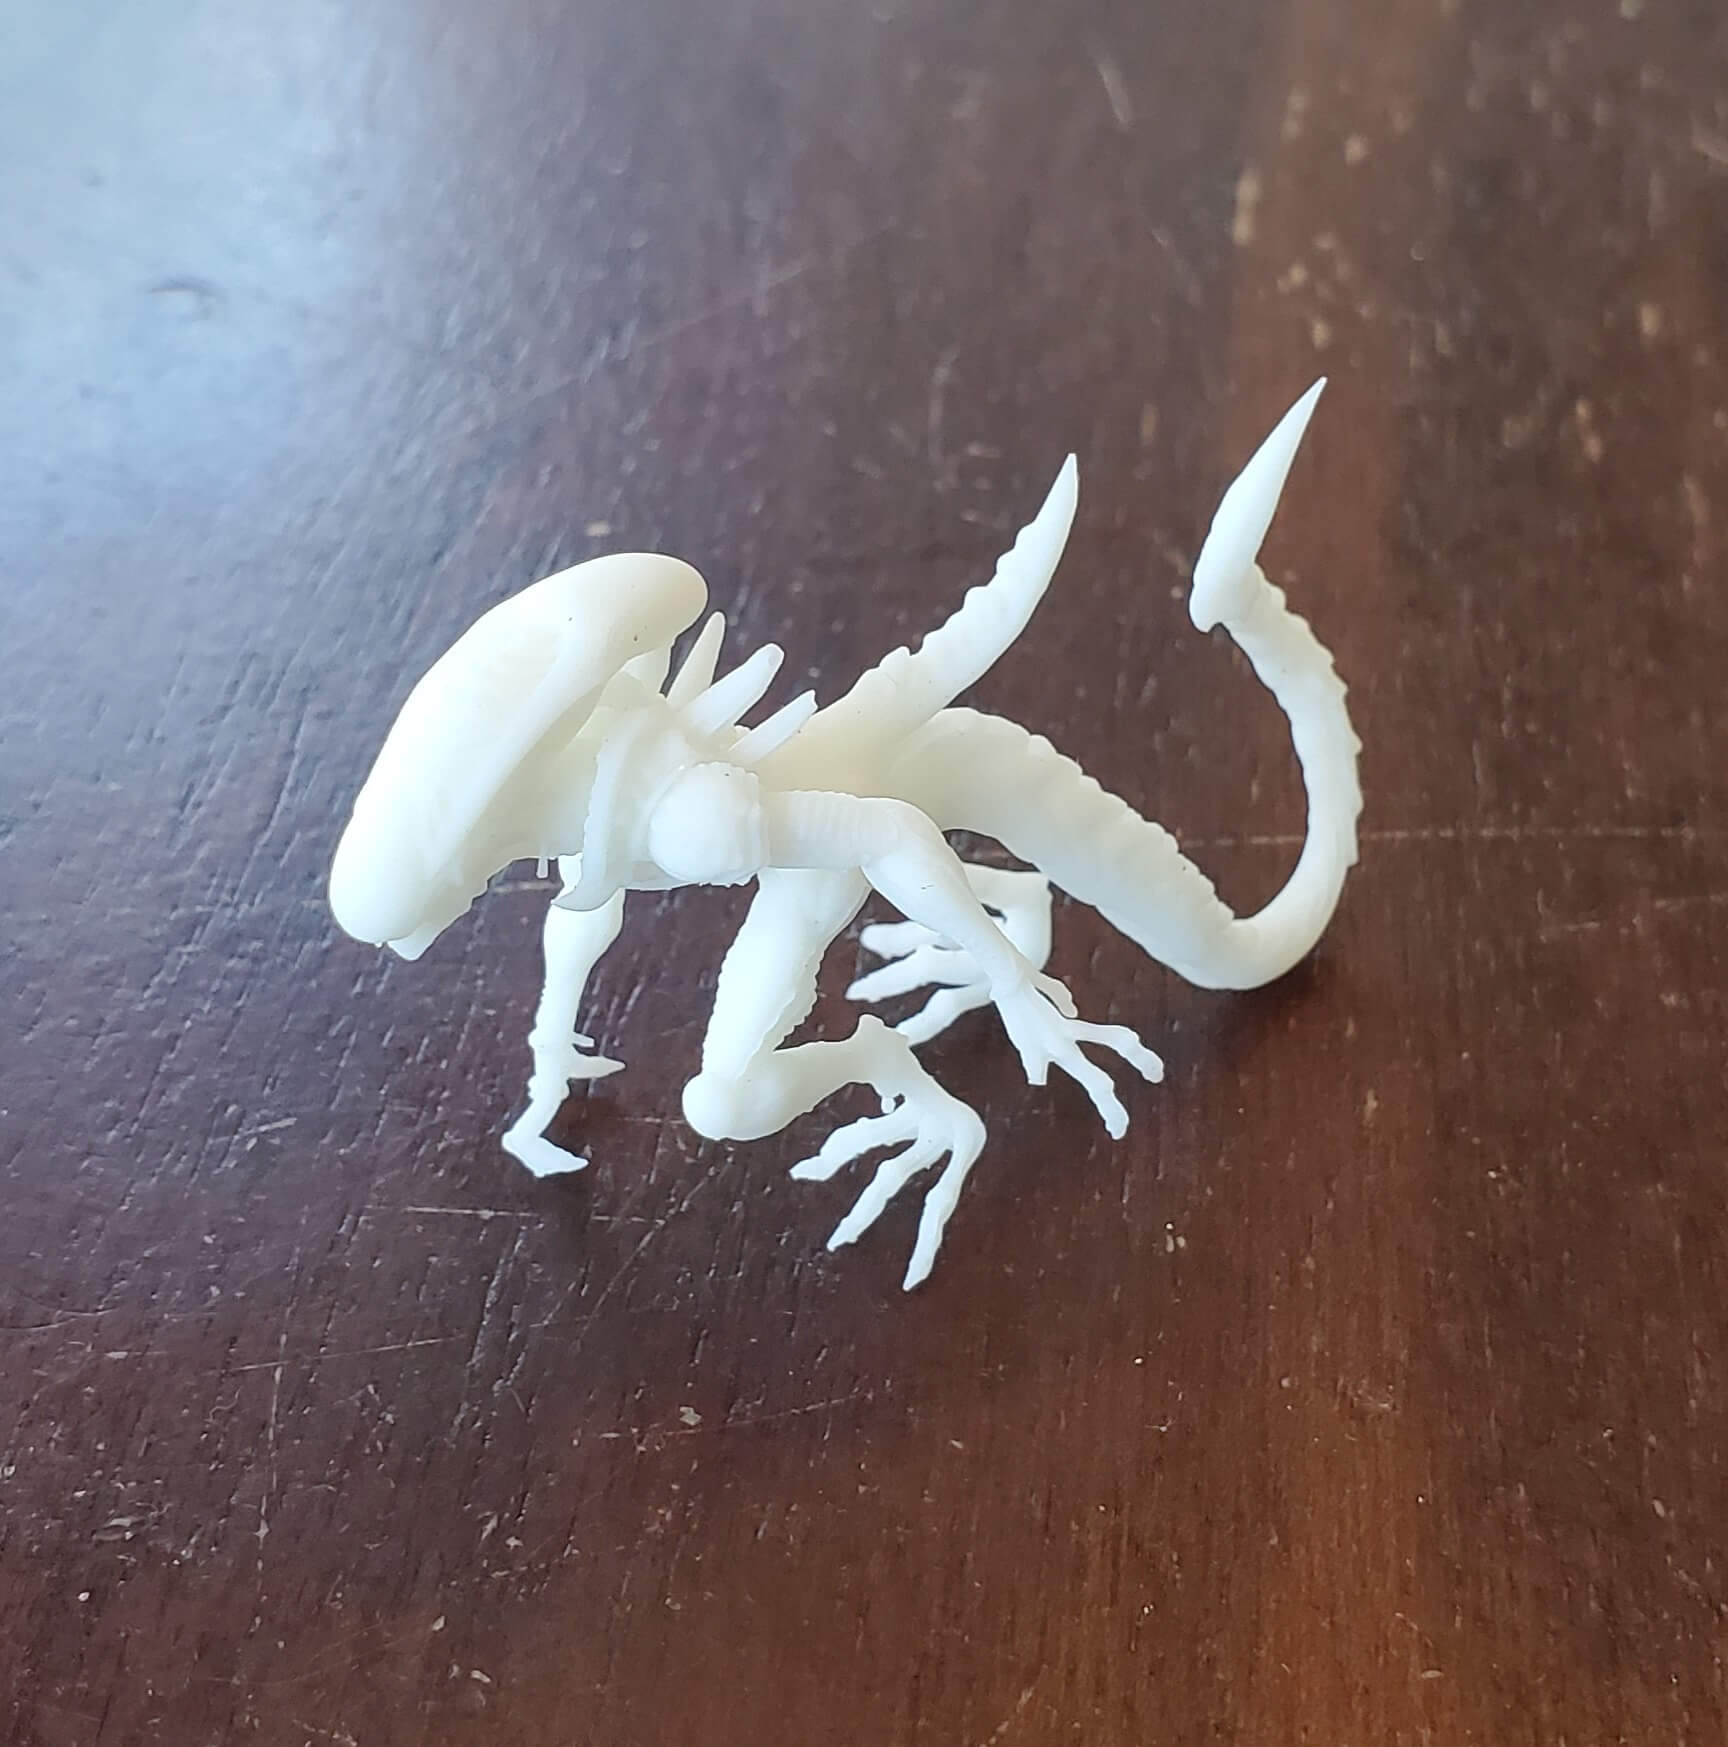

Honestly, I don’t have the photography equipment or skills to fully capture the details on this print (it doesn’t help that I printed it in white, my bad). The supports on this model were included by the designer, and thus easier to remove than generated supports, and I still broke one of the fingers off. To be clear, that has nothing to do with the printer, which performed perfectly again. I did a terrible job of including anything in the frame for scale (I eventually get there) but hopefully you can use the wood grain to tell that this thing is only about an inch tall, so these details are tiny. I love sci-fi and the Xenomorph needed a friend, so I printed ED-209 from Robocop.
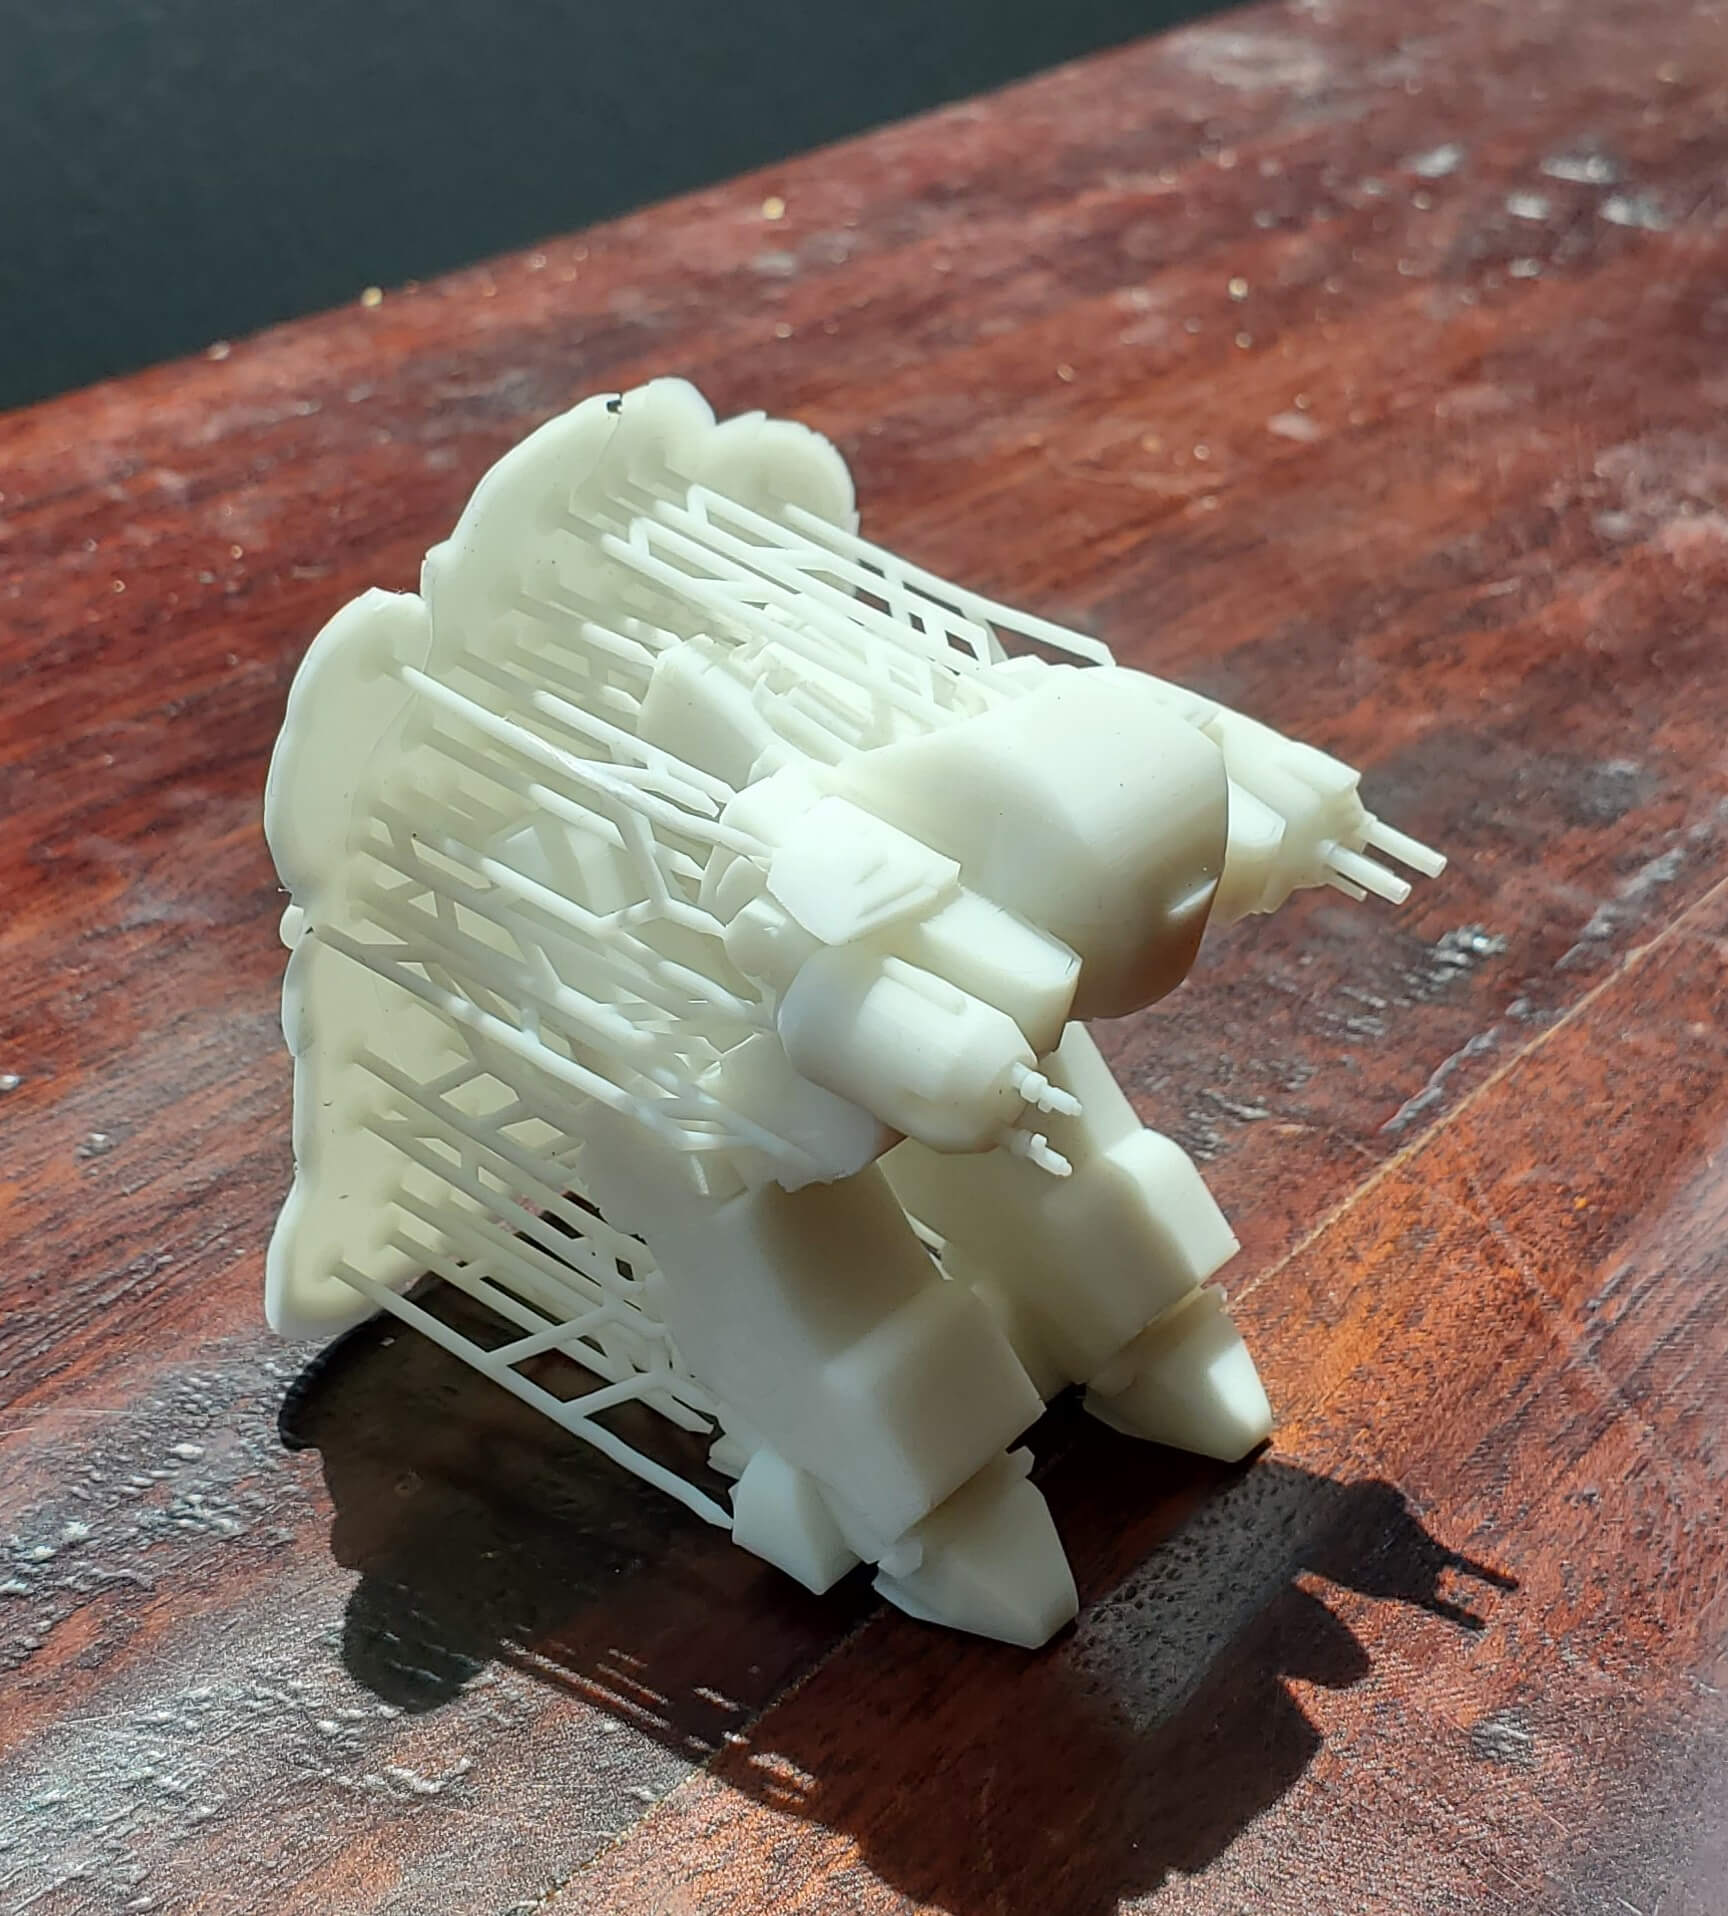

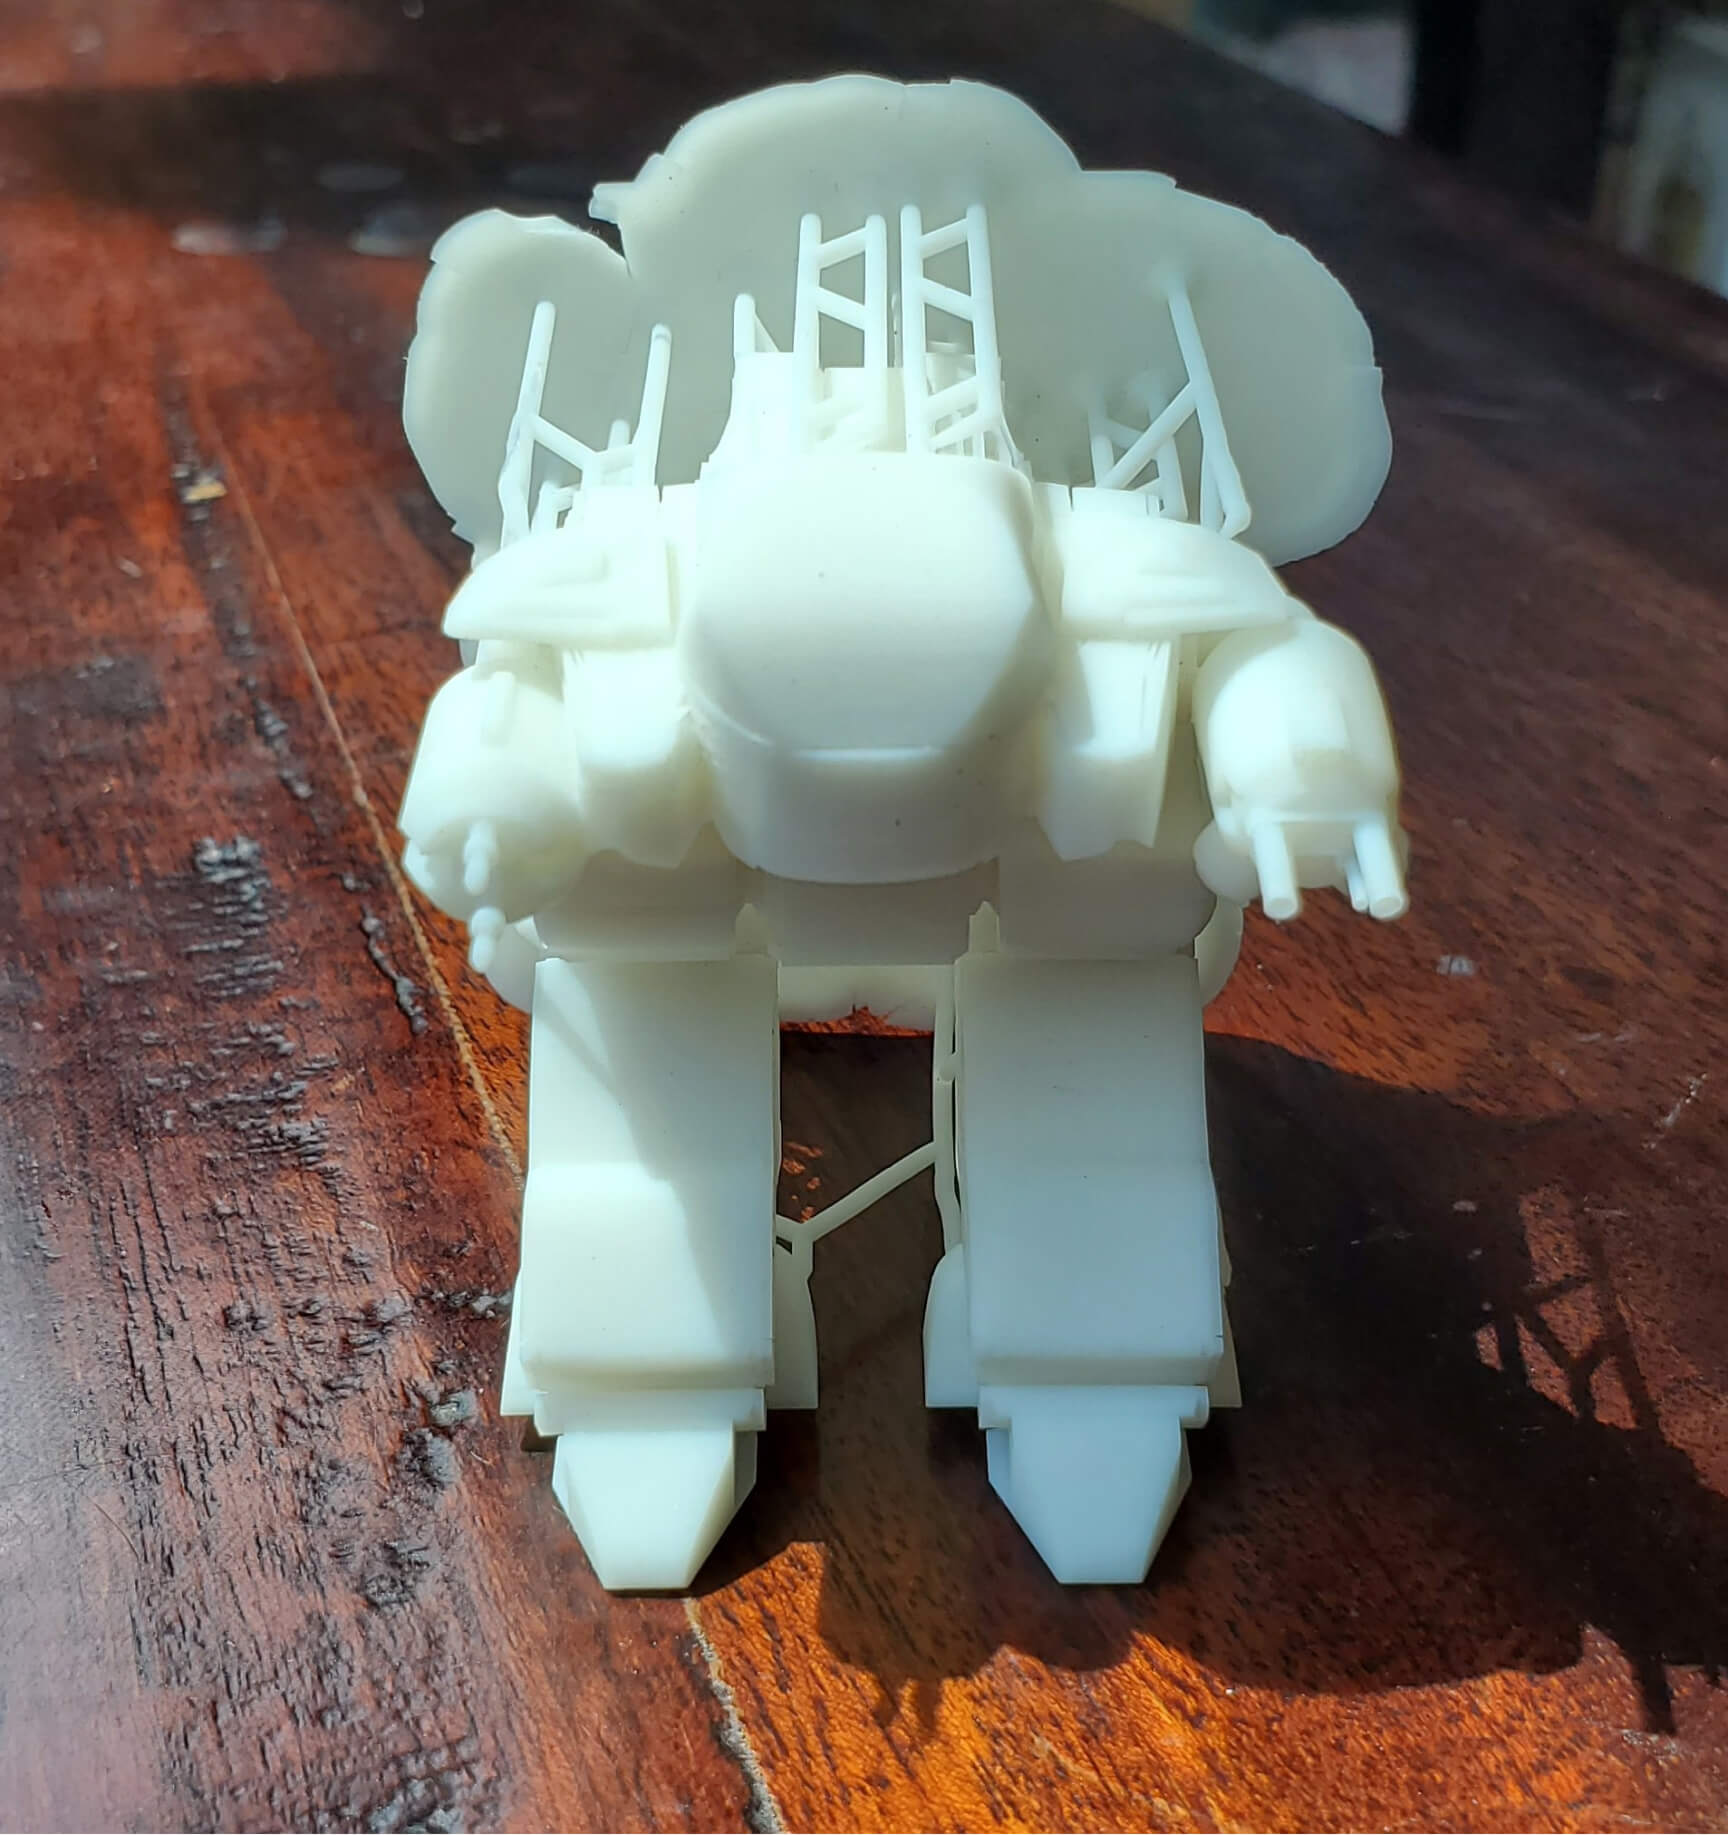

This is a solid print and came out great. There were lots of overhangs and failure points on this object so this is rather good work. And again, there are details that are difficult to see because I printed it in white, so you’ll just have to take my word for it, but they ARE there. I had a specific need for a jig so I designed this and printed it.
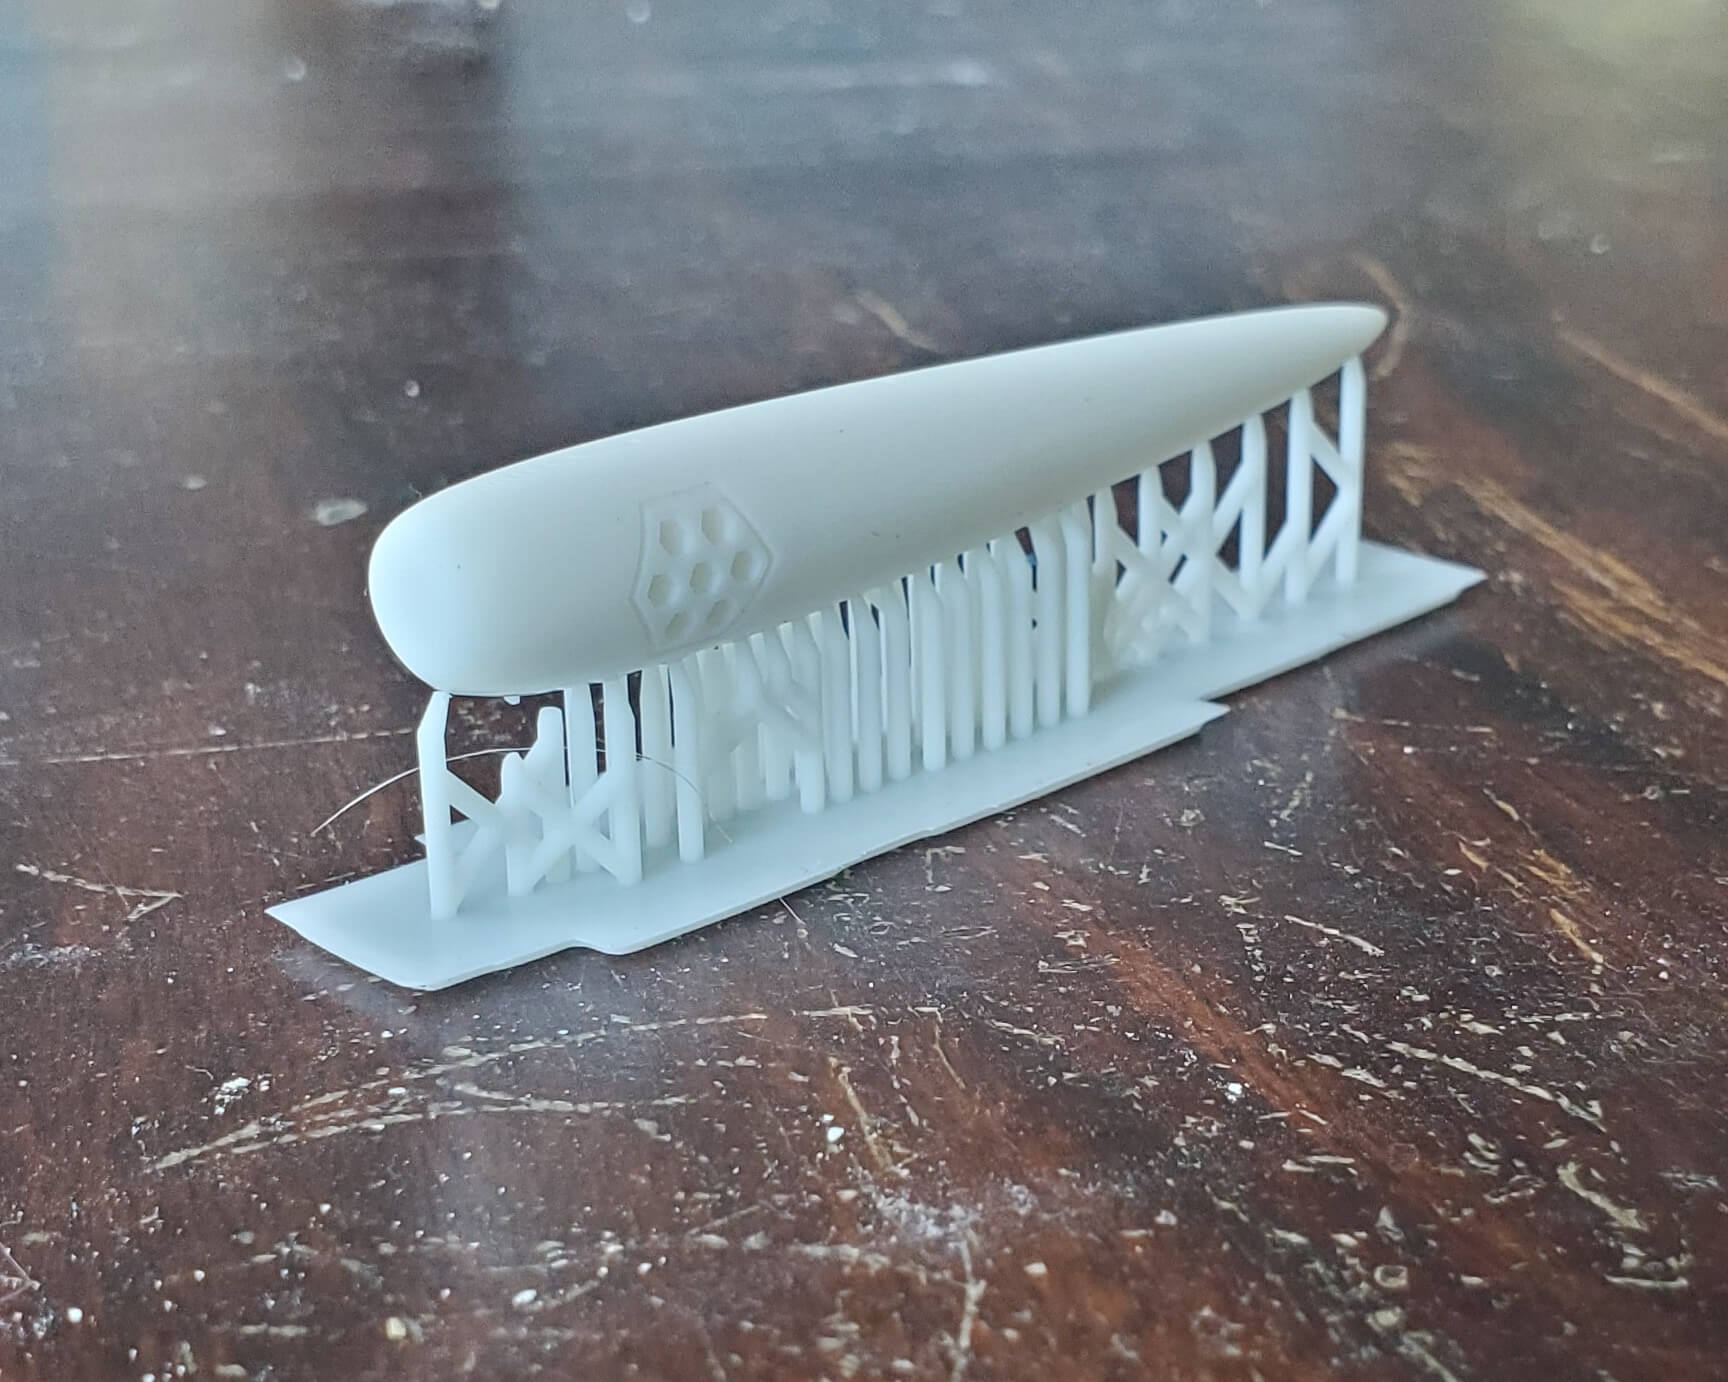

It came out just as expected. Bonus points if you can guess what it’s for in the comments. I also needed a solution for our new frameless shower door that opens both ways and doesn’t have any stopping point, so I designed these magnet mounts that attach to the top of each piece of glass.
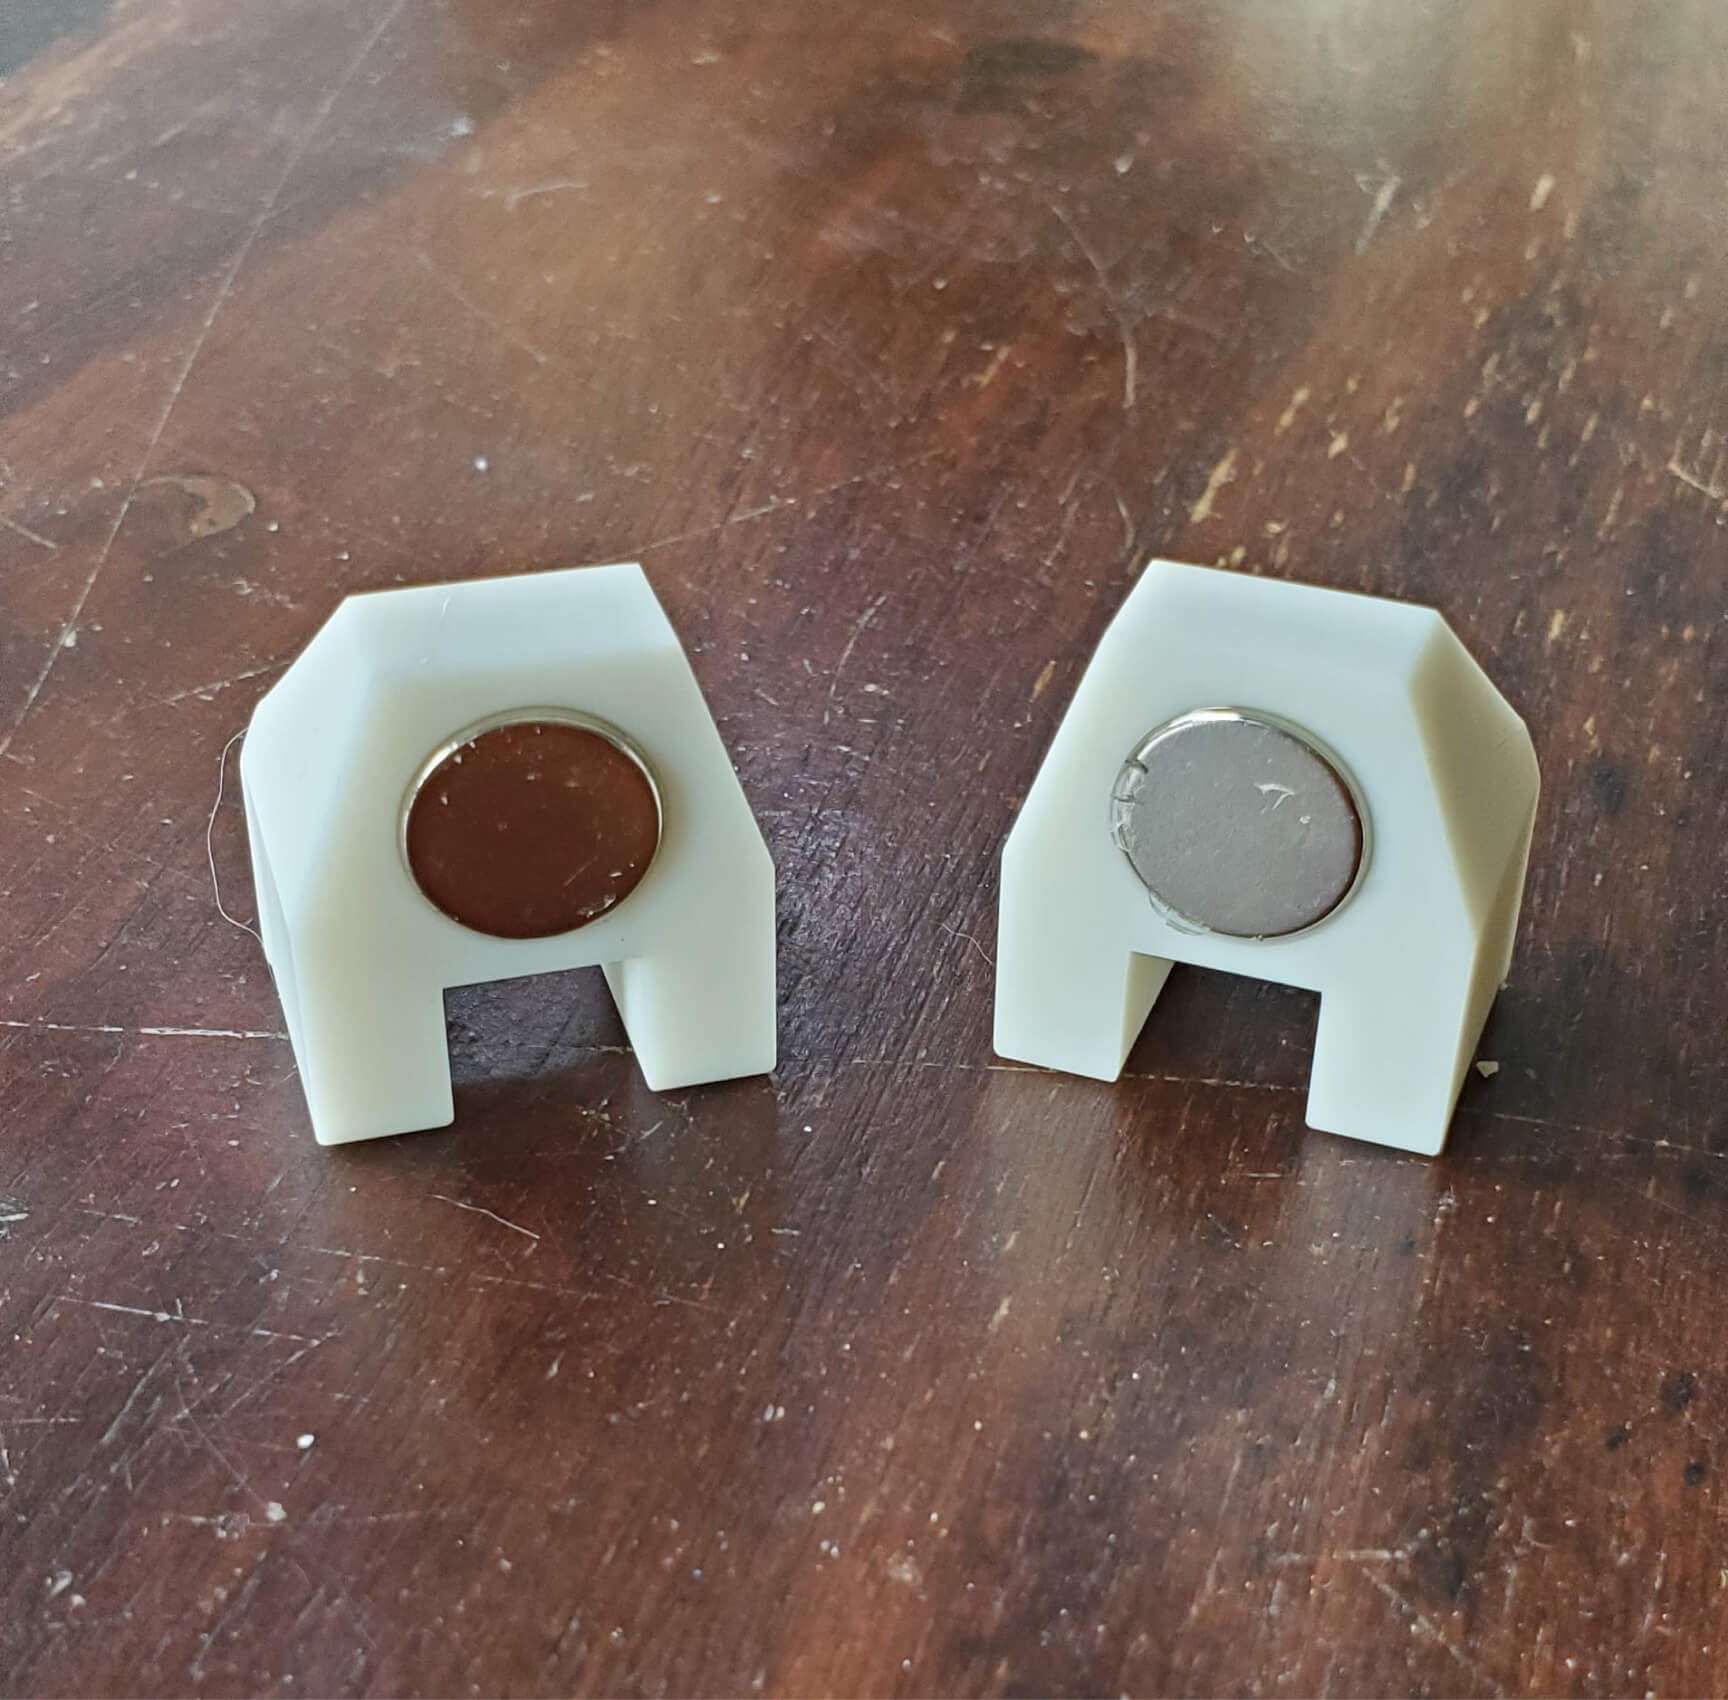

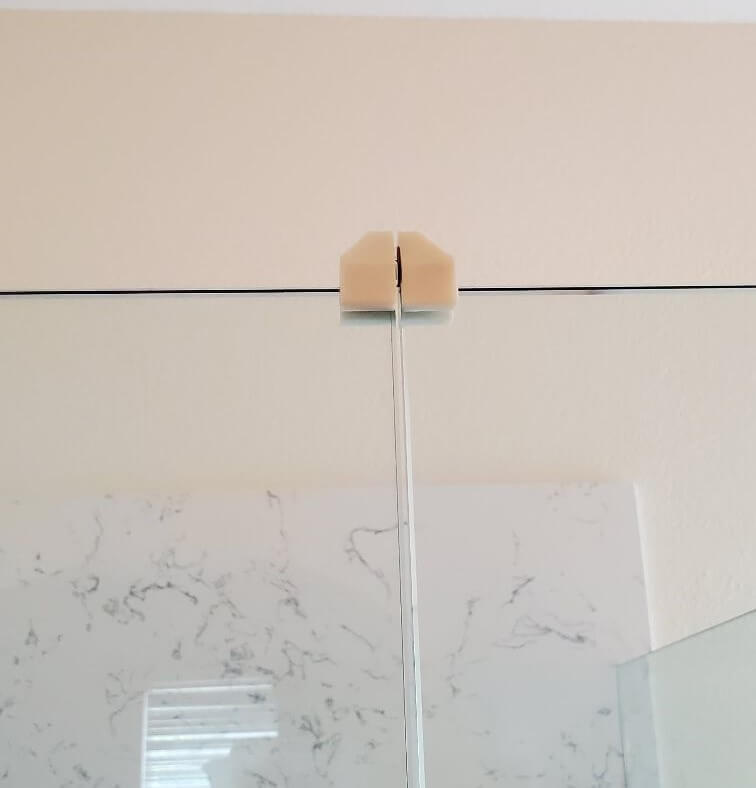

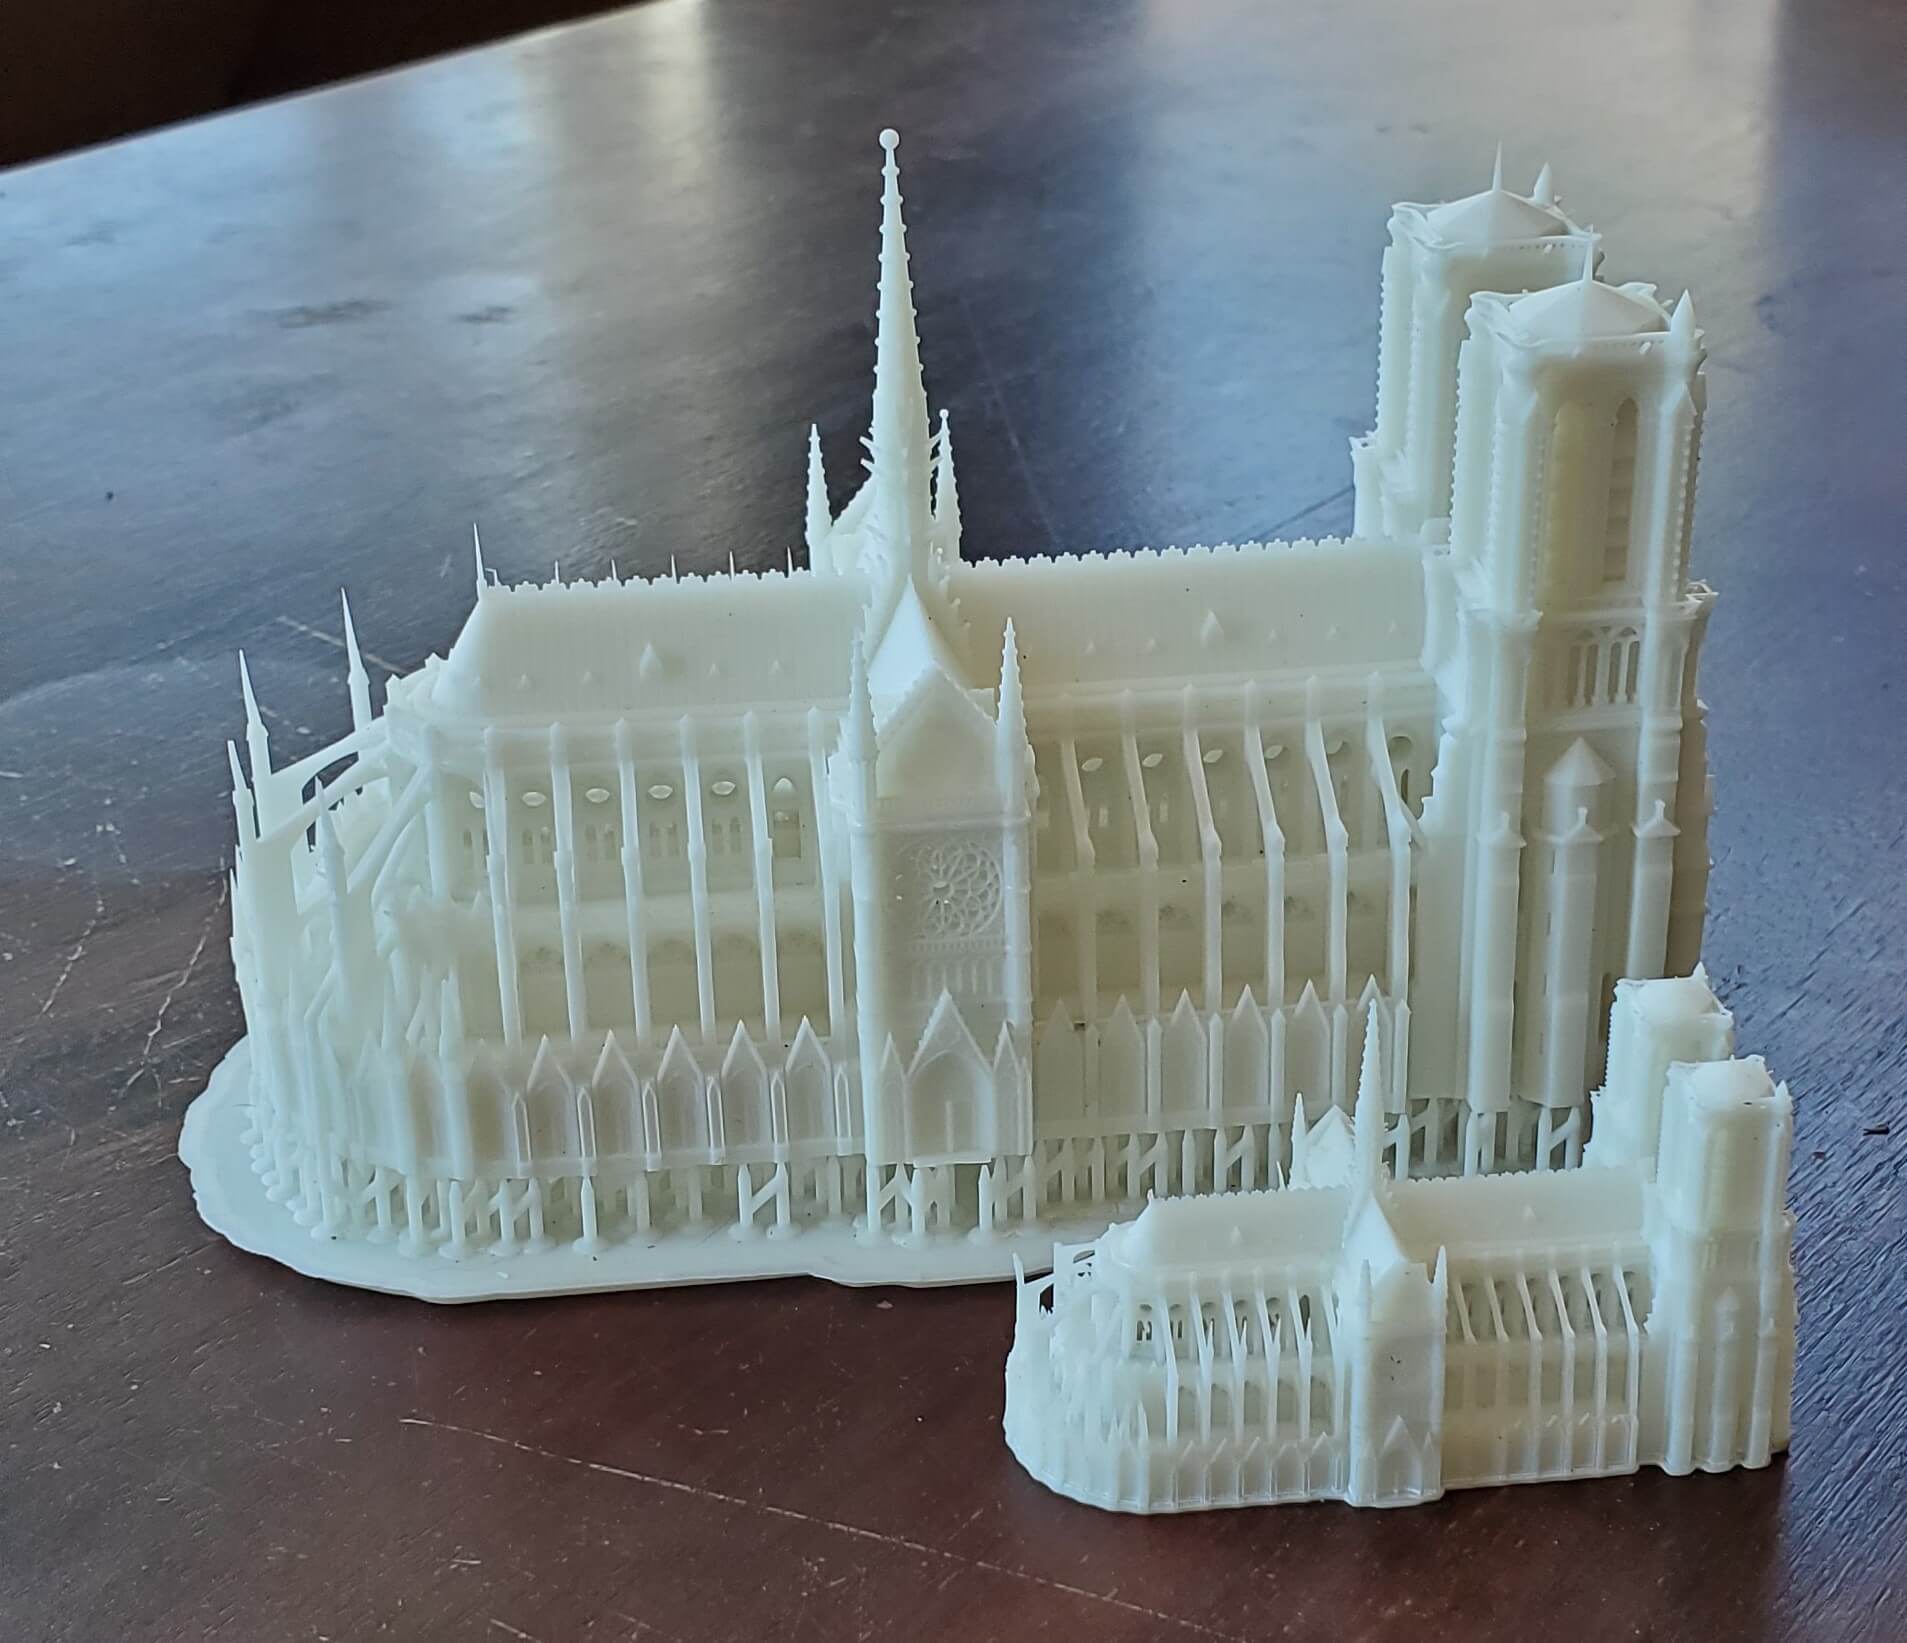
I measured the glass with digital calipers and knew the dimensions of the magnets from the packaging, so I put those numbers into the design, printed them, and they fit perfectly on the first try. Now my shower door stays shut. That’s worth the cost of the printer, right there. Tight tolerances on the first go is nearly unheard of on FDM printed parts. Every time you have to adjust a design by a quarter of a millimeter and reprint it is time and material you’ll never get back, so getting it right the first time is invaluable. Okay, enough of my home DIY projects, let’s crank the difficulty up to 11 with this insanely detailed model of the Notre Dame Cathedral.
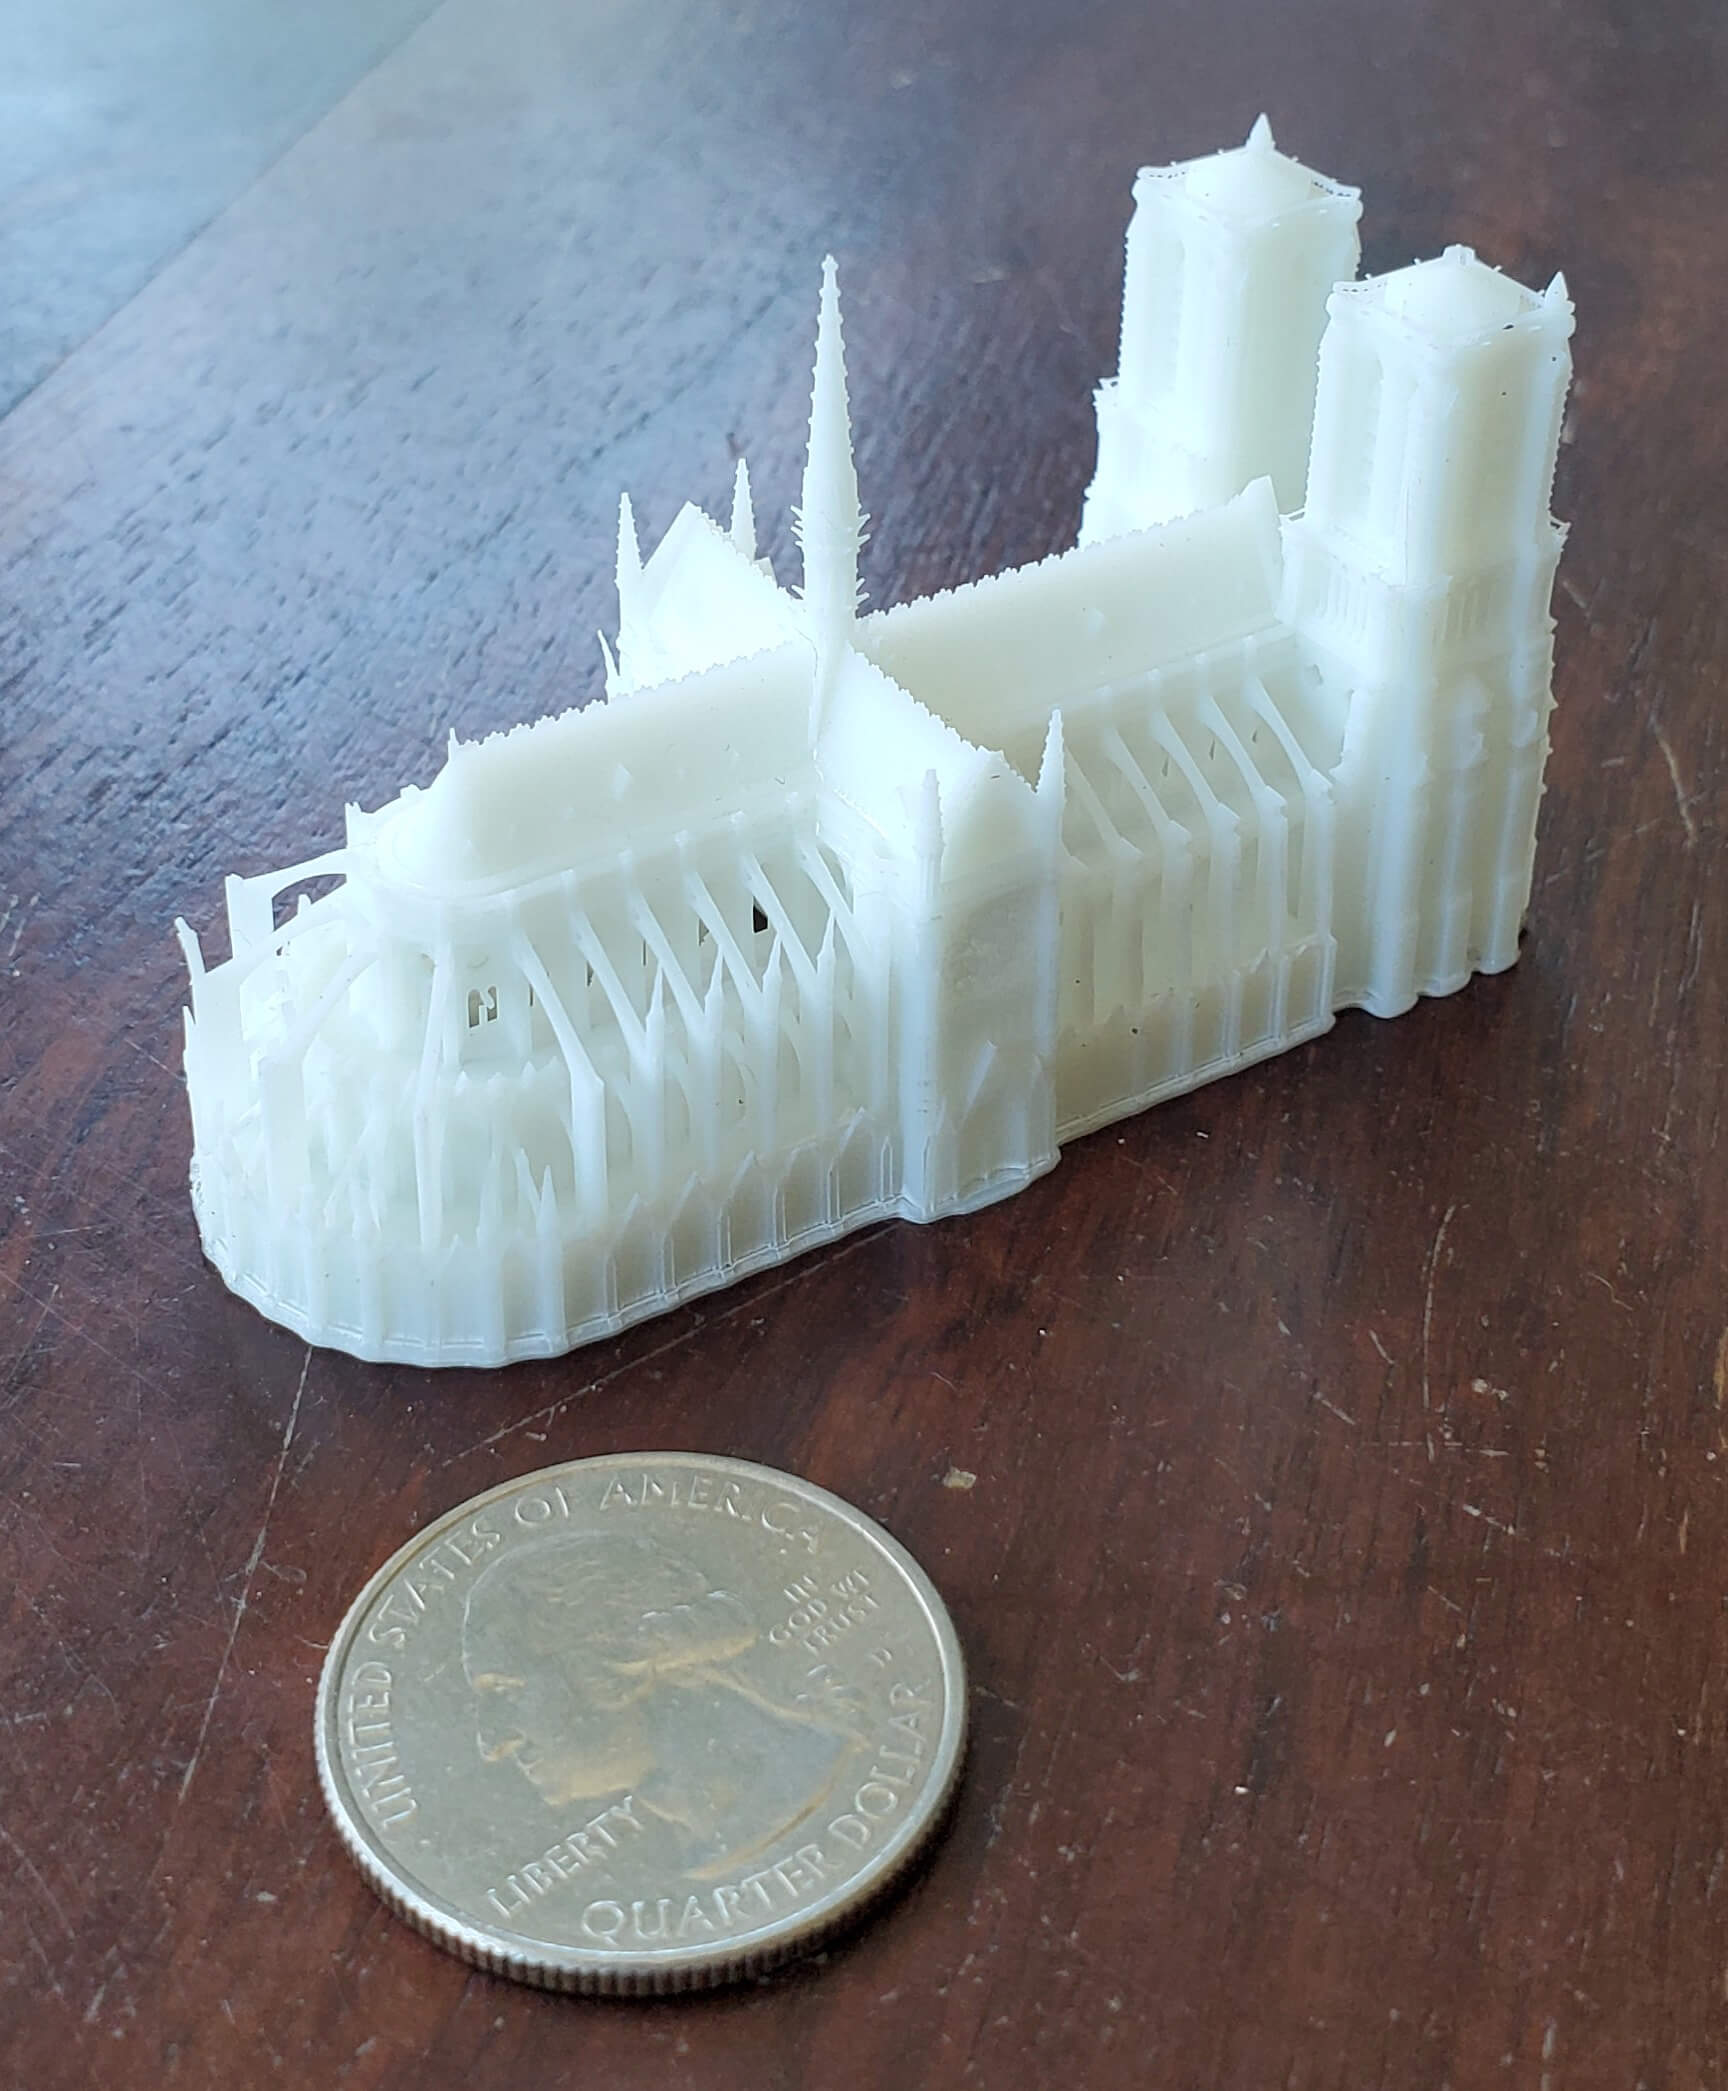

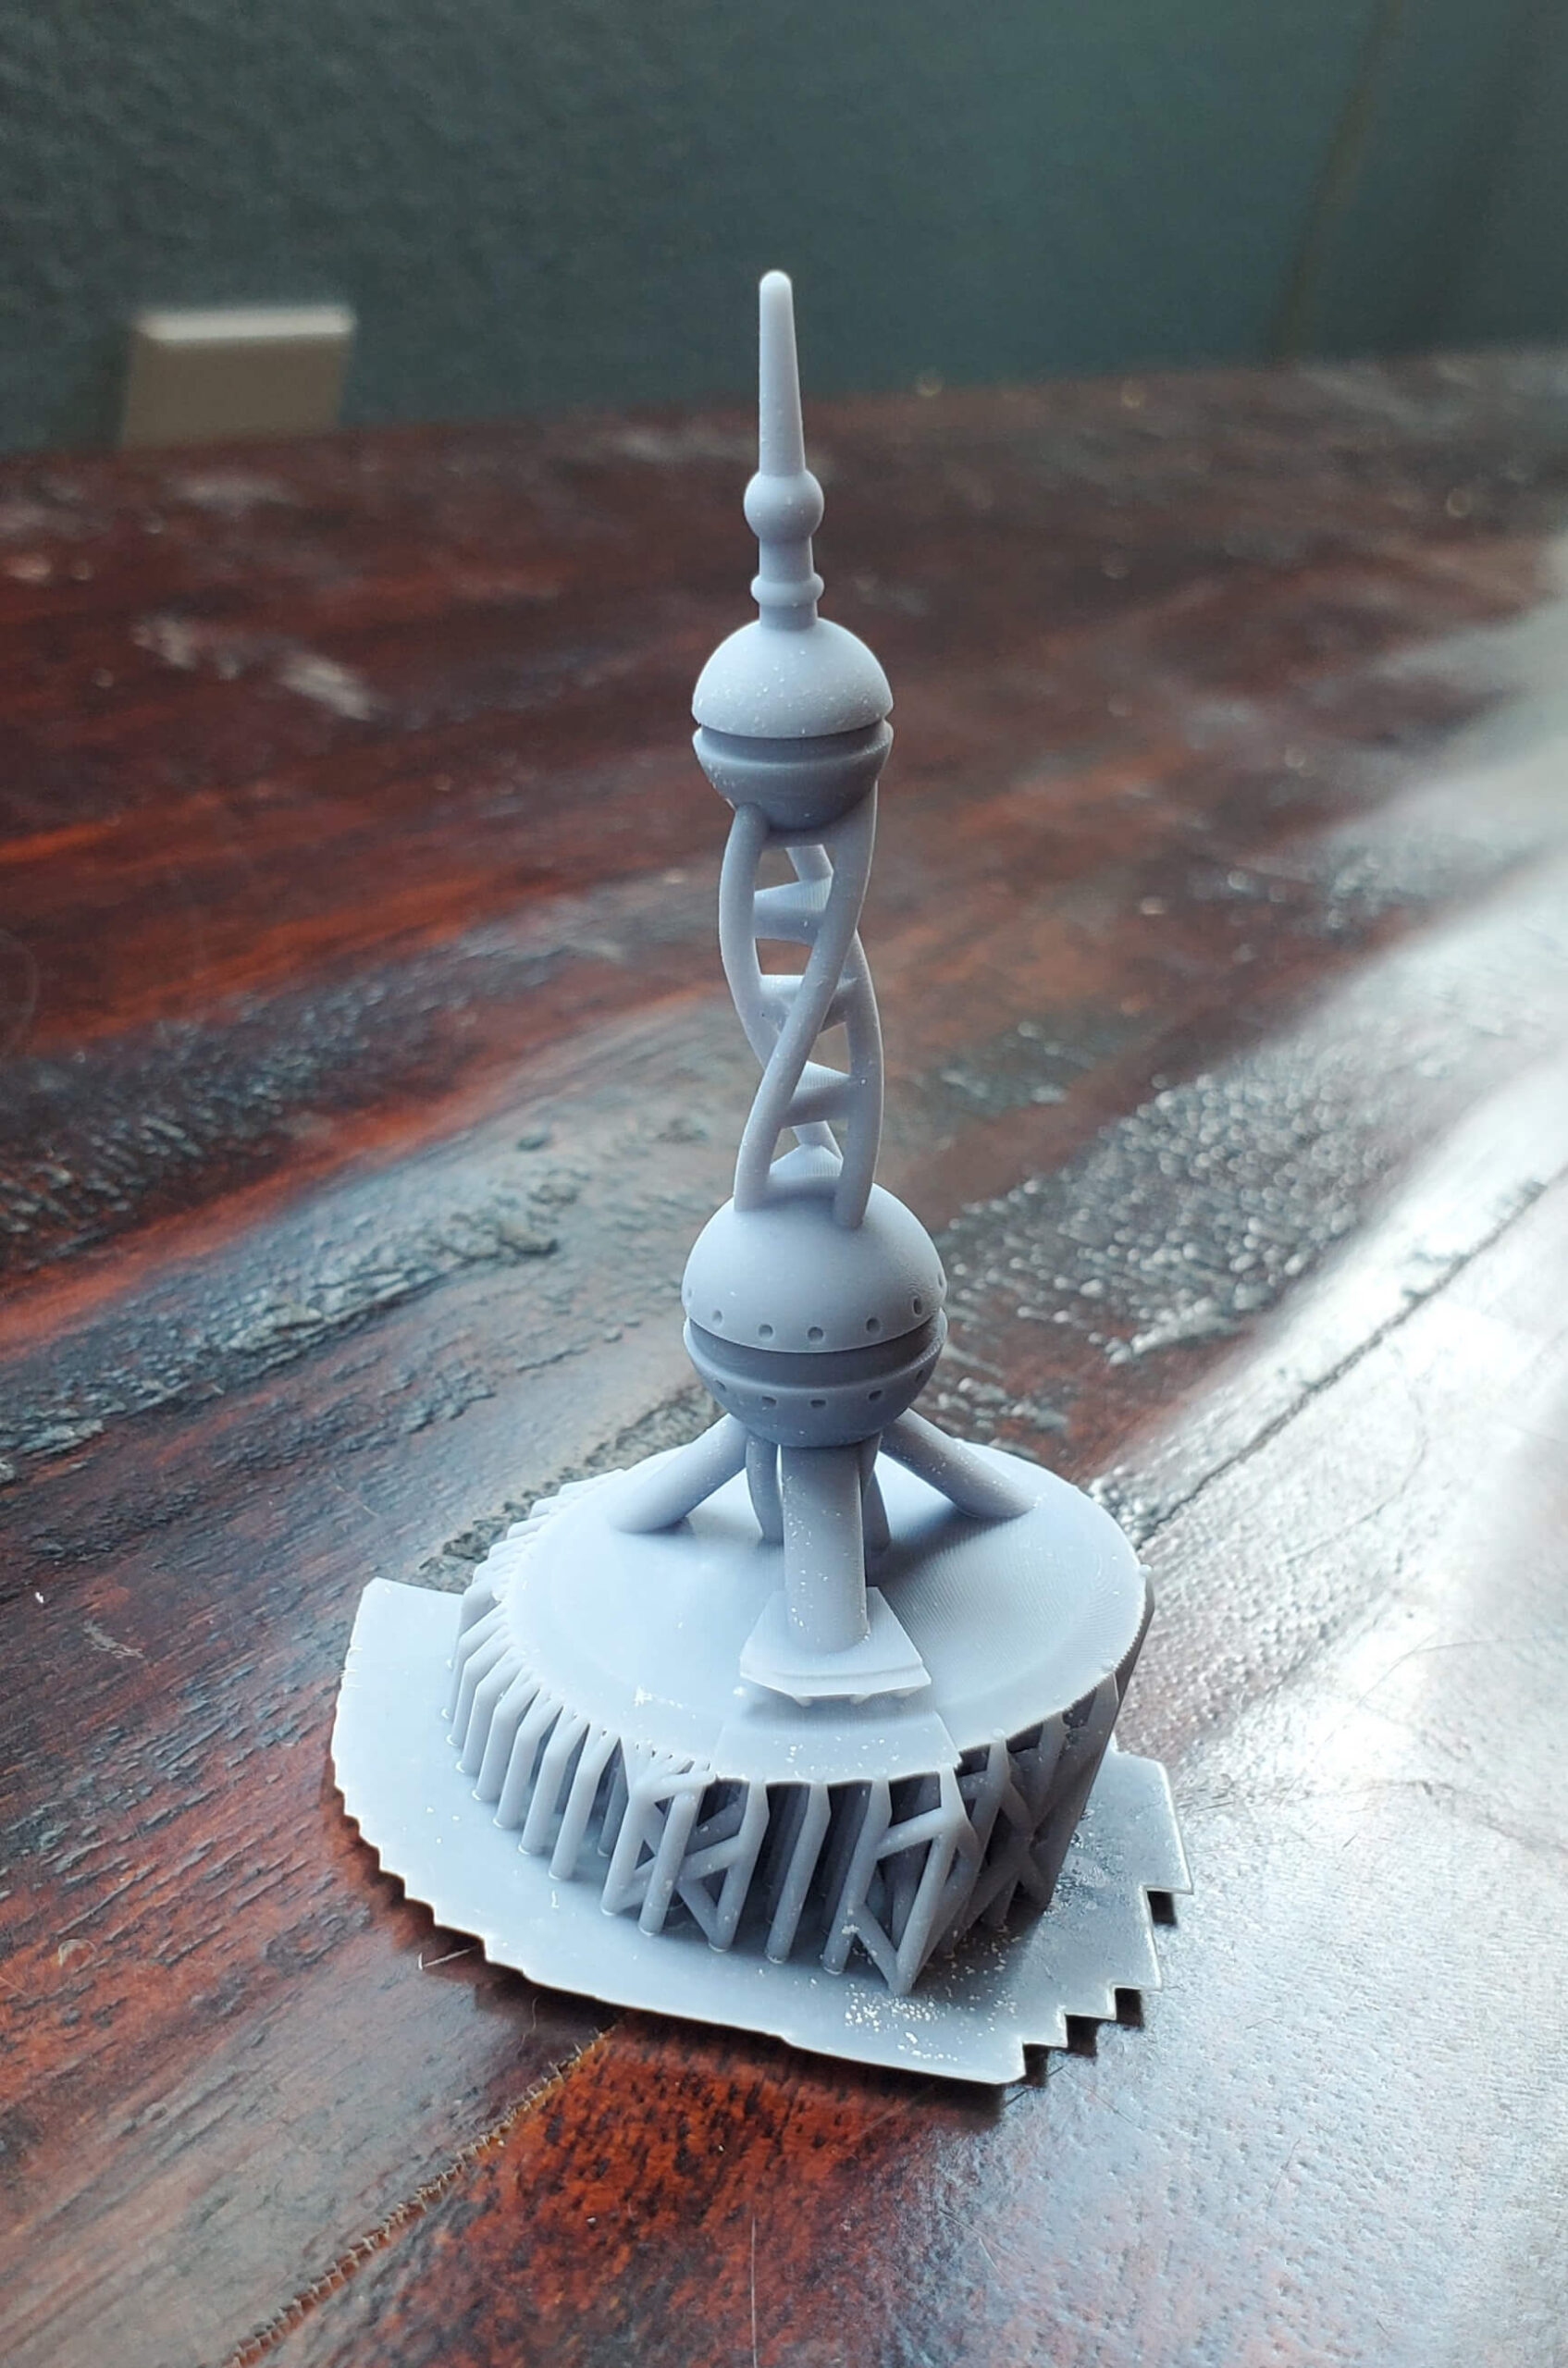
Look, an object for scale! I told you we’d get there. But check out that detail: so small, so delicate! Be awed by the thread-like banisters around the back towers. Find meaning in the miniature windows. So it can handle complex geometry no problem. And even though the standard M3 is the smallest in the M3 series, it isn’t exactly a small resin printer so why don’t we go as big as we can?
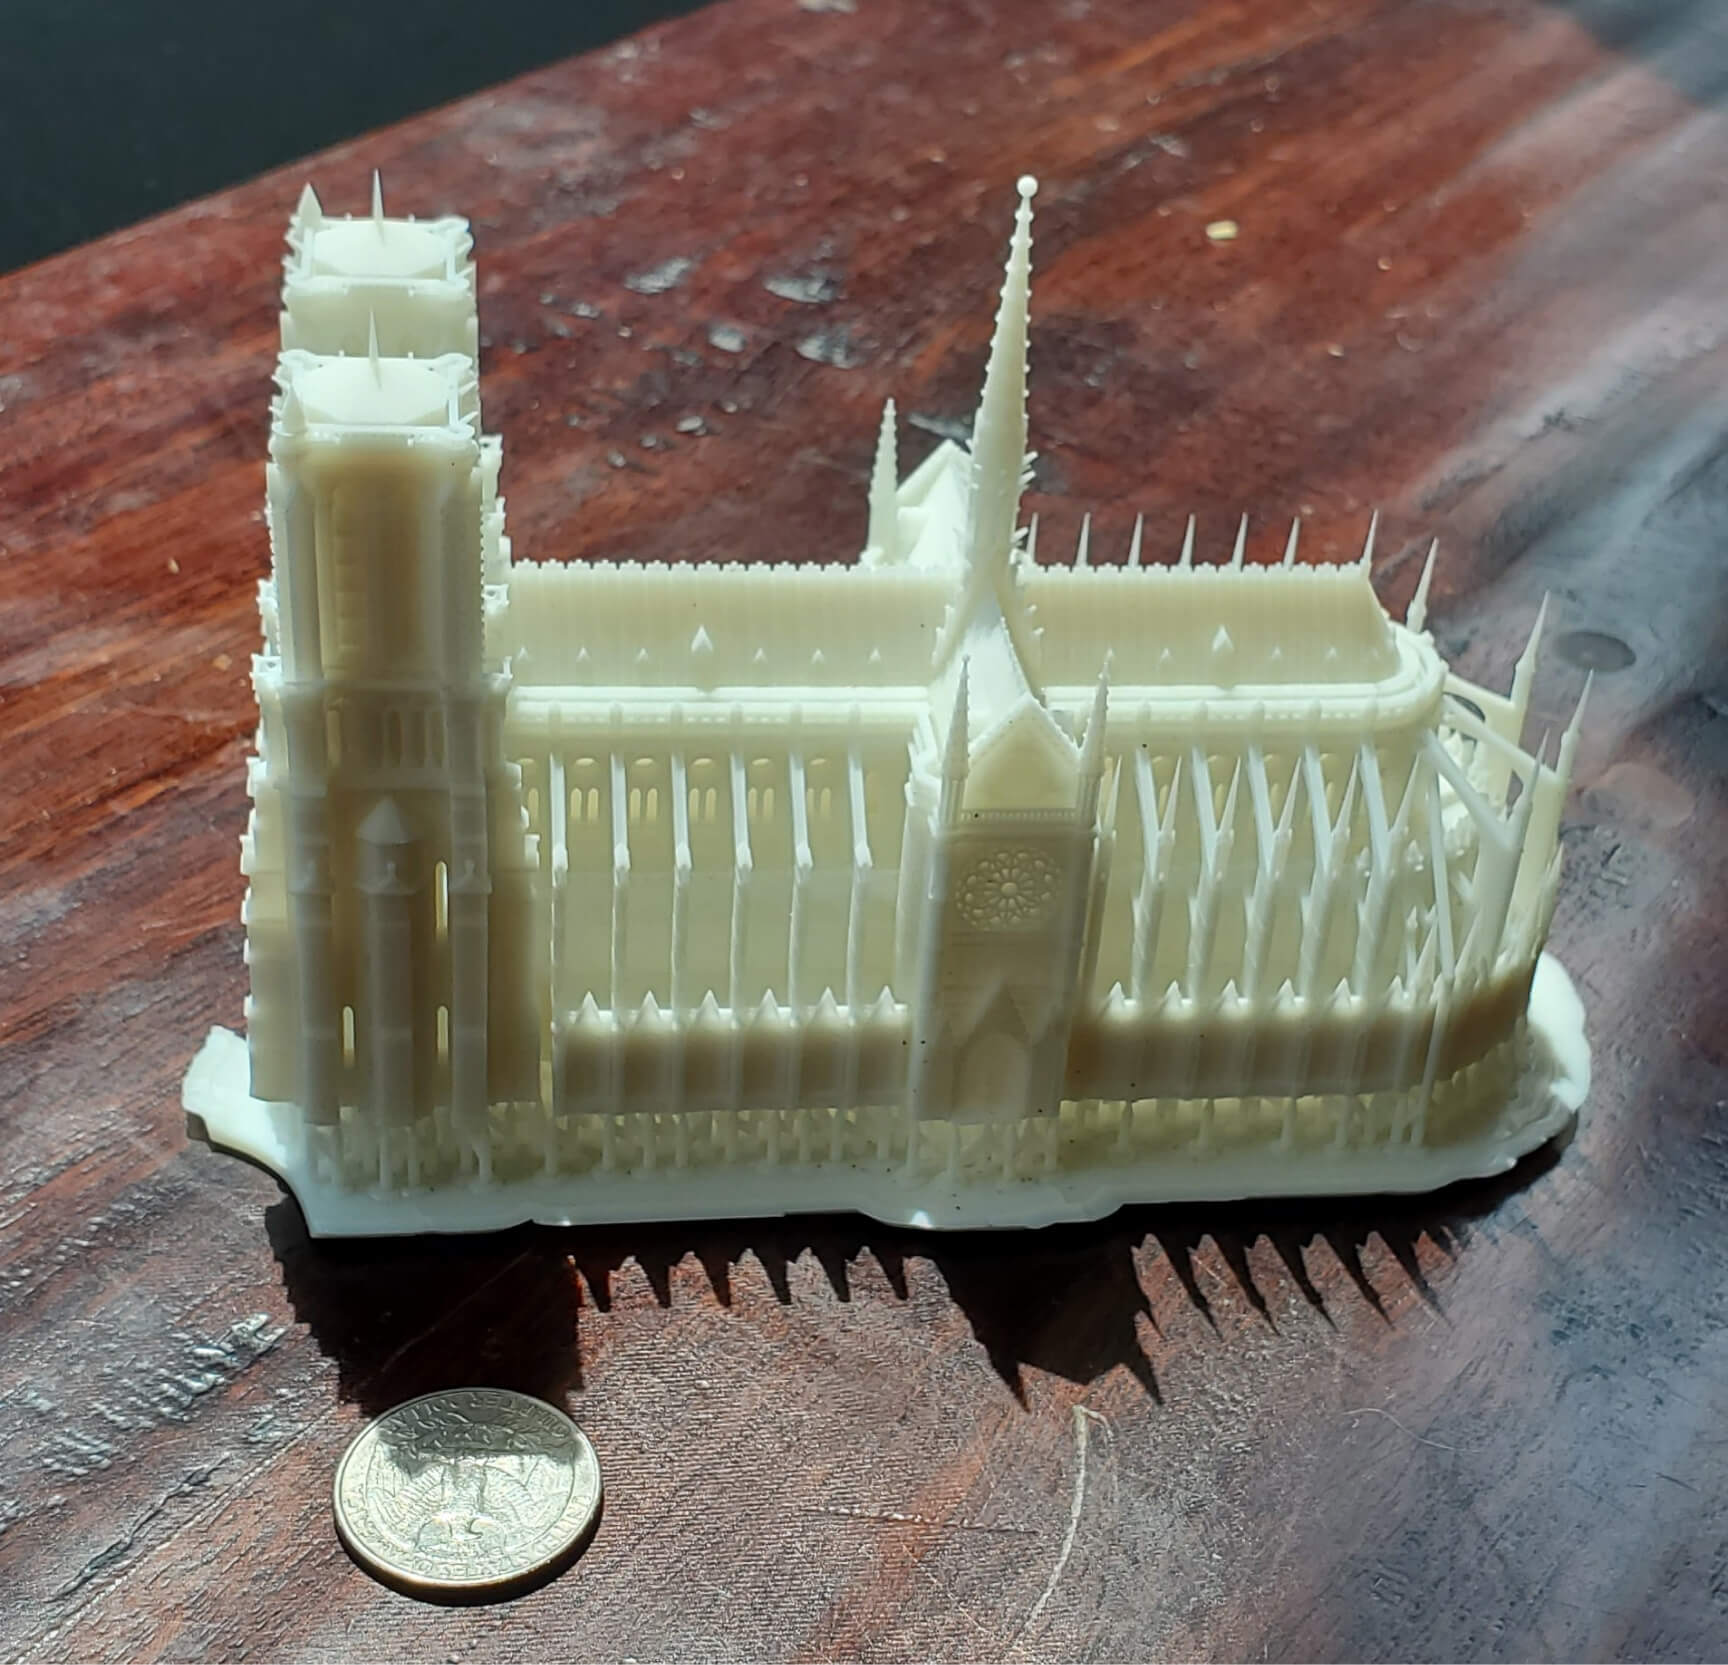

Are you impressed yet? Have you seen these arches? The real cathedral in Paris is a work of art and this print does a fantastic job of honoring that art. I printed this one on supports because getting this part off the plate without the lip that’s provided by the raft is difficult to say the least. But getting back to the print, being able to print something this large with this much detail in around 10 hours is just mind blowing. It can print faster than that, too. I didn’t do speed tests because that involves a lot of print failures that can wear out the FEP film, and I didn’t have a backup. They’re now available for $10 each from Anycubic, which is a very good price because it will need to be replaced occasionally. I’ve printed more than a dozen objects and the included film is still working fine. If you’re gentle with it, it will last much longer.
I did have some print failures, especially at the beginning when using the default settings of 2 second cure times at 60% brightness. 2 seconds is very fast and the printer can print with those settings, but I had more consistent results after turning the cure time to 3 seconds, still quite fast. Alternatively, it’s possible that turning the brightness up to 70% or 80% would have had a similar effect without increasing print time. The fact that it can print with such short cure times at only 60% power means there’s a TON of headroom for tweaking for speed. My biggest complaint is with their slicing software Photon Workshop. It works okay, but the auto-generated supports are terrible. For most models, I had to manually add supports under critical areas that would have certainly caused print failures had I not looked through the slice to see they were unsupported. The good news is that this printer works fine with other popular slicers, which is how I used it.
Conclusion
Overall, the Photon M3 has been a fantastic printer. The quality of prints is astounding thanks to the 4K+ screen and max Z resolution of 0.01mm, and the body and Z rail are plenty stiff enough to prevent Z wobble. It’s a very quiet printer, especially compared to an FDM printer; I used it in my office and barely noticed the noise. And the fact that I could use it in my office surprised me because the smell of the resins is quite noxious, but with the lid on it, I couldn’t smell it at all. I have another resin printer that must be operated in the garage because of the smell so it’s a noteworthy difference. All in all, Anycubic has released another high-quality resin printer with the M3, and professionals and hobbyists alike will find it useful.