Hands-On Review
Flashforge Creator 3 Pro
The Flashforge Creator 3 Pro is a professional/industrial IDEX 3D printer catered to the needs of small design studios, prototyping firms, and print farms. IDEX stands for Independent Dual Extrusion, a design structure that enables it to print two objects at the same time, either a copy or a mirrored version. It can also print two colors or materials in one object. Both extruders can reach a very high temp of 320°C, and the bed tops out at 120°C. The fully-enclosed build volume of 300mm x 250mm x 200mm is not especially large by today’s standards, but it’s about as big as is possible when you want to have a second extruder, keep it fully enclosed (and assembled), and not require a pallet to ship it (which is especially important). It also sports a magnetic-flexible build plate, HEPA air filtration, and cloud printing and monitoring.
No, your memory isn’t failing you, I have already reviewed a Flashforge Creator 3, but this is the Pro model! It’s different. Or is it? When I reviewed the C3, my overall impression of the printer was positive with a few minor caveats. Did Flashforge address those issues? Did they introduce entirely new problems? We’ll find out today!


![]()

Unboxing and Assembly
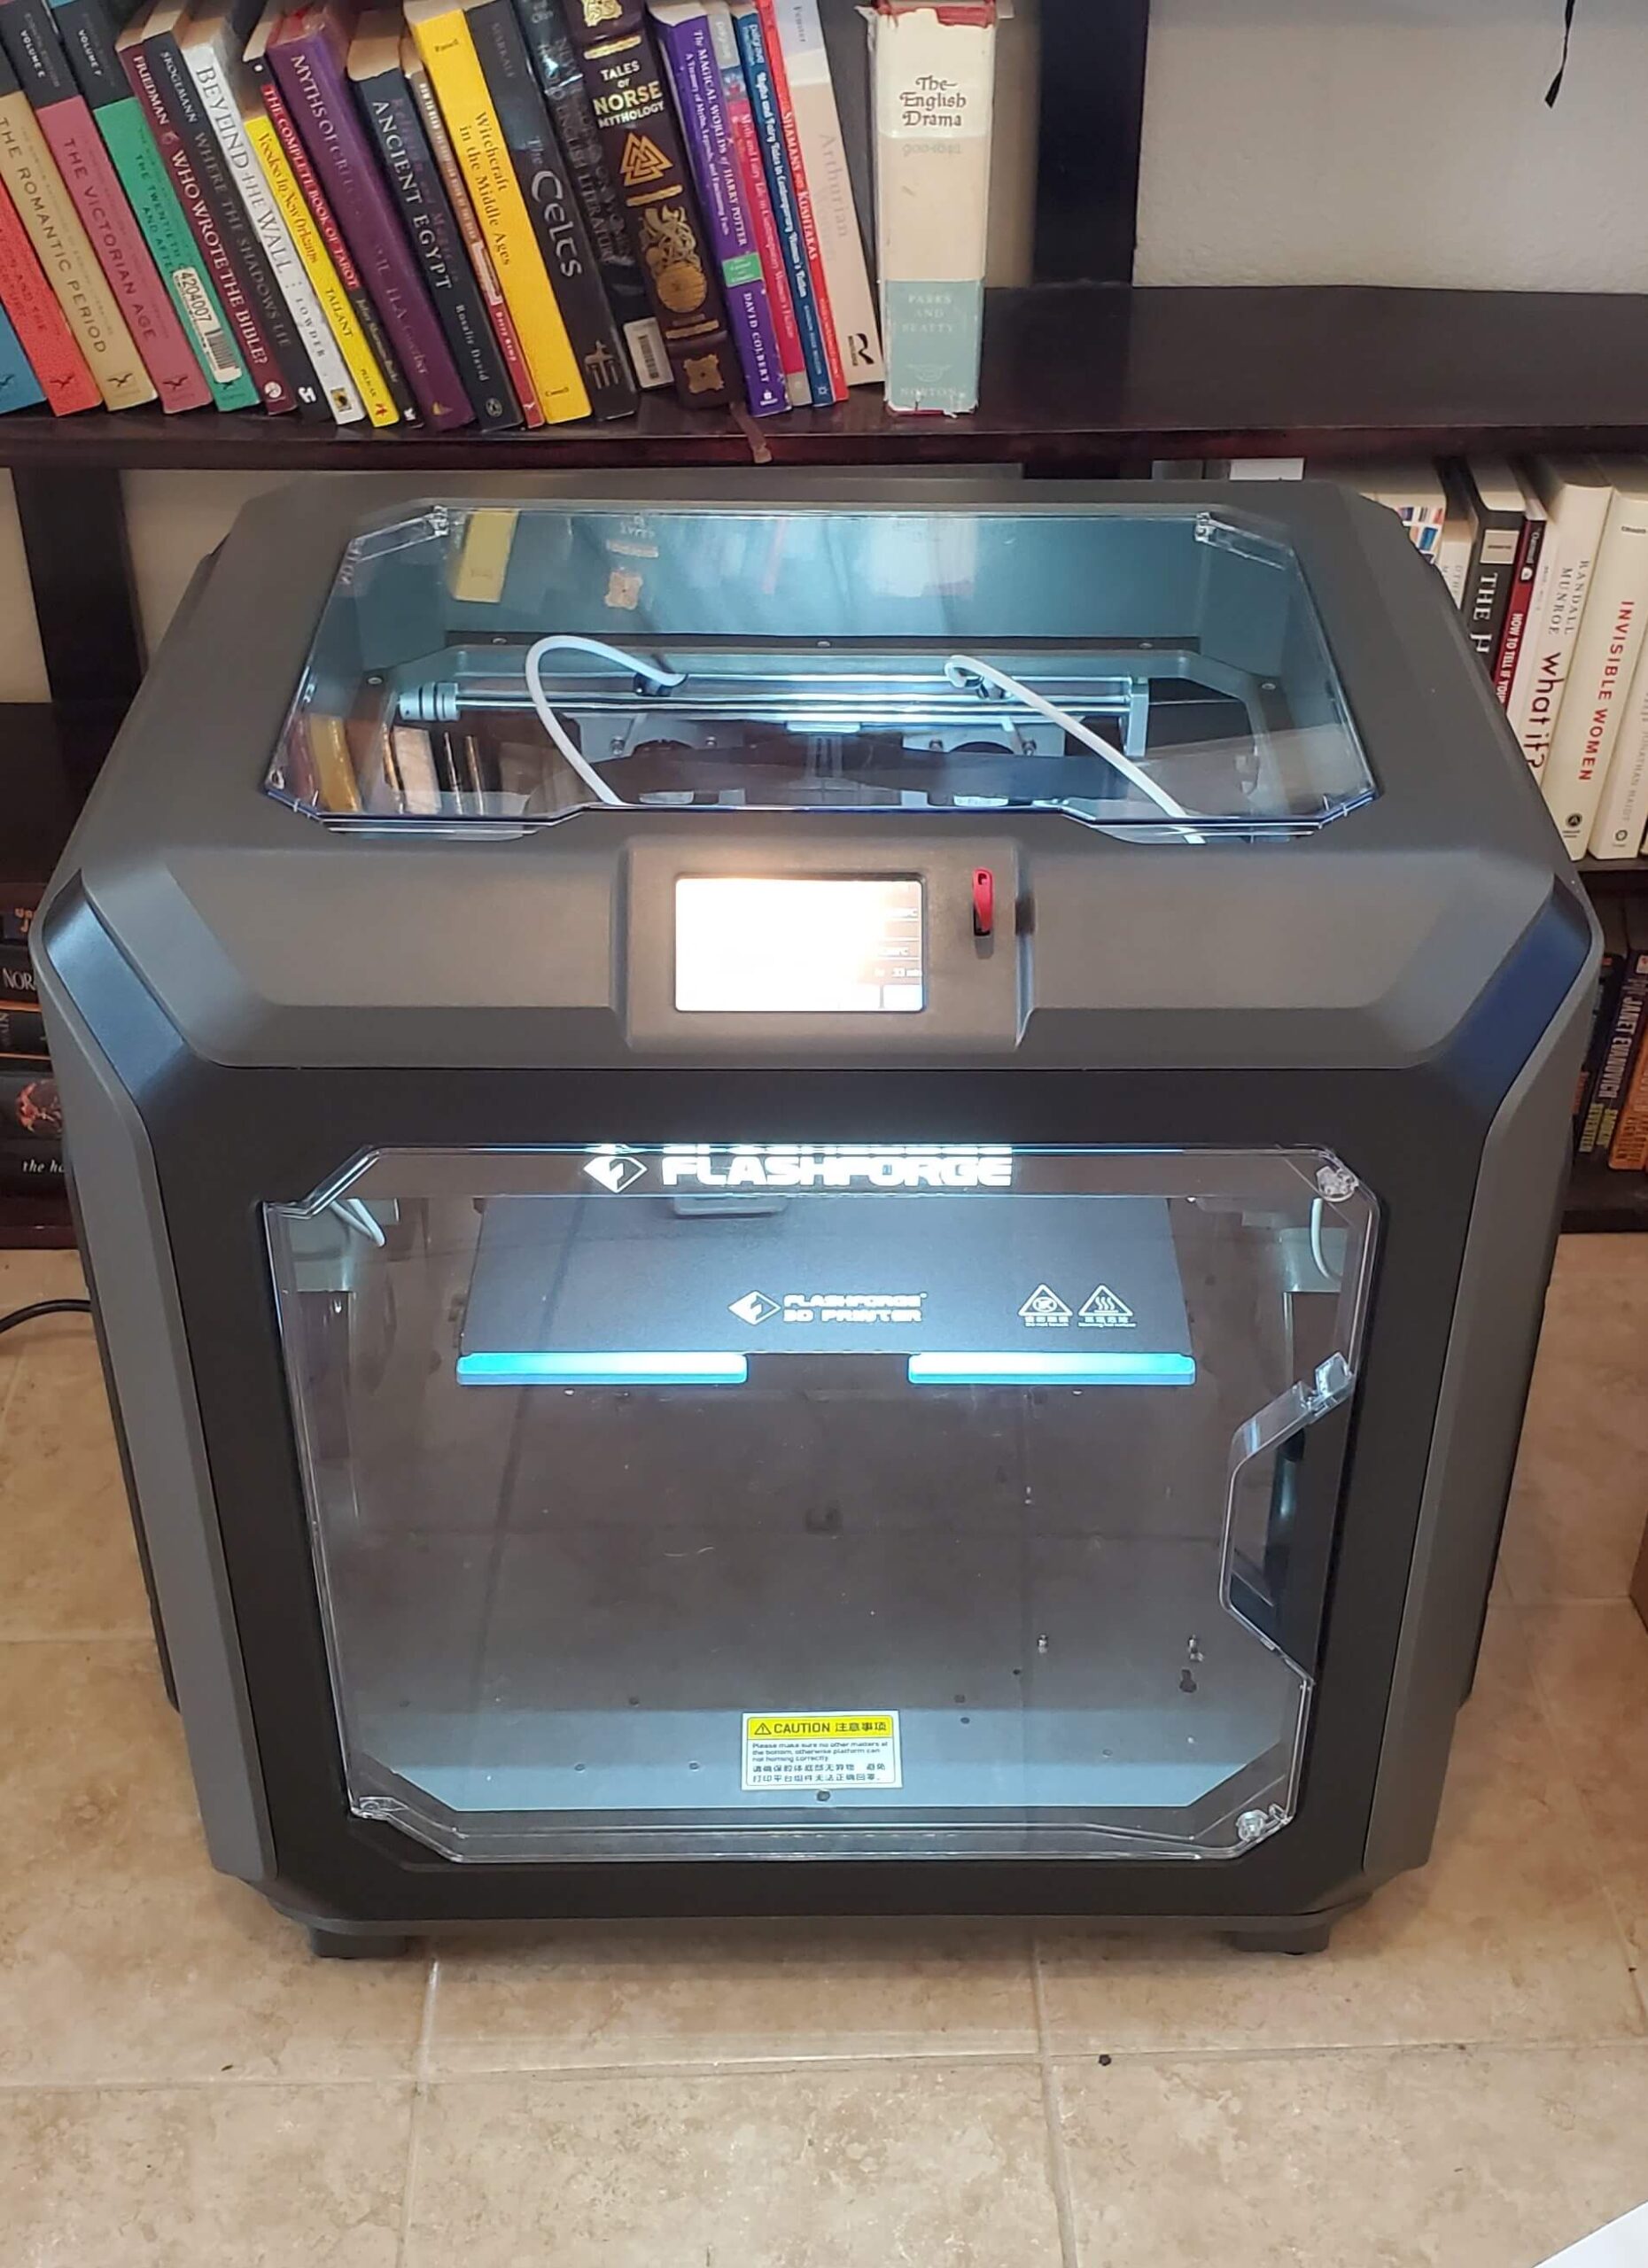
Flashforge does a fantastic job of shipping FULLY assembled printers. Users can expect to pull the printer out of the box, remove some packing tape and an insert, plug it in, and start printing. A professional 3D printer should be plug-and-play and I’m happy to report that the C3 Pro checks that box.

The only setup required was to go through the assisted leveling process that pretty much all Flashforge printers have now. It’s sensor-based so there’s no need to slide a piece of paper around under the nozzle like the olden days. The on-screen prompts indicate when and how much to turn each knob under the platform, and it takes only a couple of minutes.
The timing of the launch of this printer coincides closely with the timing of the FlashPrint 5.0 release, which I used for this review. So in a less official way, this is also a review of 5; my first impression is that the new dark interface lends a more professional feel. Just like with the C3, this Pro model has a wifi connection that works very well, though it sometimes takes a few minutes to be seen on the network. The new machine control window is cleaner and more intuitive than in prior versions of FlashPrint, so sending commands to the C3 Pro over the network is quick and easy.
The Tests
My first command was to print Benchy, you might have guessed.


This is among the best Benchies I’ve printed, certainly so with default settings (0.18mm layers). The definition of the small features is fantastic, evidenced by the steering wheel. Arches came out well, and the overhang of the bow is completely smooth, indicating there’s adequate cooling available. The bow is kind of hard to see because I was trying to get an angle that shows how consistent the top surfaces are. This is what I expect from a professional 3D printer in 2021.
I mentioned in the C3 review that one setting I change for my reviews is to disable the raft if it’s on by default. Due to a variety of reasons related to hardware and software at the time, the C3 couldn’t effectively print without rafts so I did that review with rafts, and the printer lost a few points for that. The C3 Pro has raft off by default, and I was pleased to see it print just fine without. In fact, the first layer of the first print was a bit close and caused some of the plastic to stick to the bed when the first print was removed. But Flashforge doesn’t lose points for this because FlashPrint 5 finally includes a Z offset setting! I added a 0.2mm offset and every subsequent print has been at the right height, including the All In One 3D Printer Test.
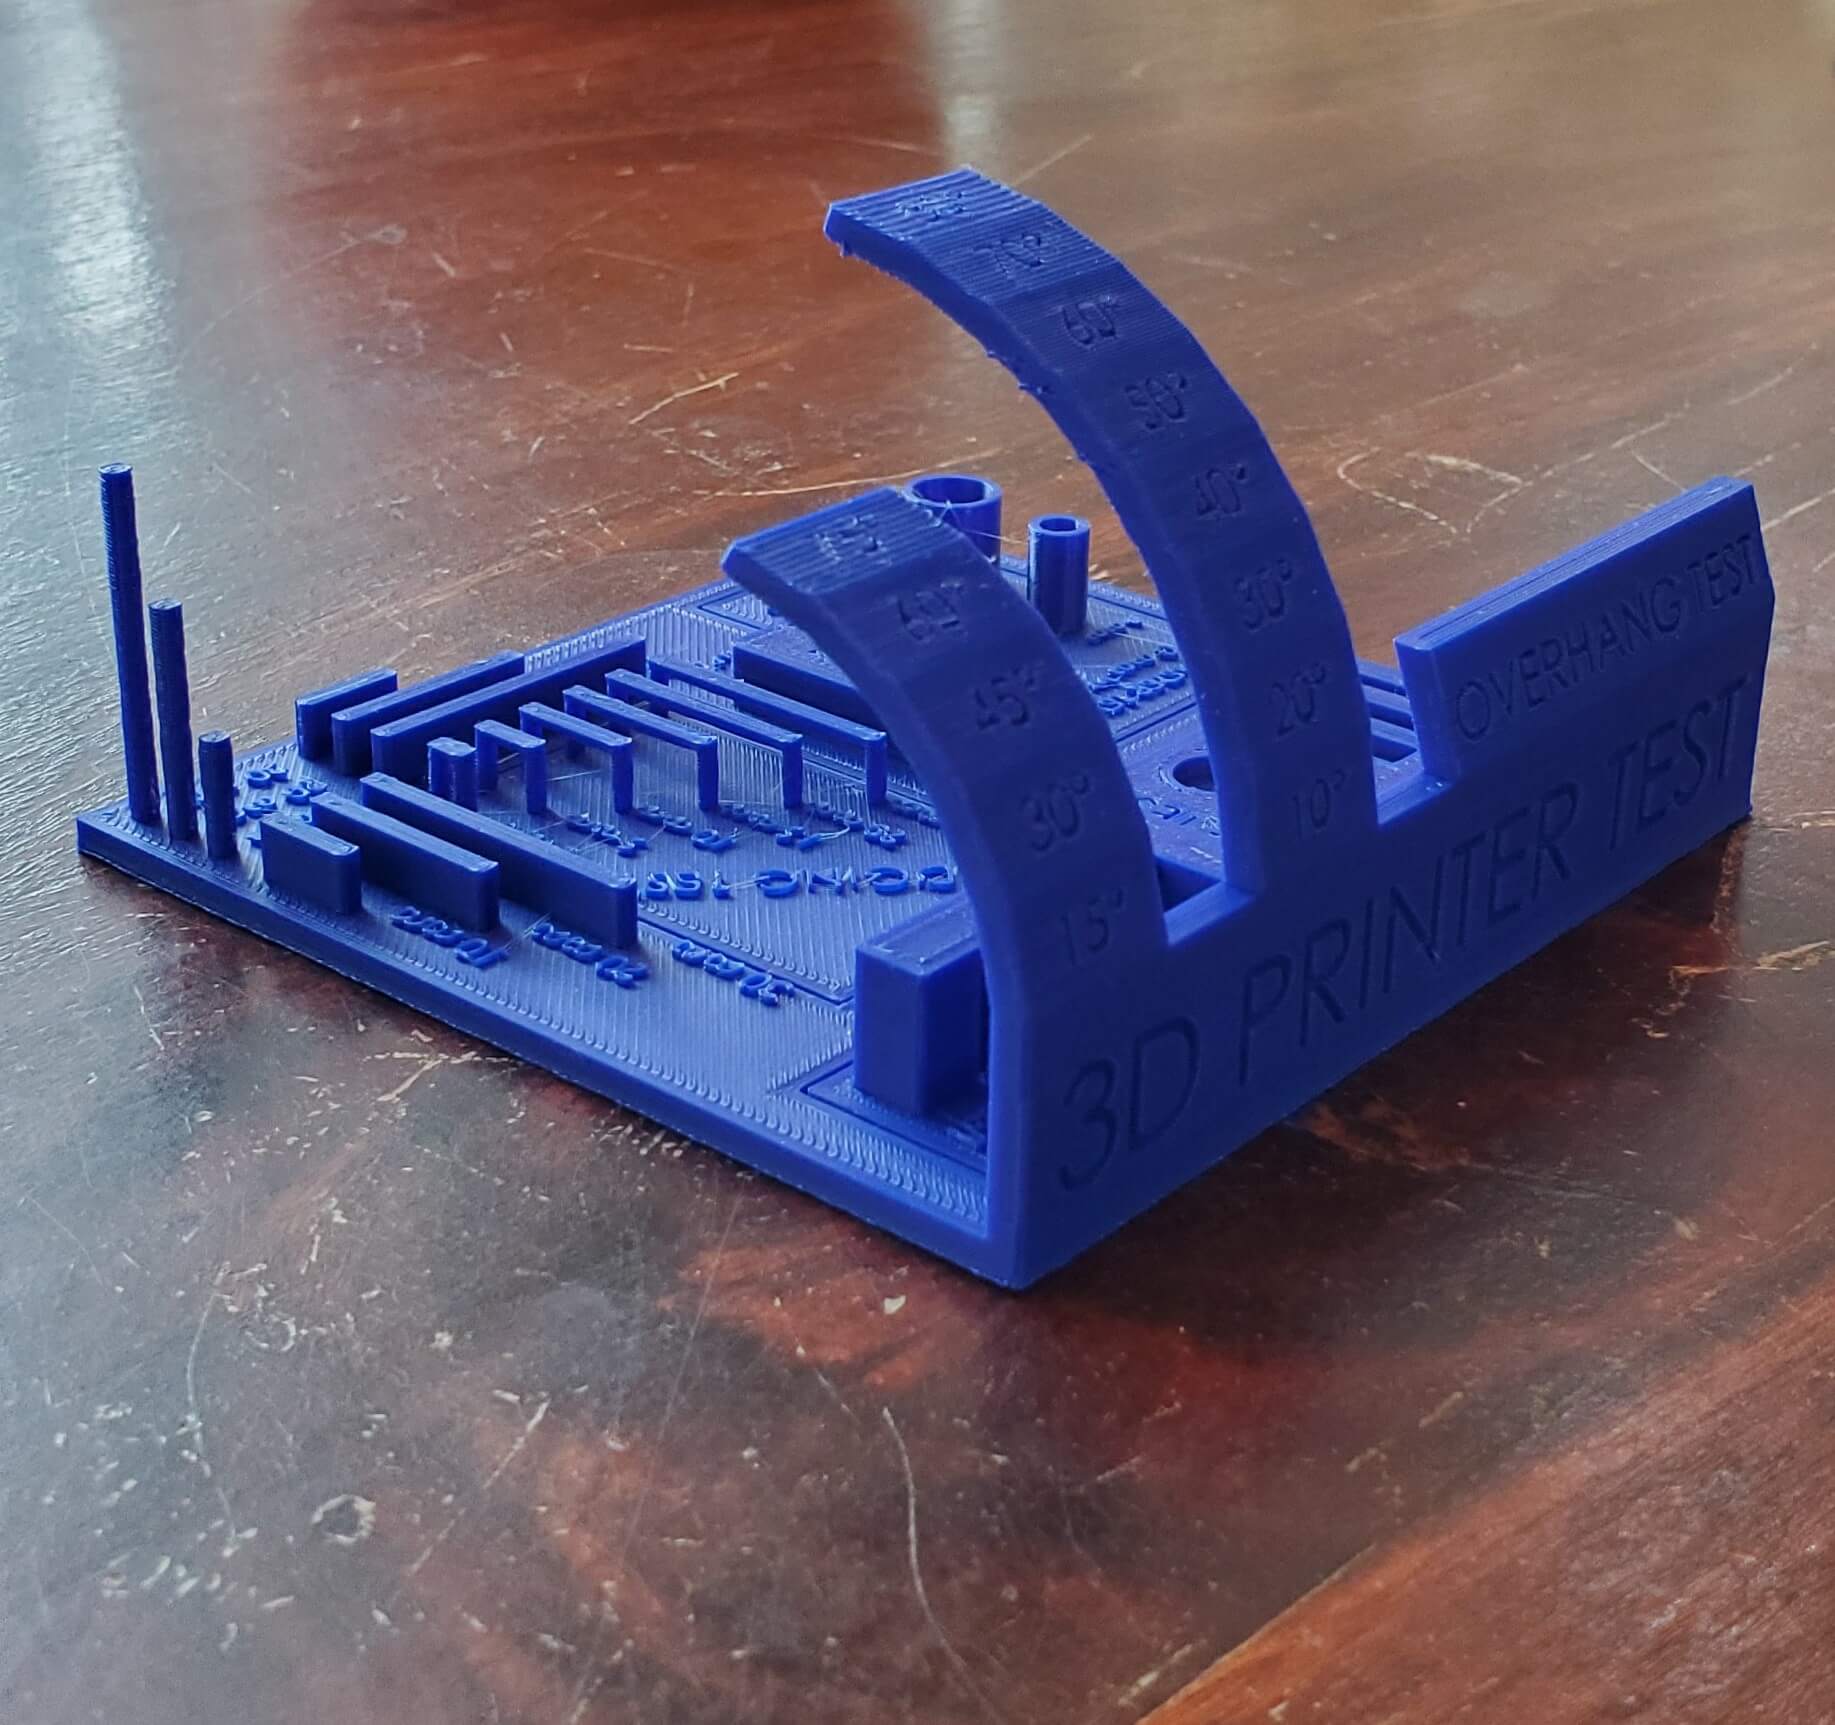

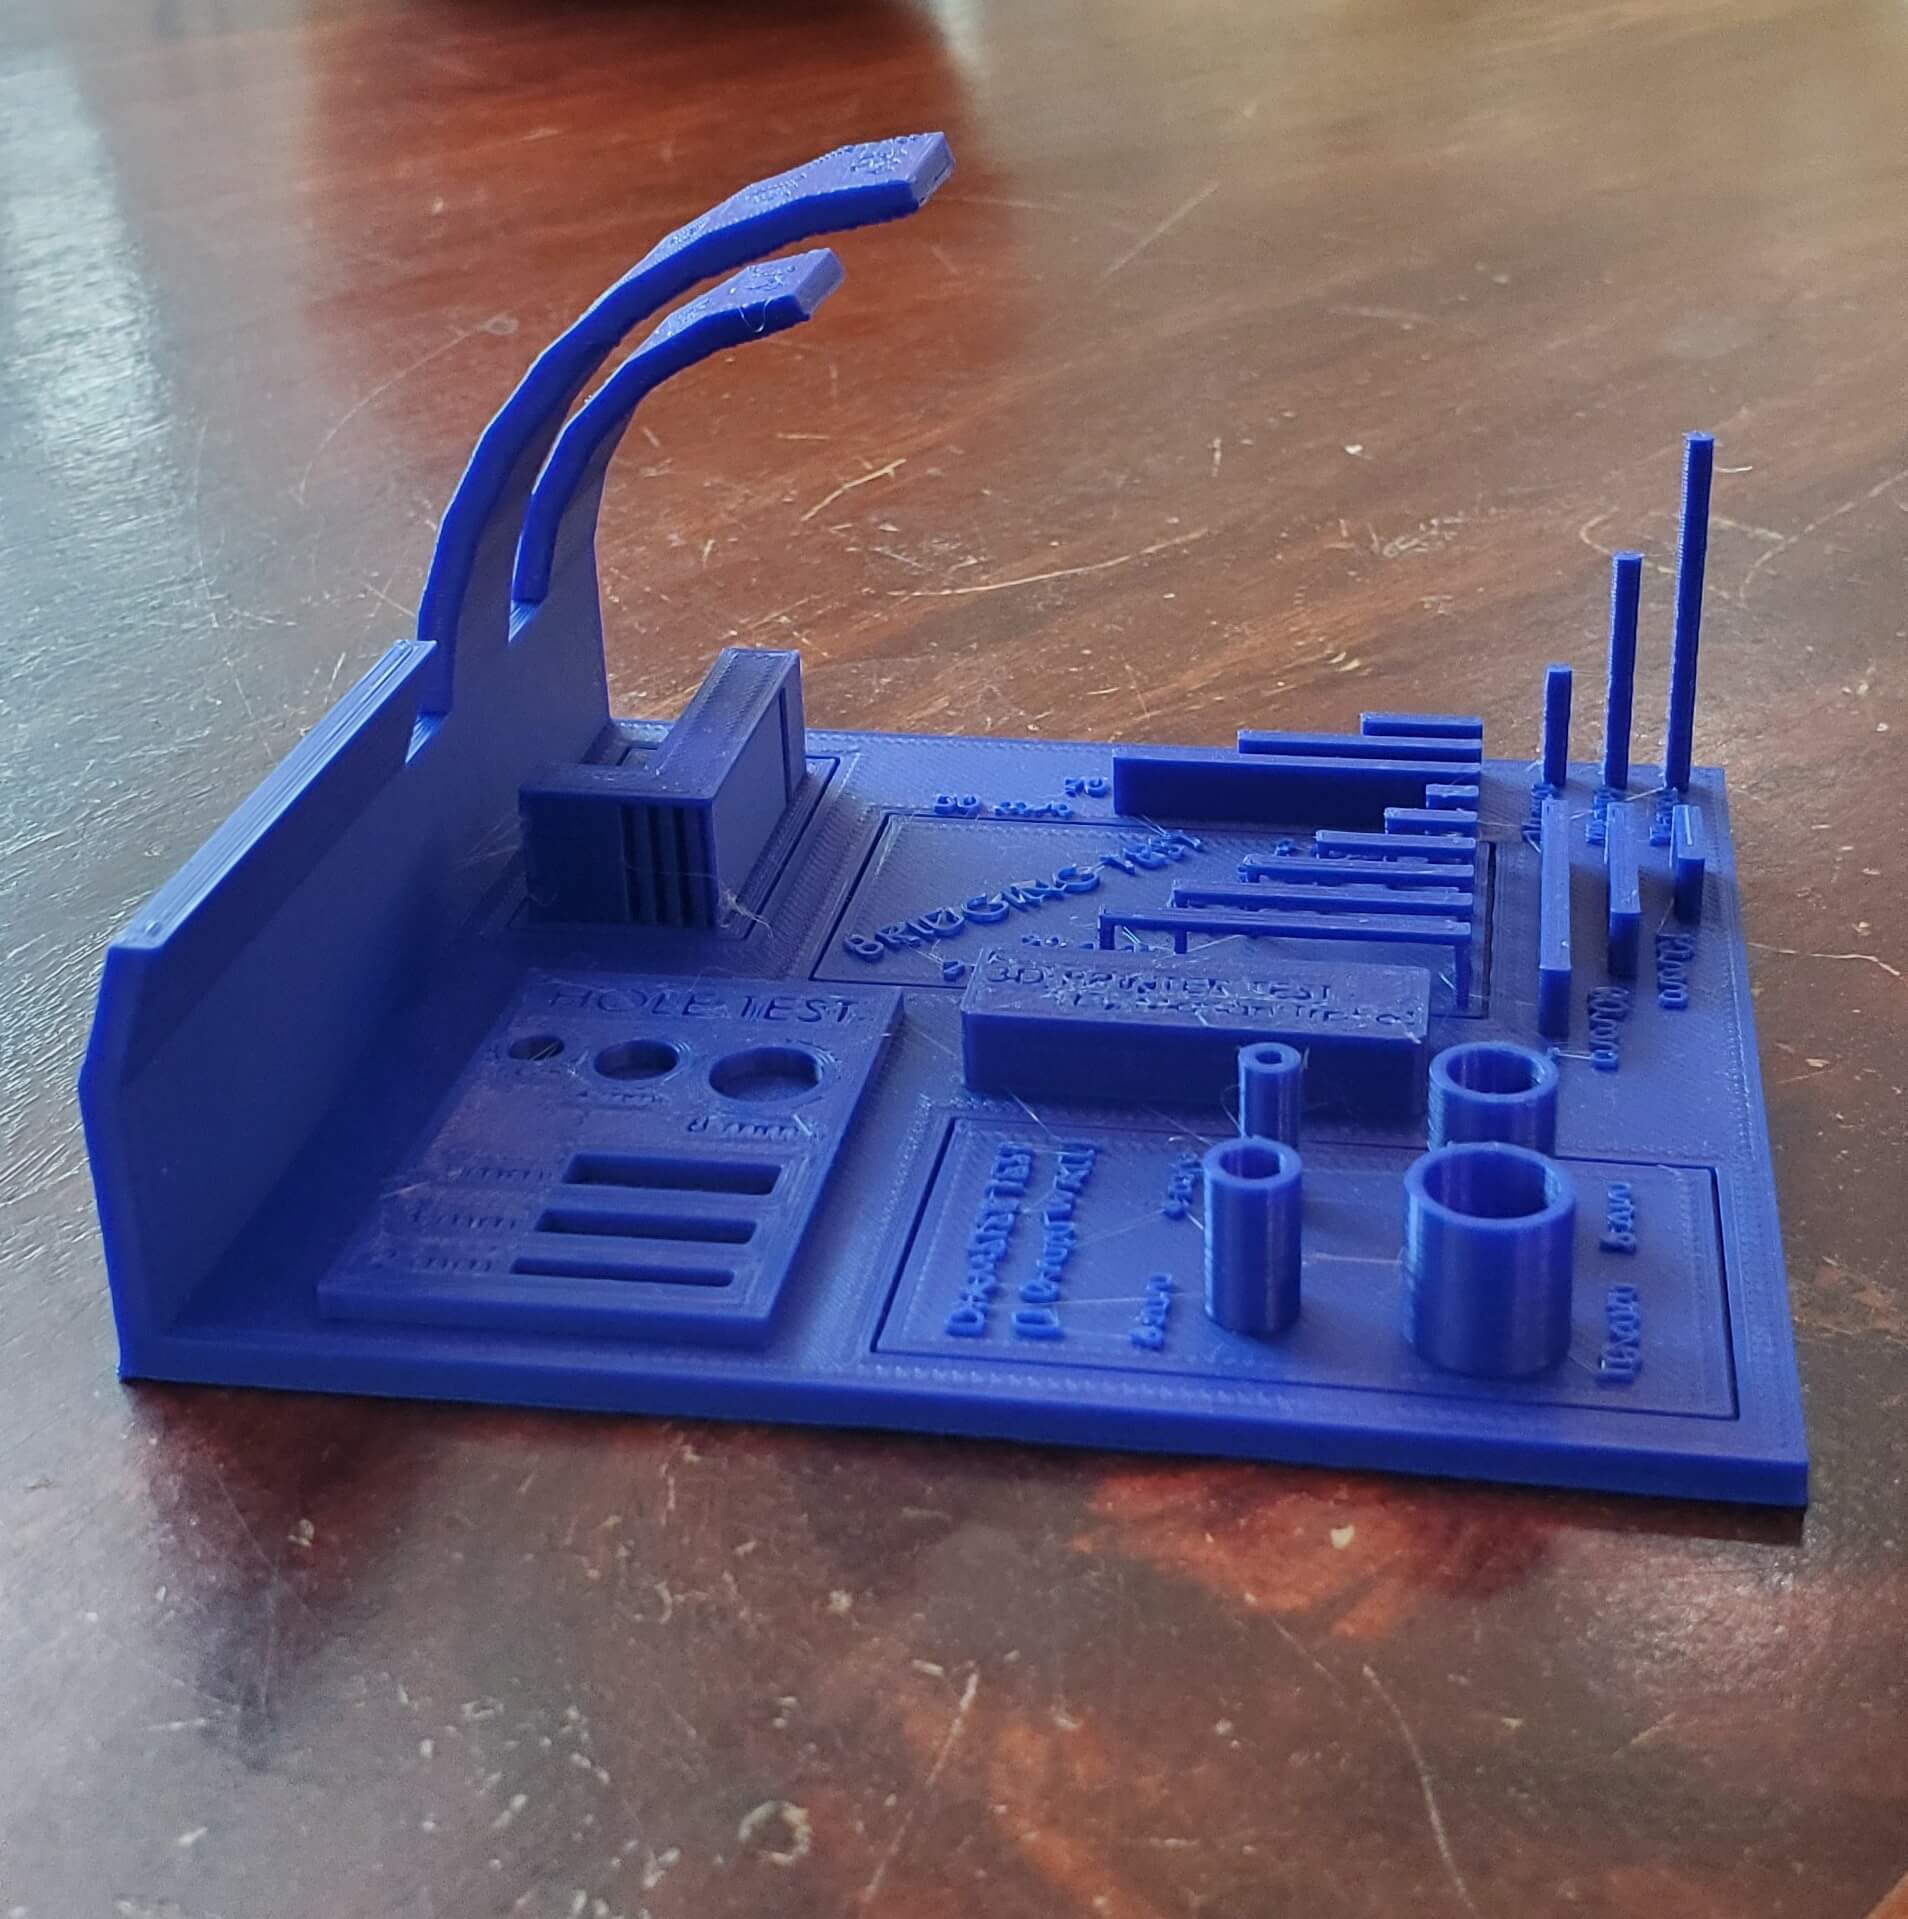

This print tests pretty much everything and the C3 Pro scores high marks on everything. The steepest overhangs are crisp with no signs of struggle, the pillars are square and straight, surfaces are smooth, bridges don’t sag, and the text is legible. For measuring tolerance precision, I use the Calibration Cube.
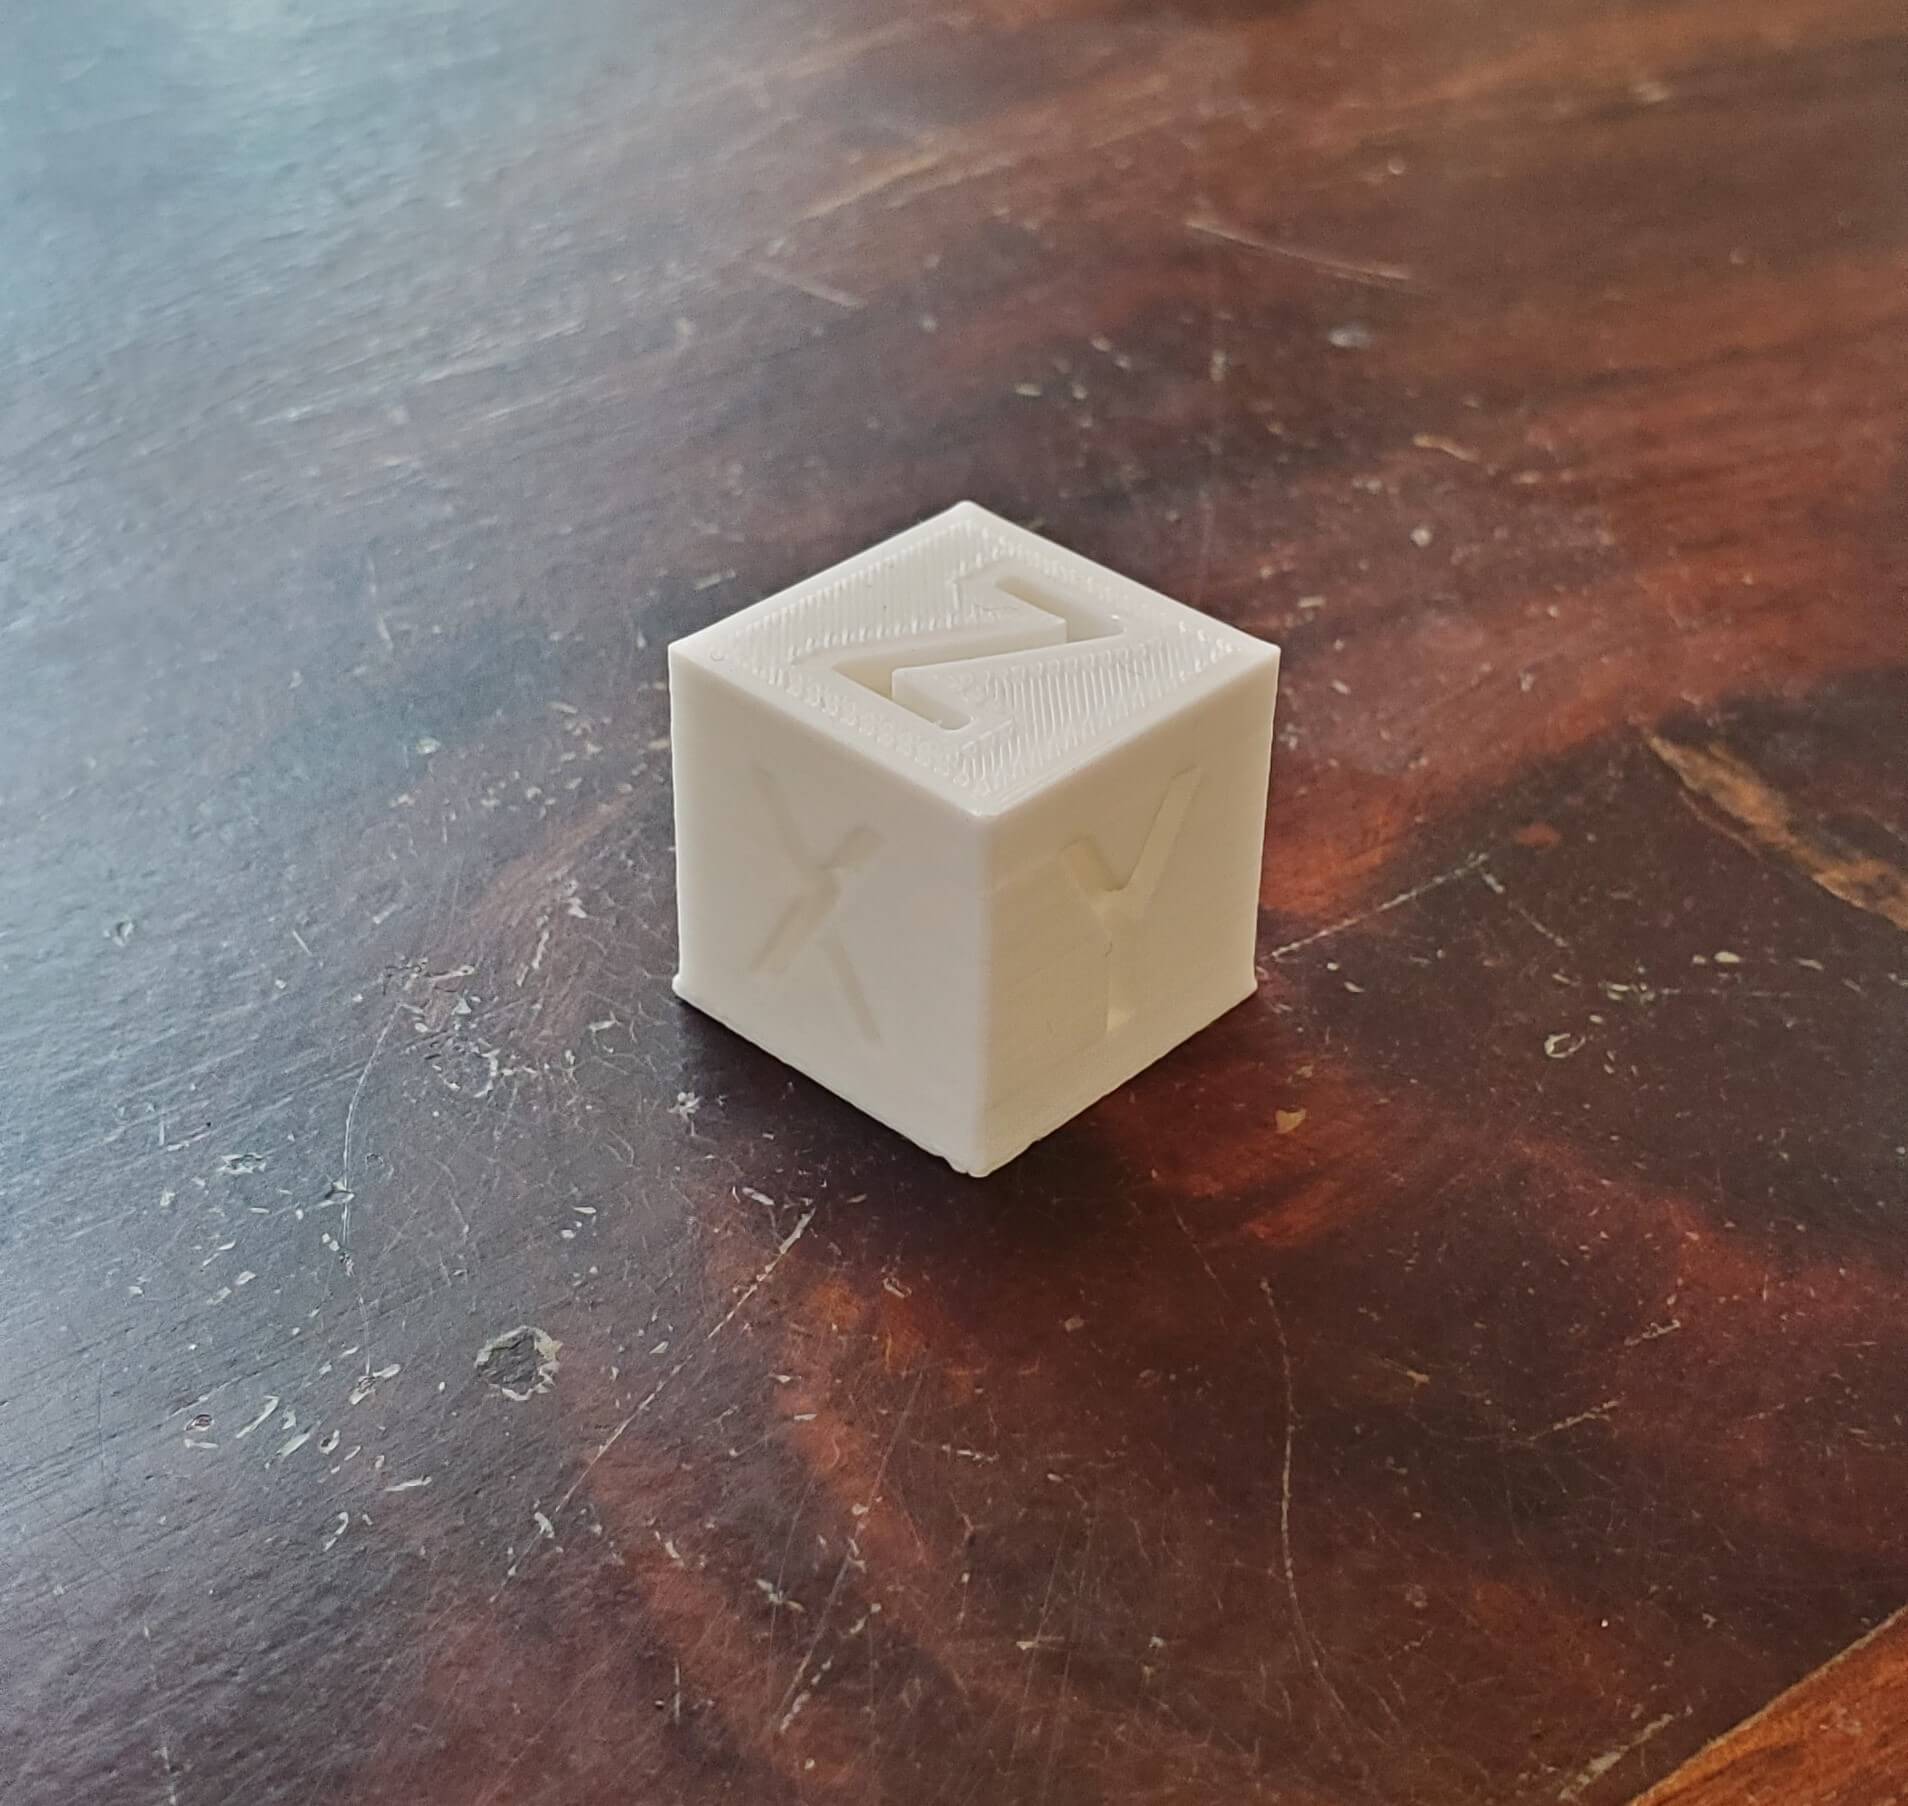

The measured dimensions are X = 20.12mm, Y = 20.02mm, and Z = 19.83mm. That’s quite good, with a maximum variance on the XY of 0.6% on a small object; it will be less on larger objects. The bigger difference on the Z is expected and explained by the small “elephant foot” around the bottom edge caused by the first layer being squished a bit. It’s normal, but FlashPrint does have a Z compensation setting if absolute precision is necessary for your application. To really put those tolerances to the test, I print the Machine Canister.
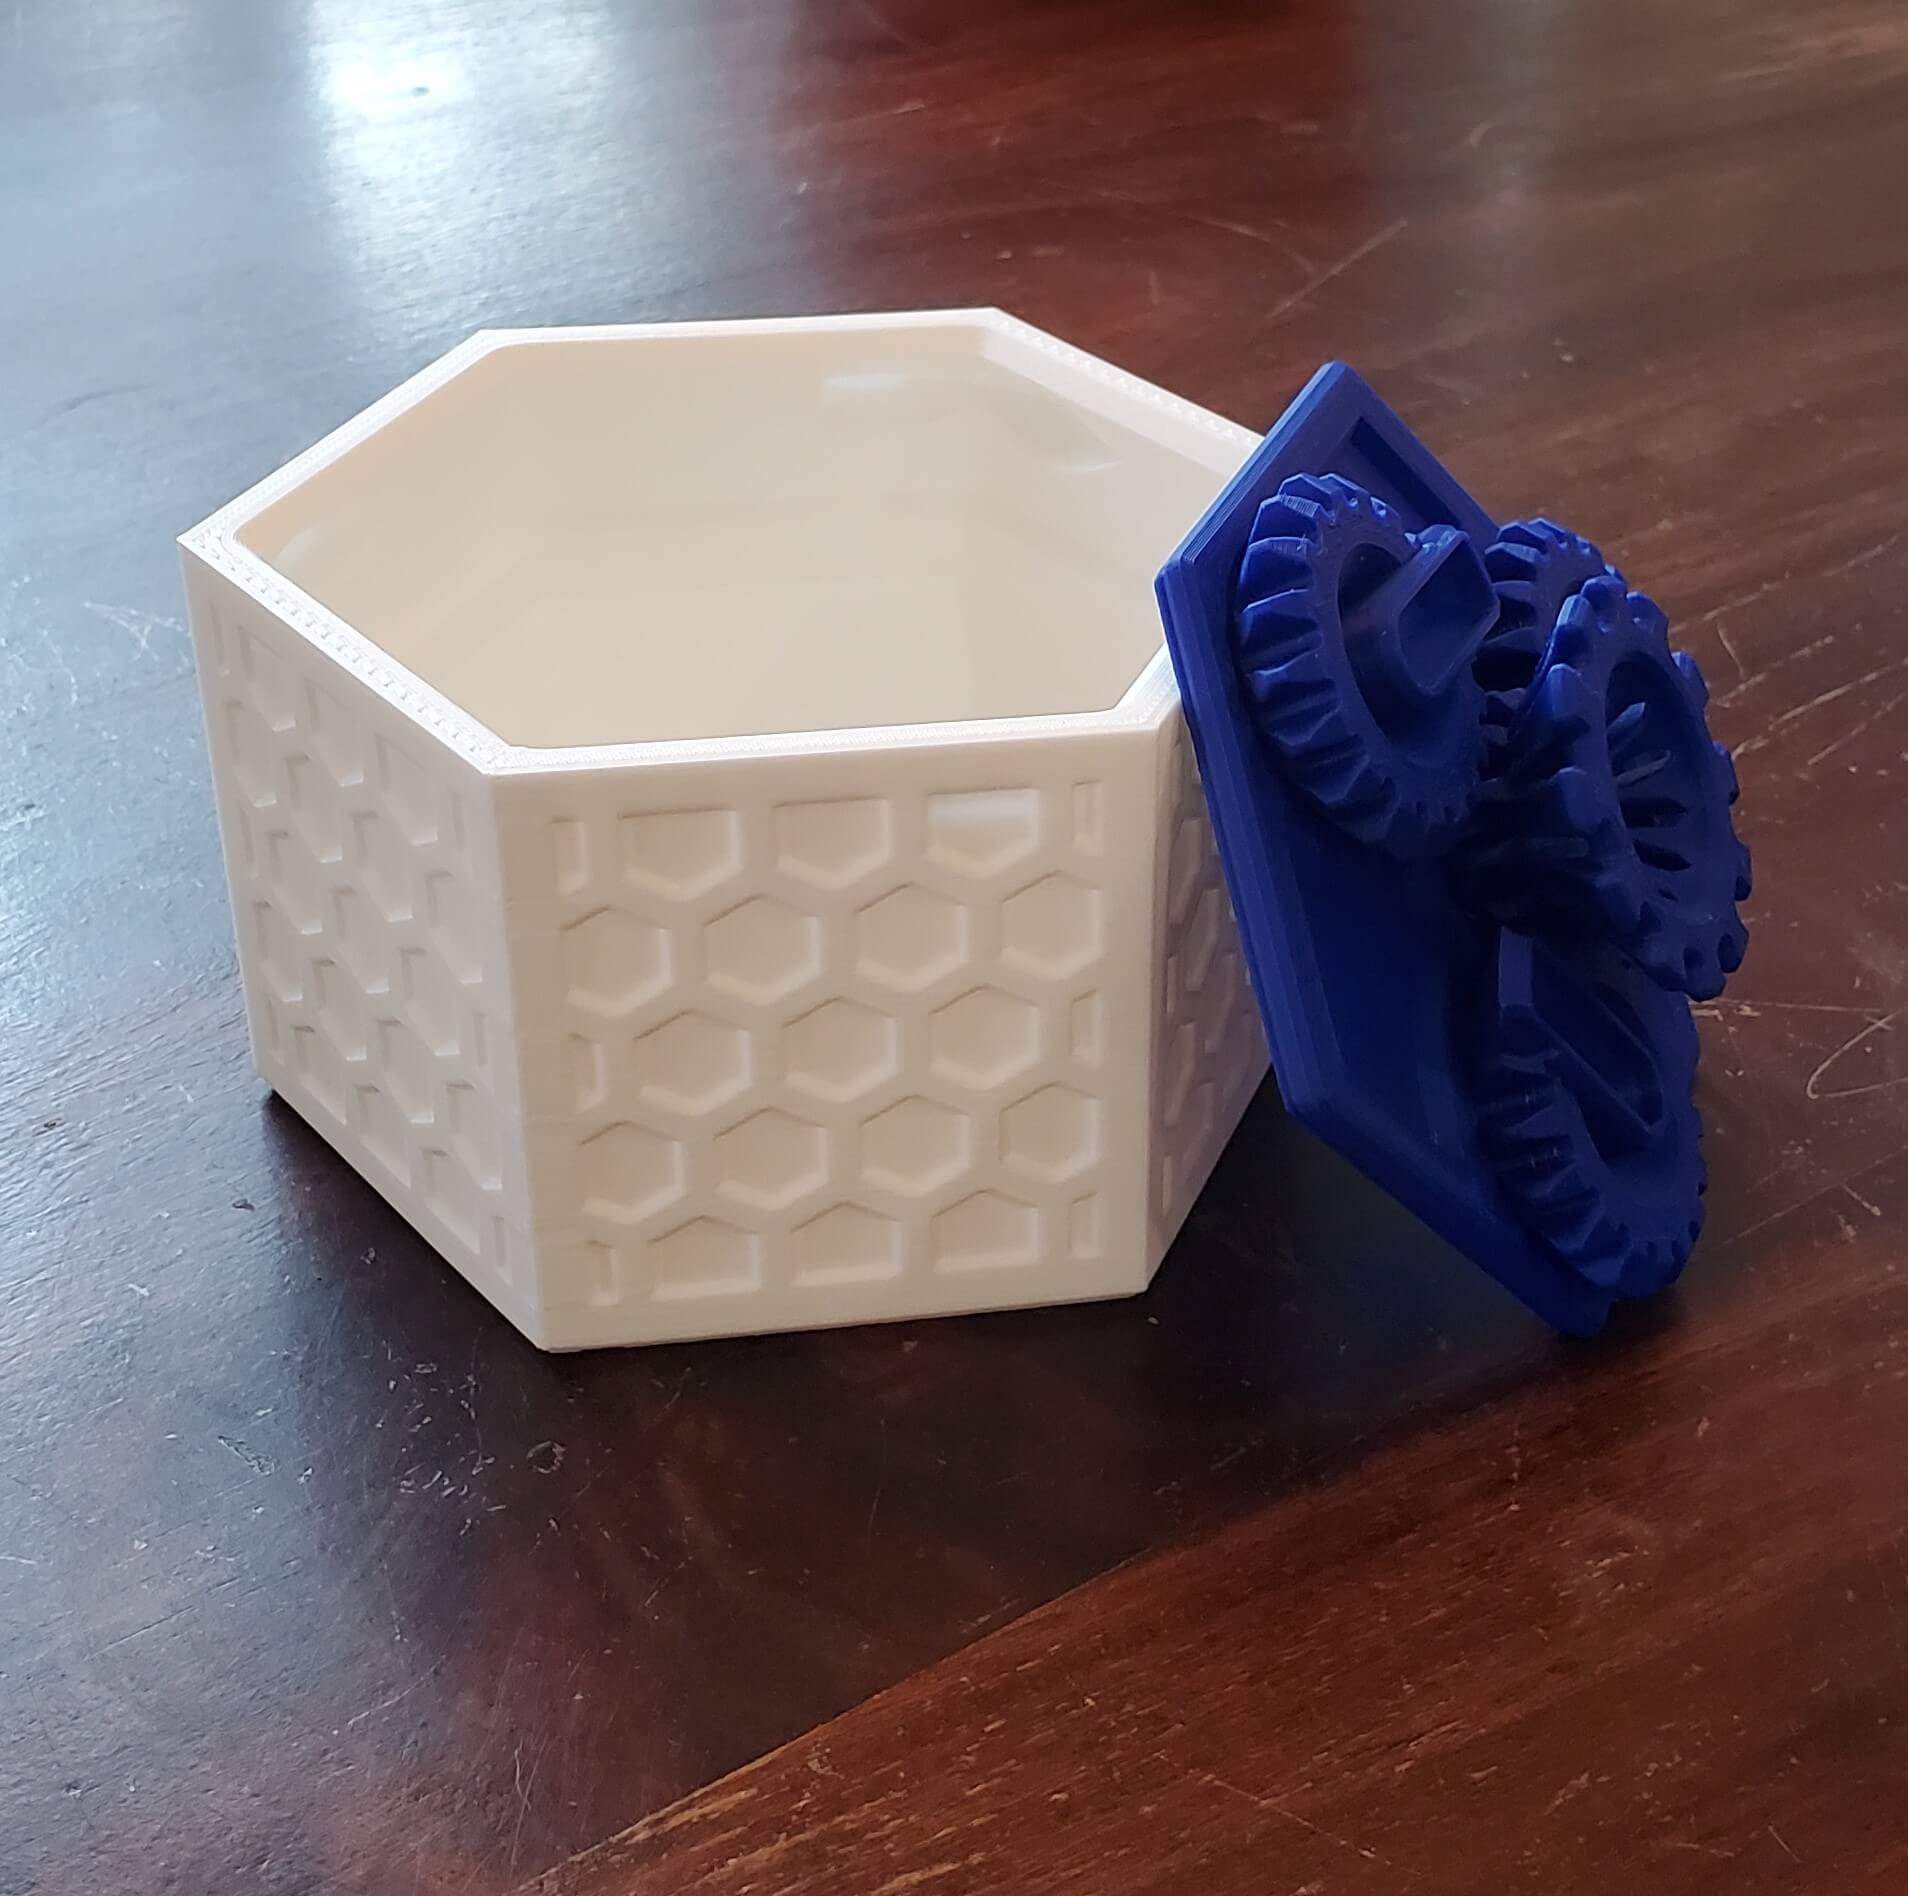

The canister and print-in-place mechanical lid came out so well that they barely look 3D printed. Of course, the gears turn smoothly and weren’t bound at all. Not having to change filaments to print the two objects in different colors is a huge convenience. Speaking of two colors, the 2-color standing cat does a great job of demonstrating the feature.
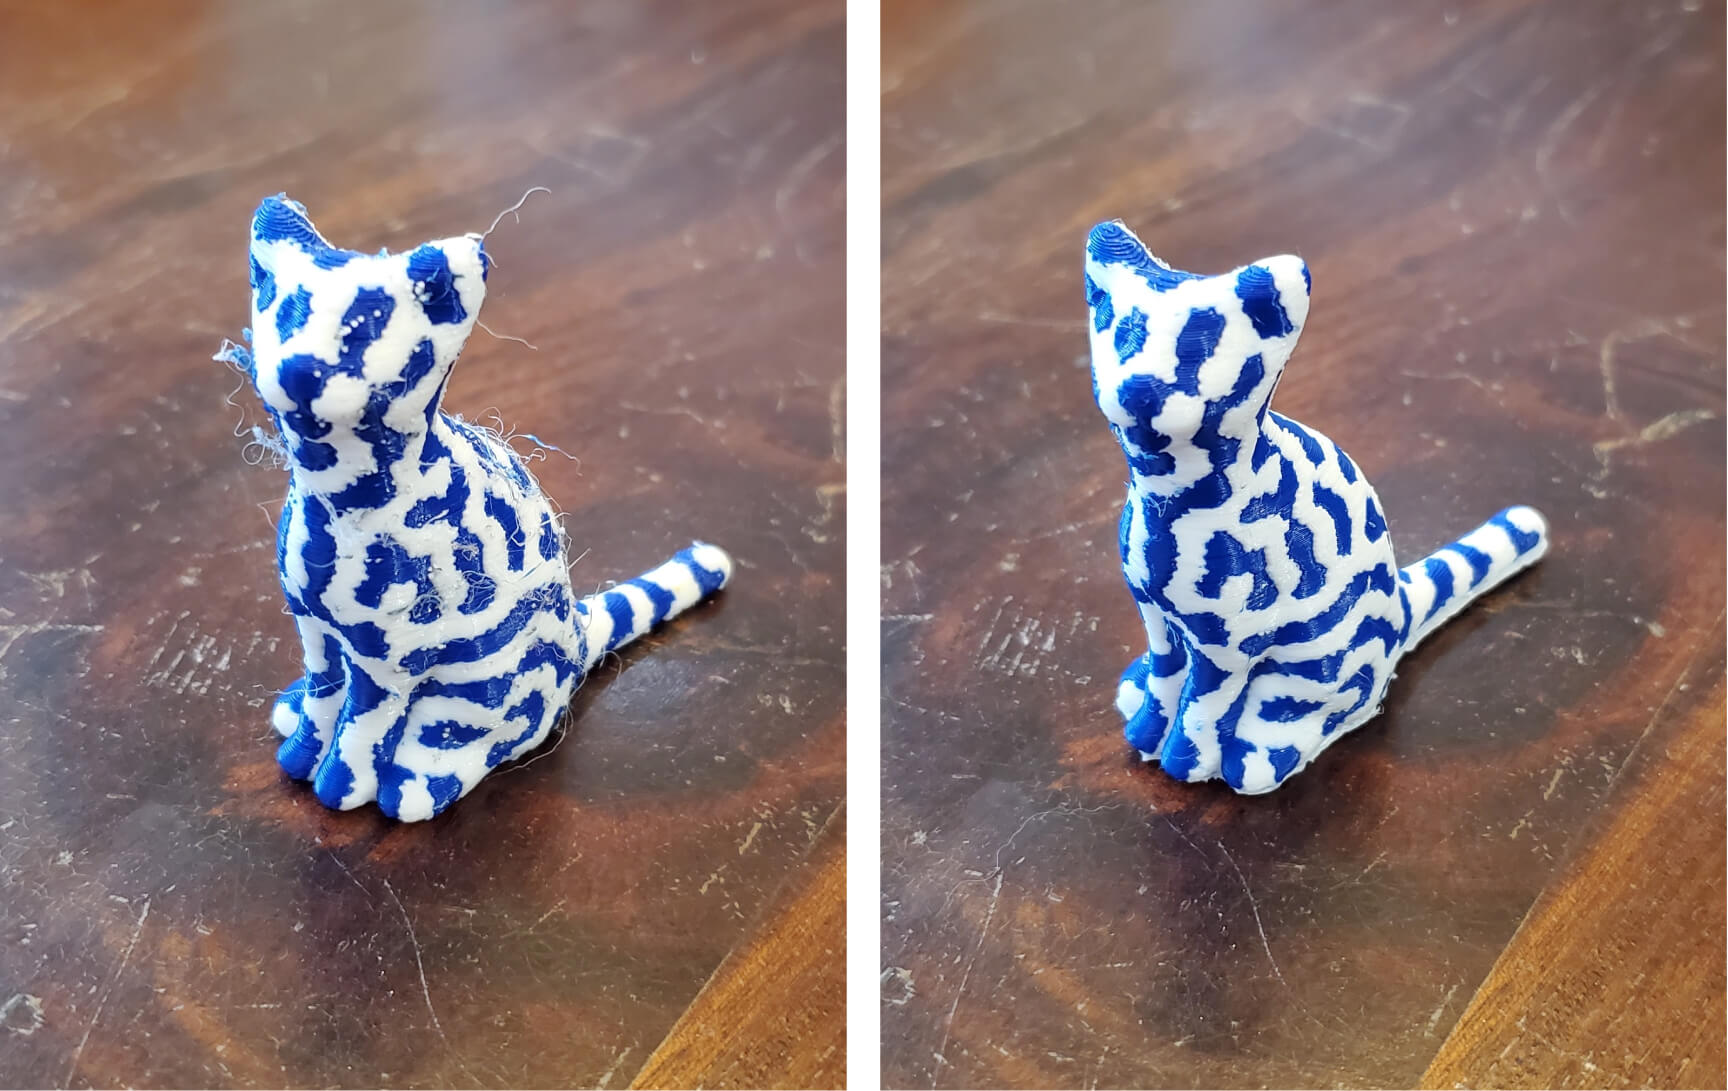

The first picture is without a wipe wall and the second picture is with a wipe wall, and the difference is clear. I did no cleanup on either print so as to fully represent the capabilities of the printer. They look good, especially the wipe-wall version that has very few dots. I took this opportunity to test the camera.
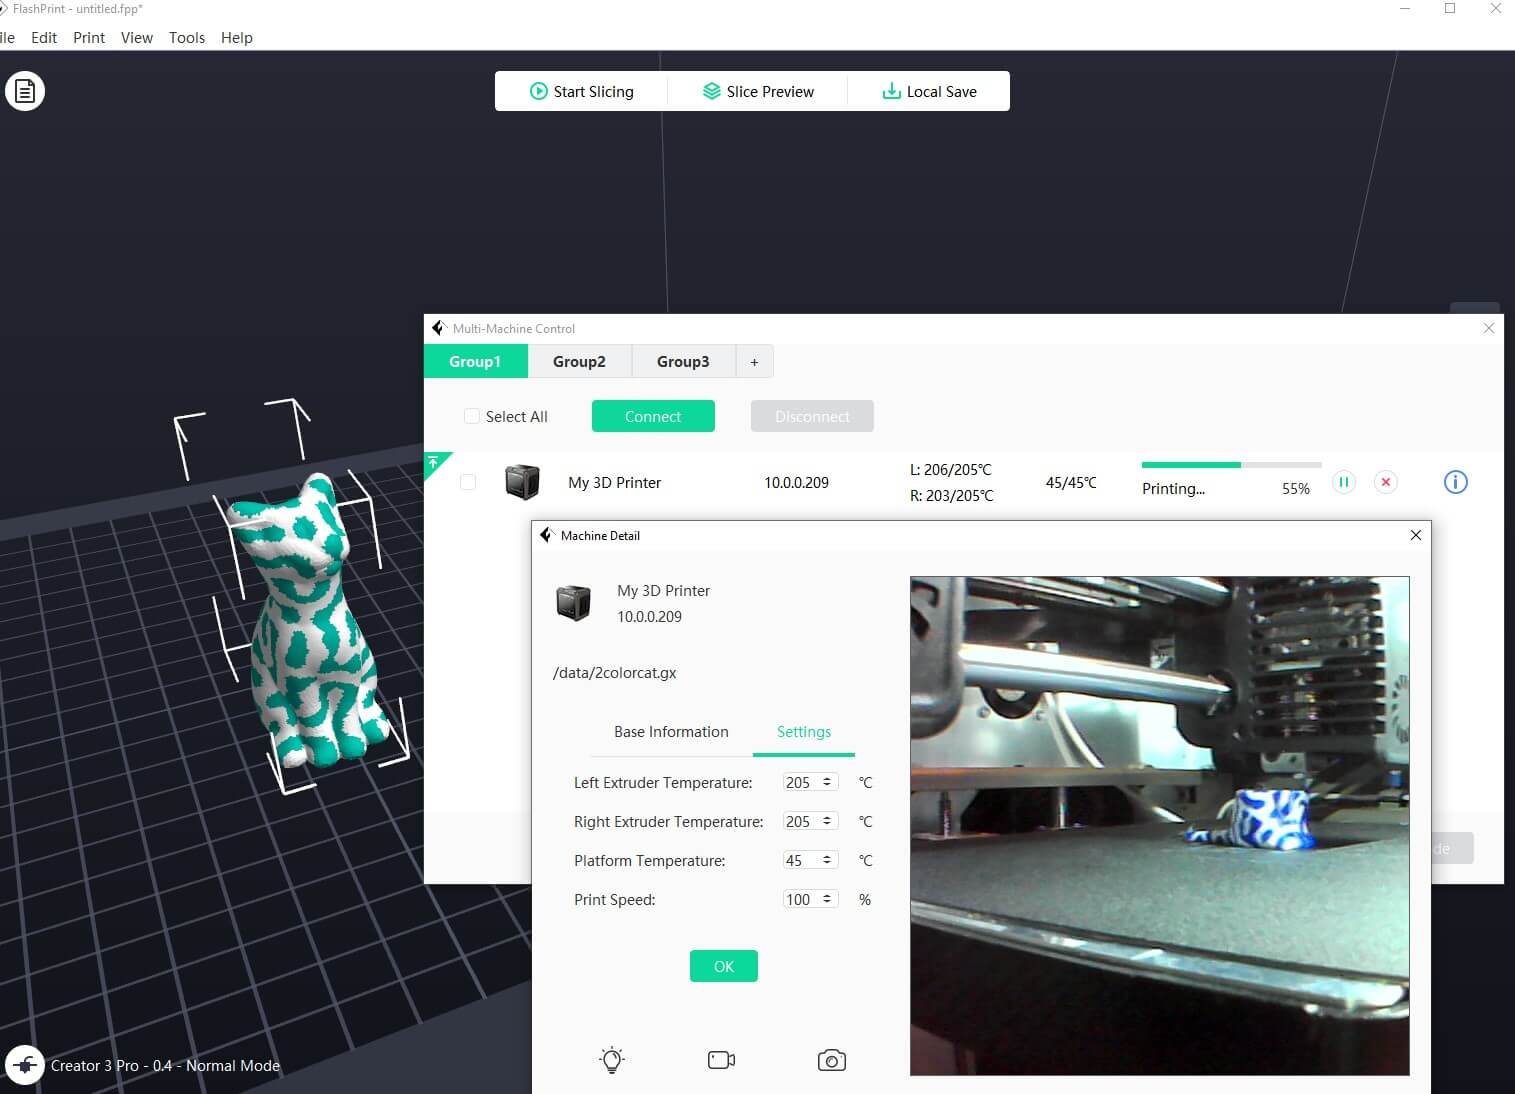

In my opinion, an on-board camera is an absolute necessity for an industrial printer like this because it’s the quickest way to monitor a print when the printer is almost certainly in another room (as it’s a tad loud). While I didn’t experience a fail on this print, fails are quite common on dual-color prints so it was very convenient to be able to check on the progress of the printer in the library without leaving my office. This screenshot also shows how easy it is to adjust the hotend temps, bed temp, and print speed during a print, a feature that really helps when dialing in a new material. I forgot to take a screenshot of these Chameleon Pen Holders being printed at the same time so you’ll have to take my word for it that they were.
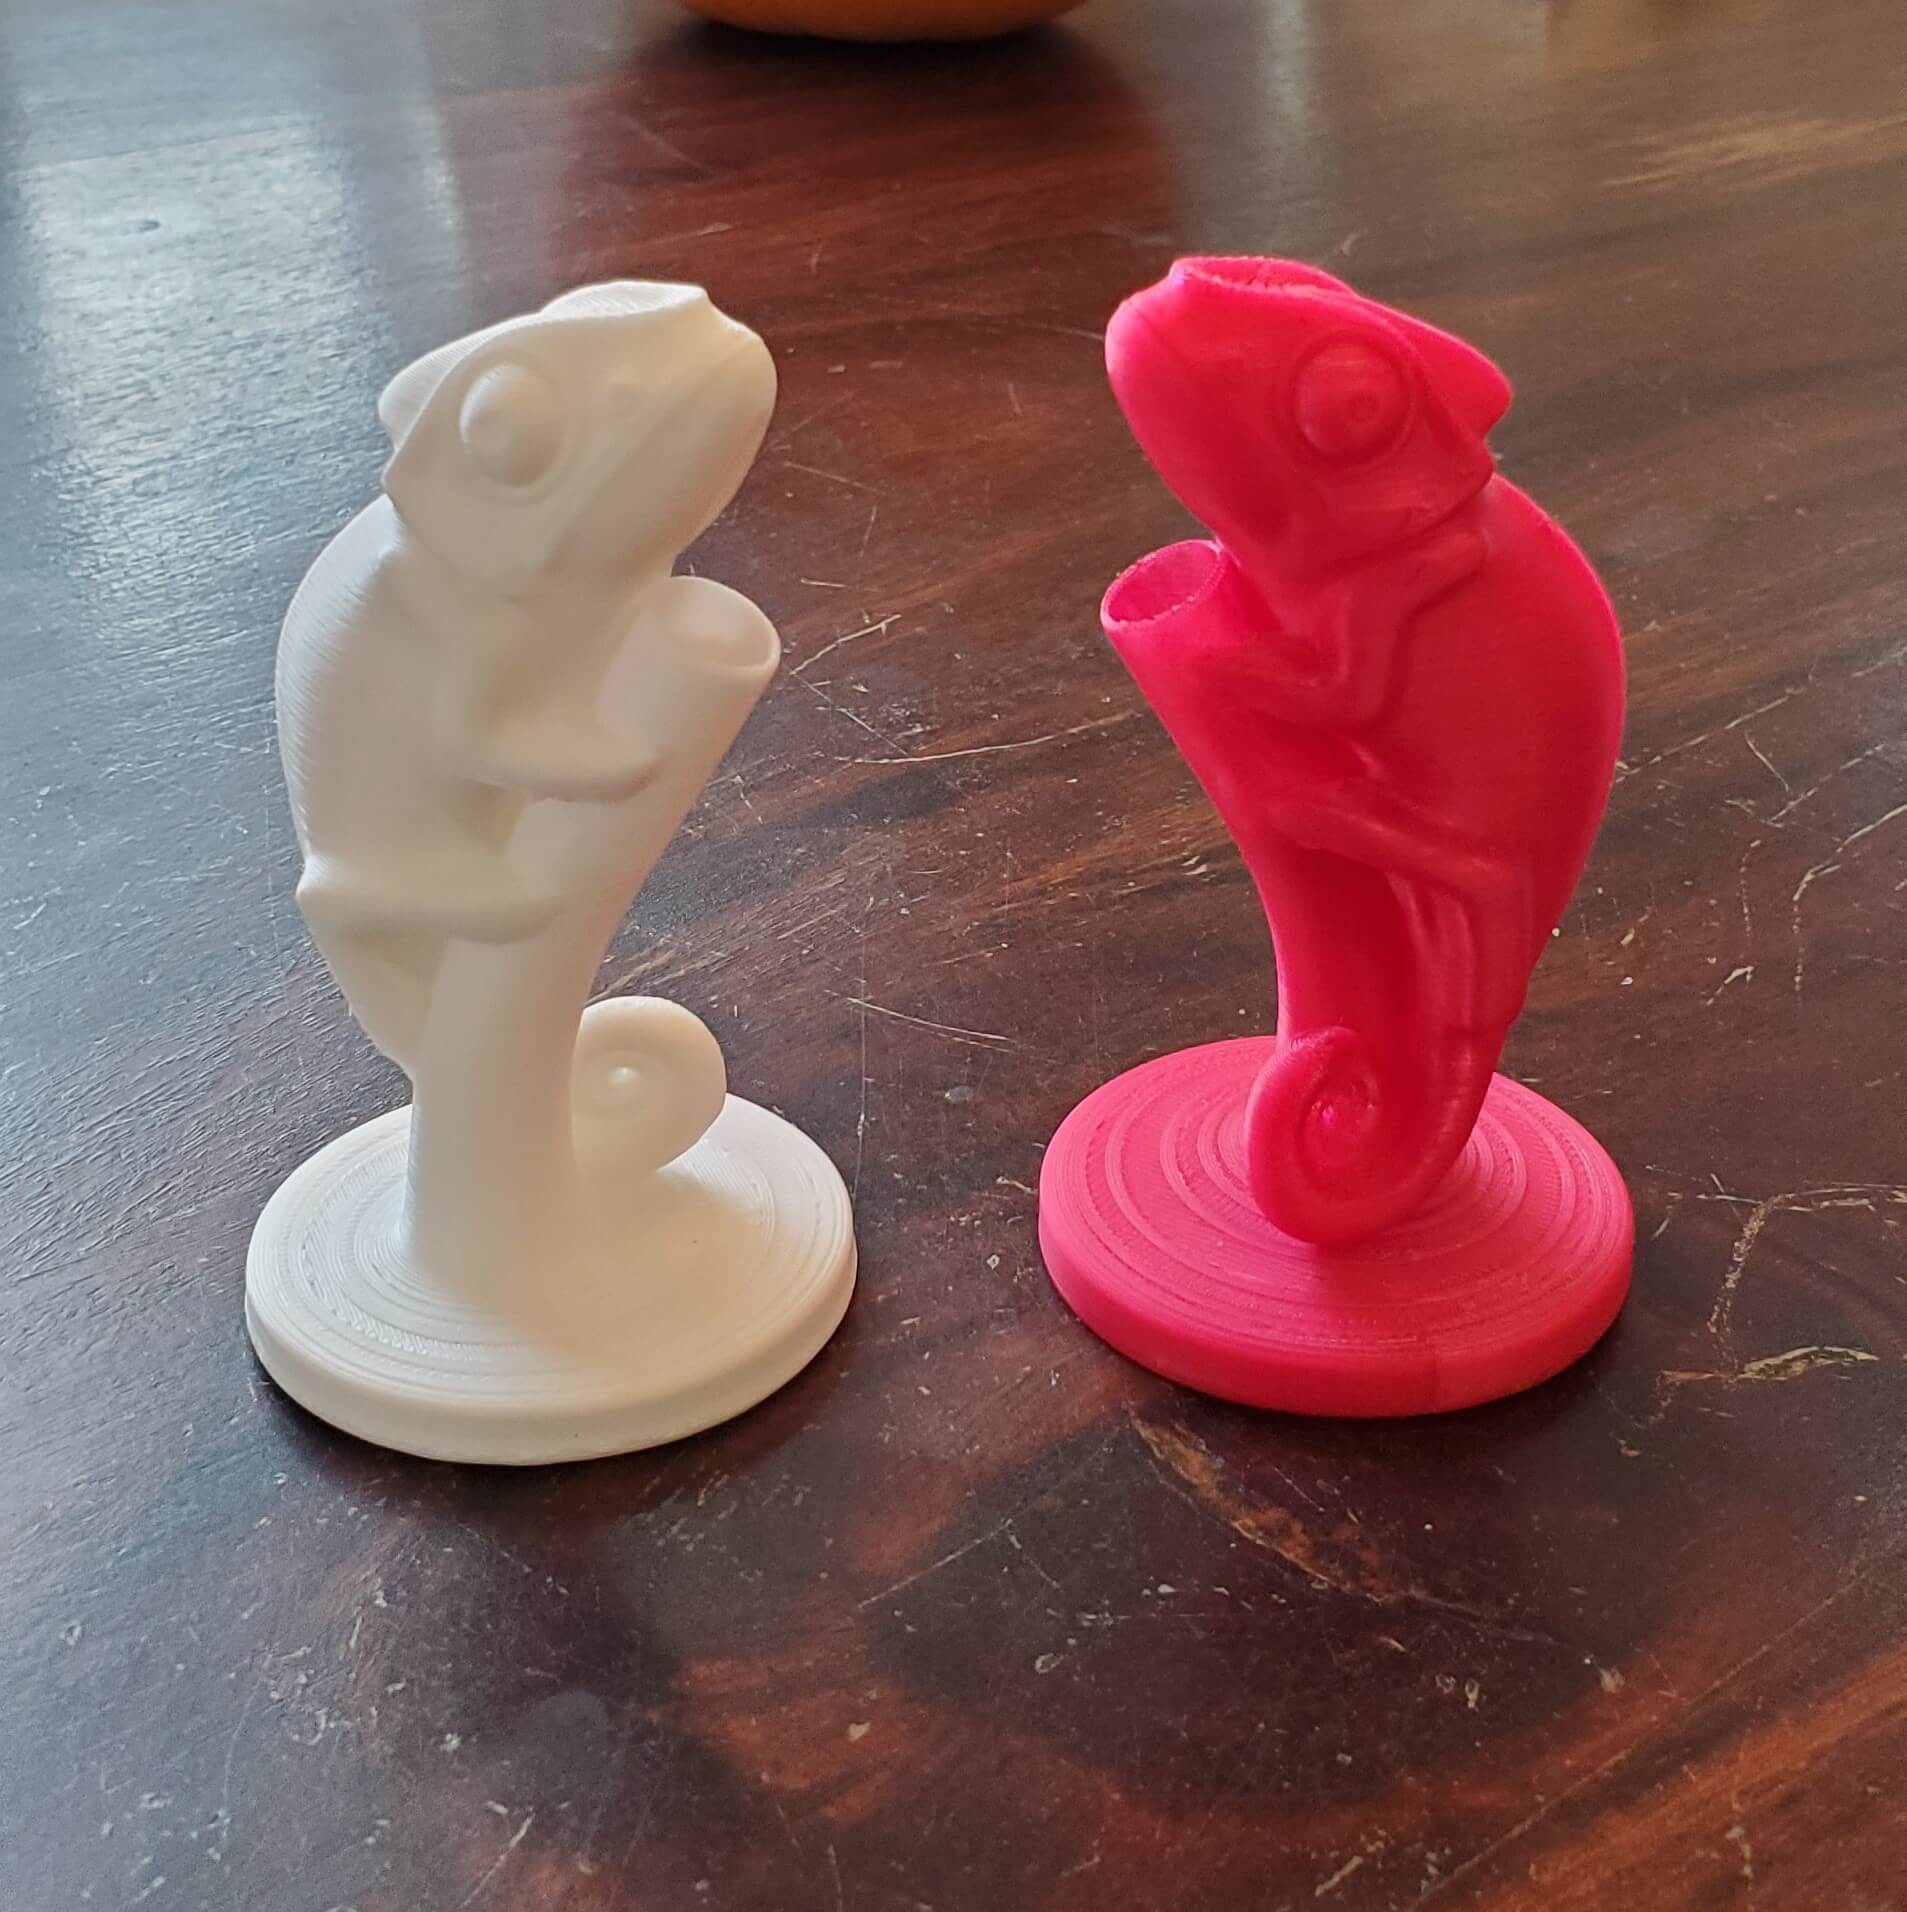

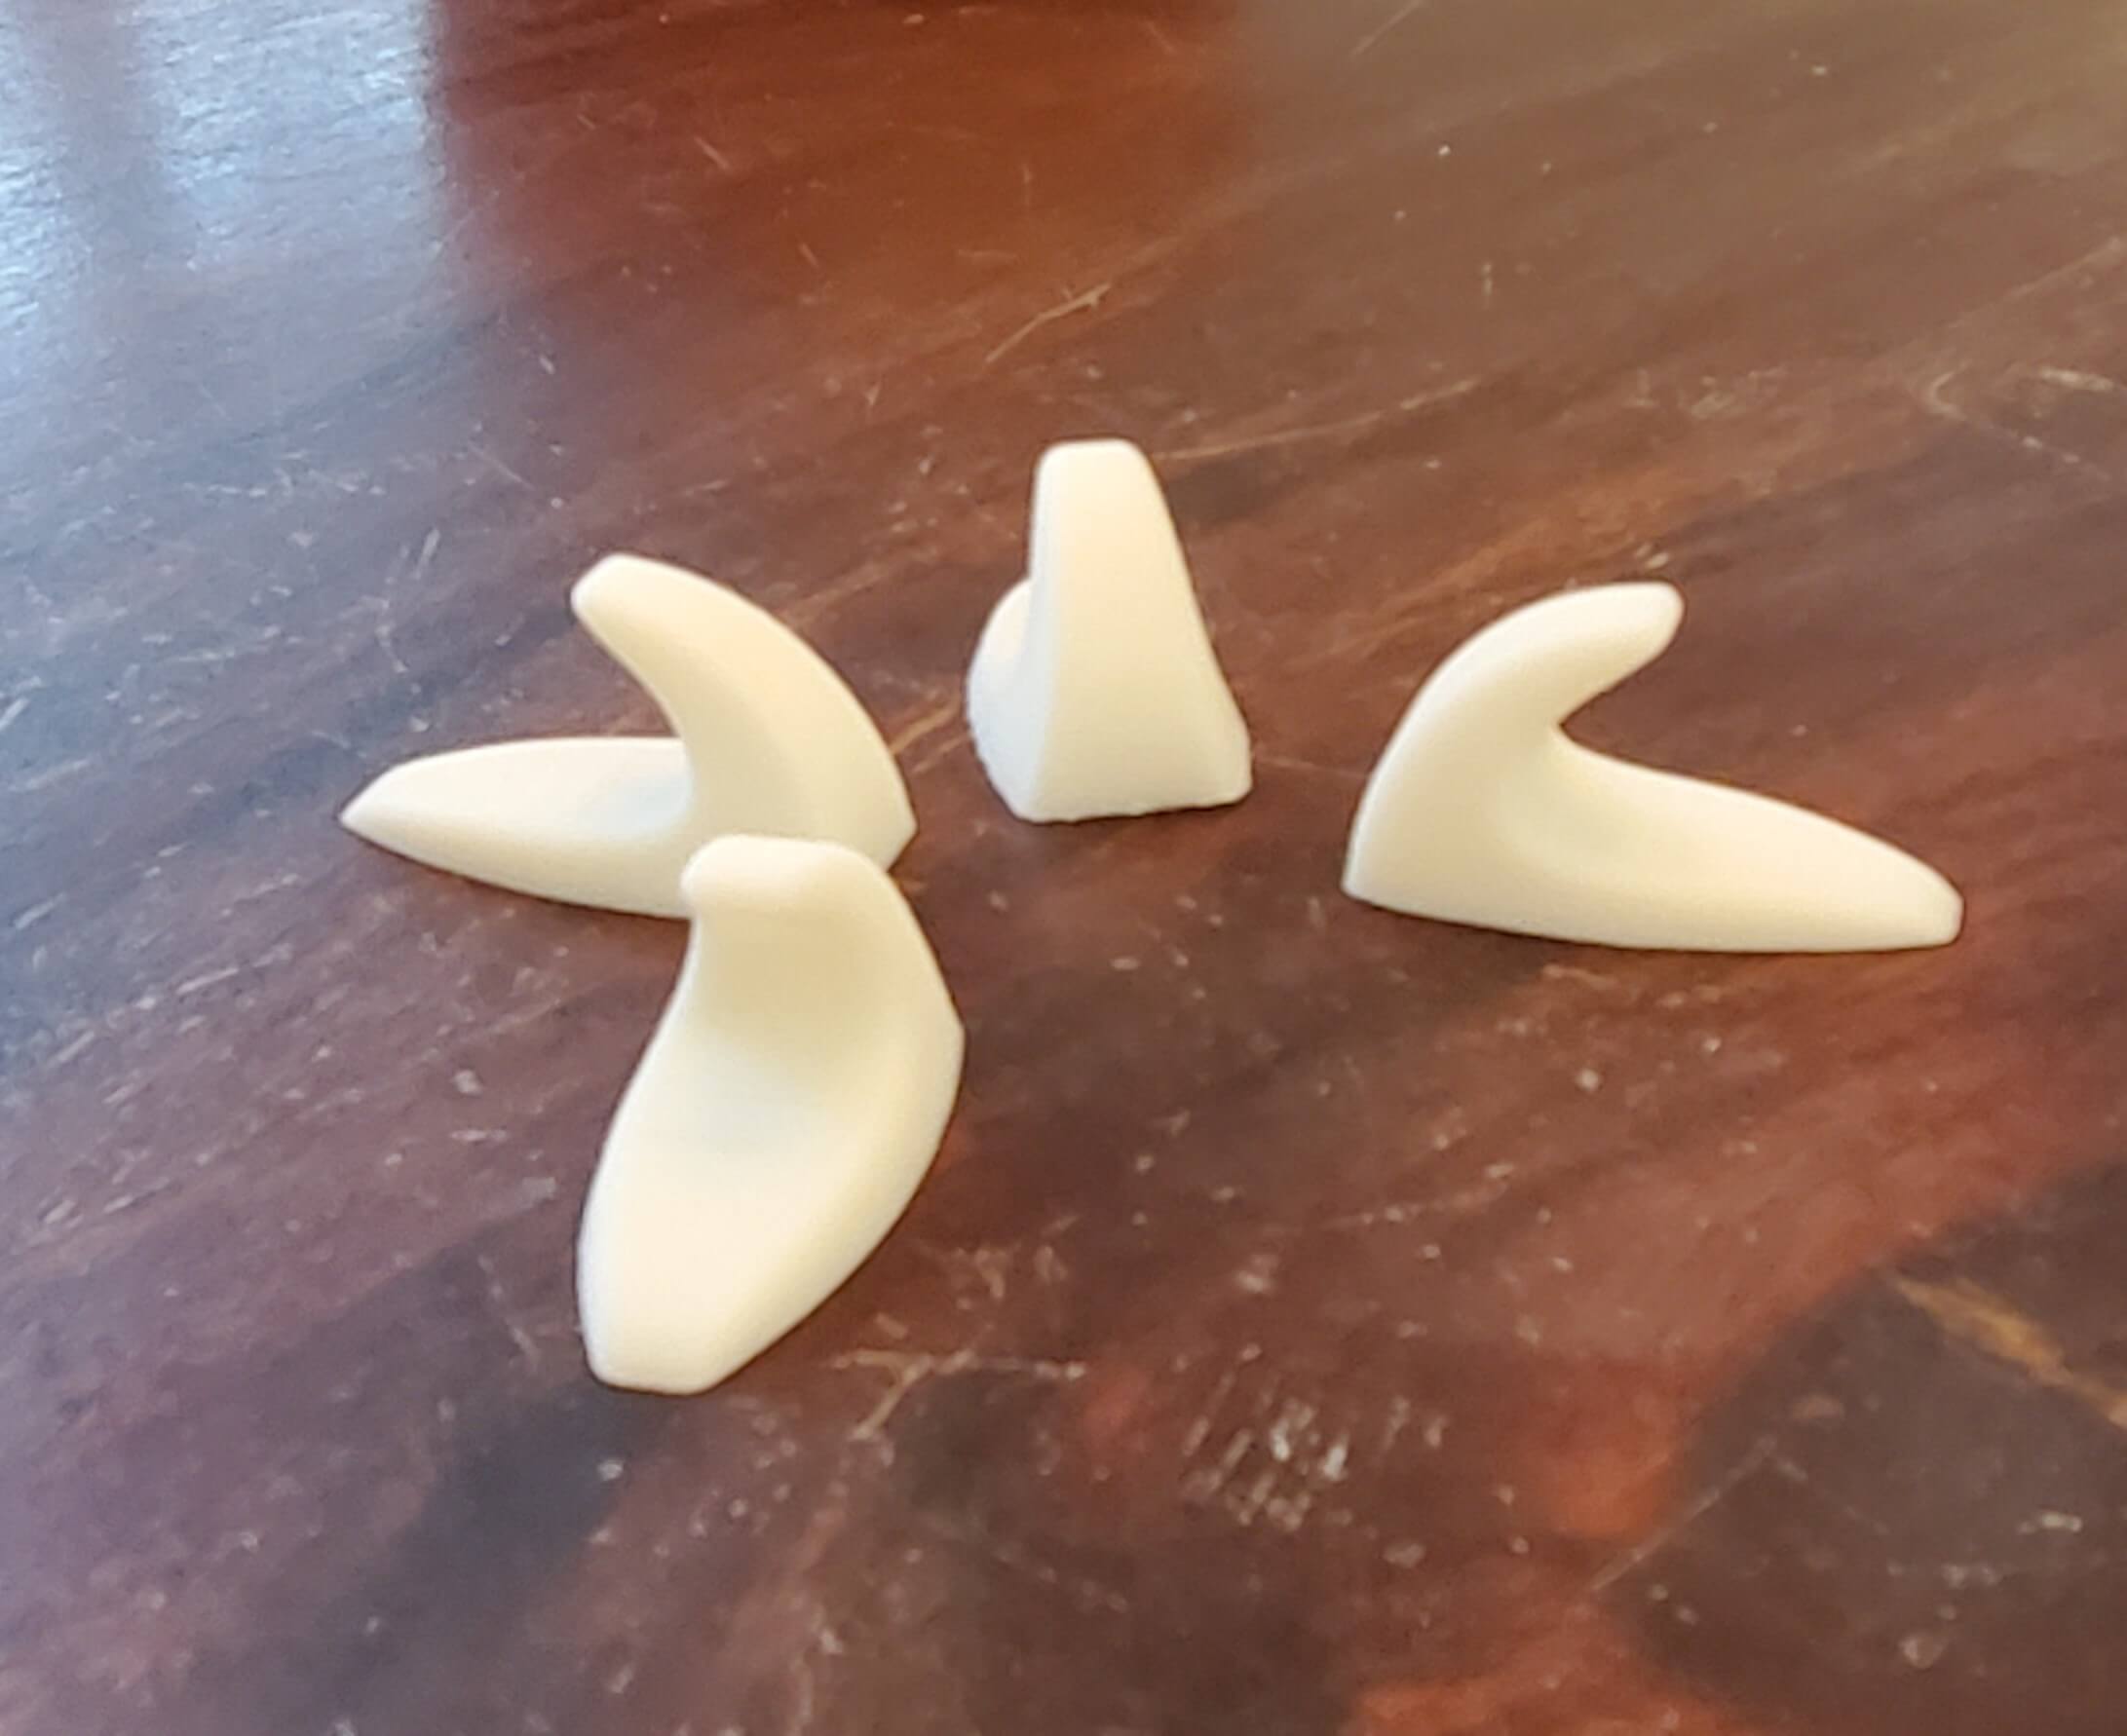
The white is in PLA and the red is PETG, so it’s even more impressive that they were printed simultaneously. There’s no better way to test a prototype in different materials or colors, and obviously it doubles production speed when you get to that point. To test supports, I printed this Ornamental Squirtle since Christmas is right around the corner.


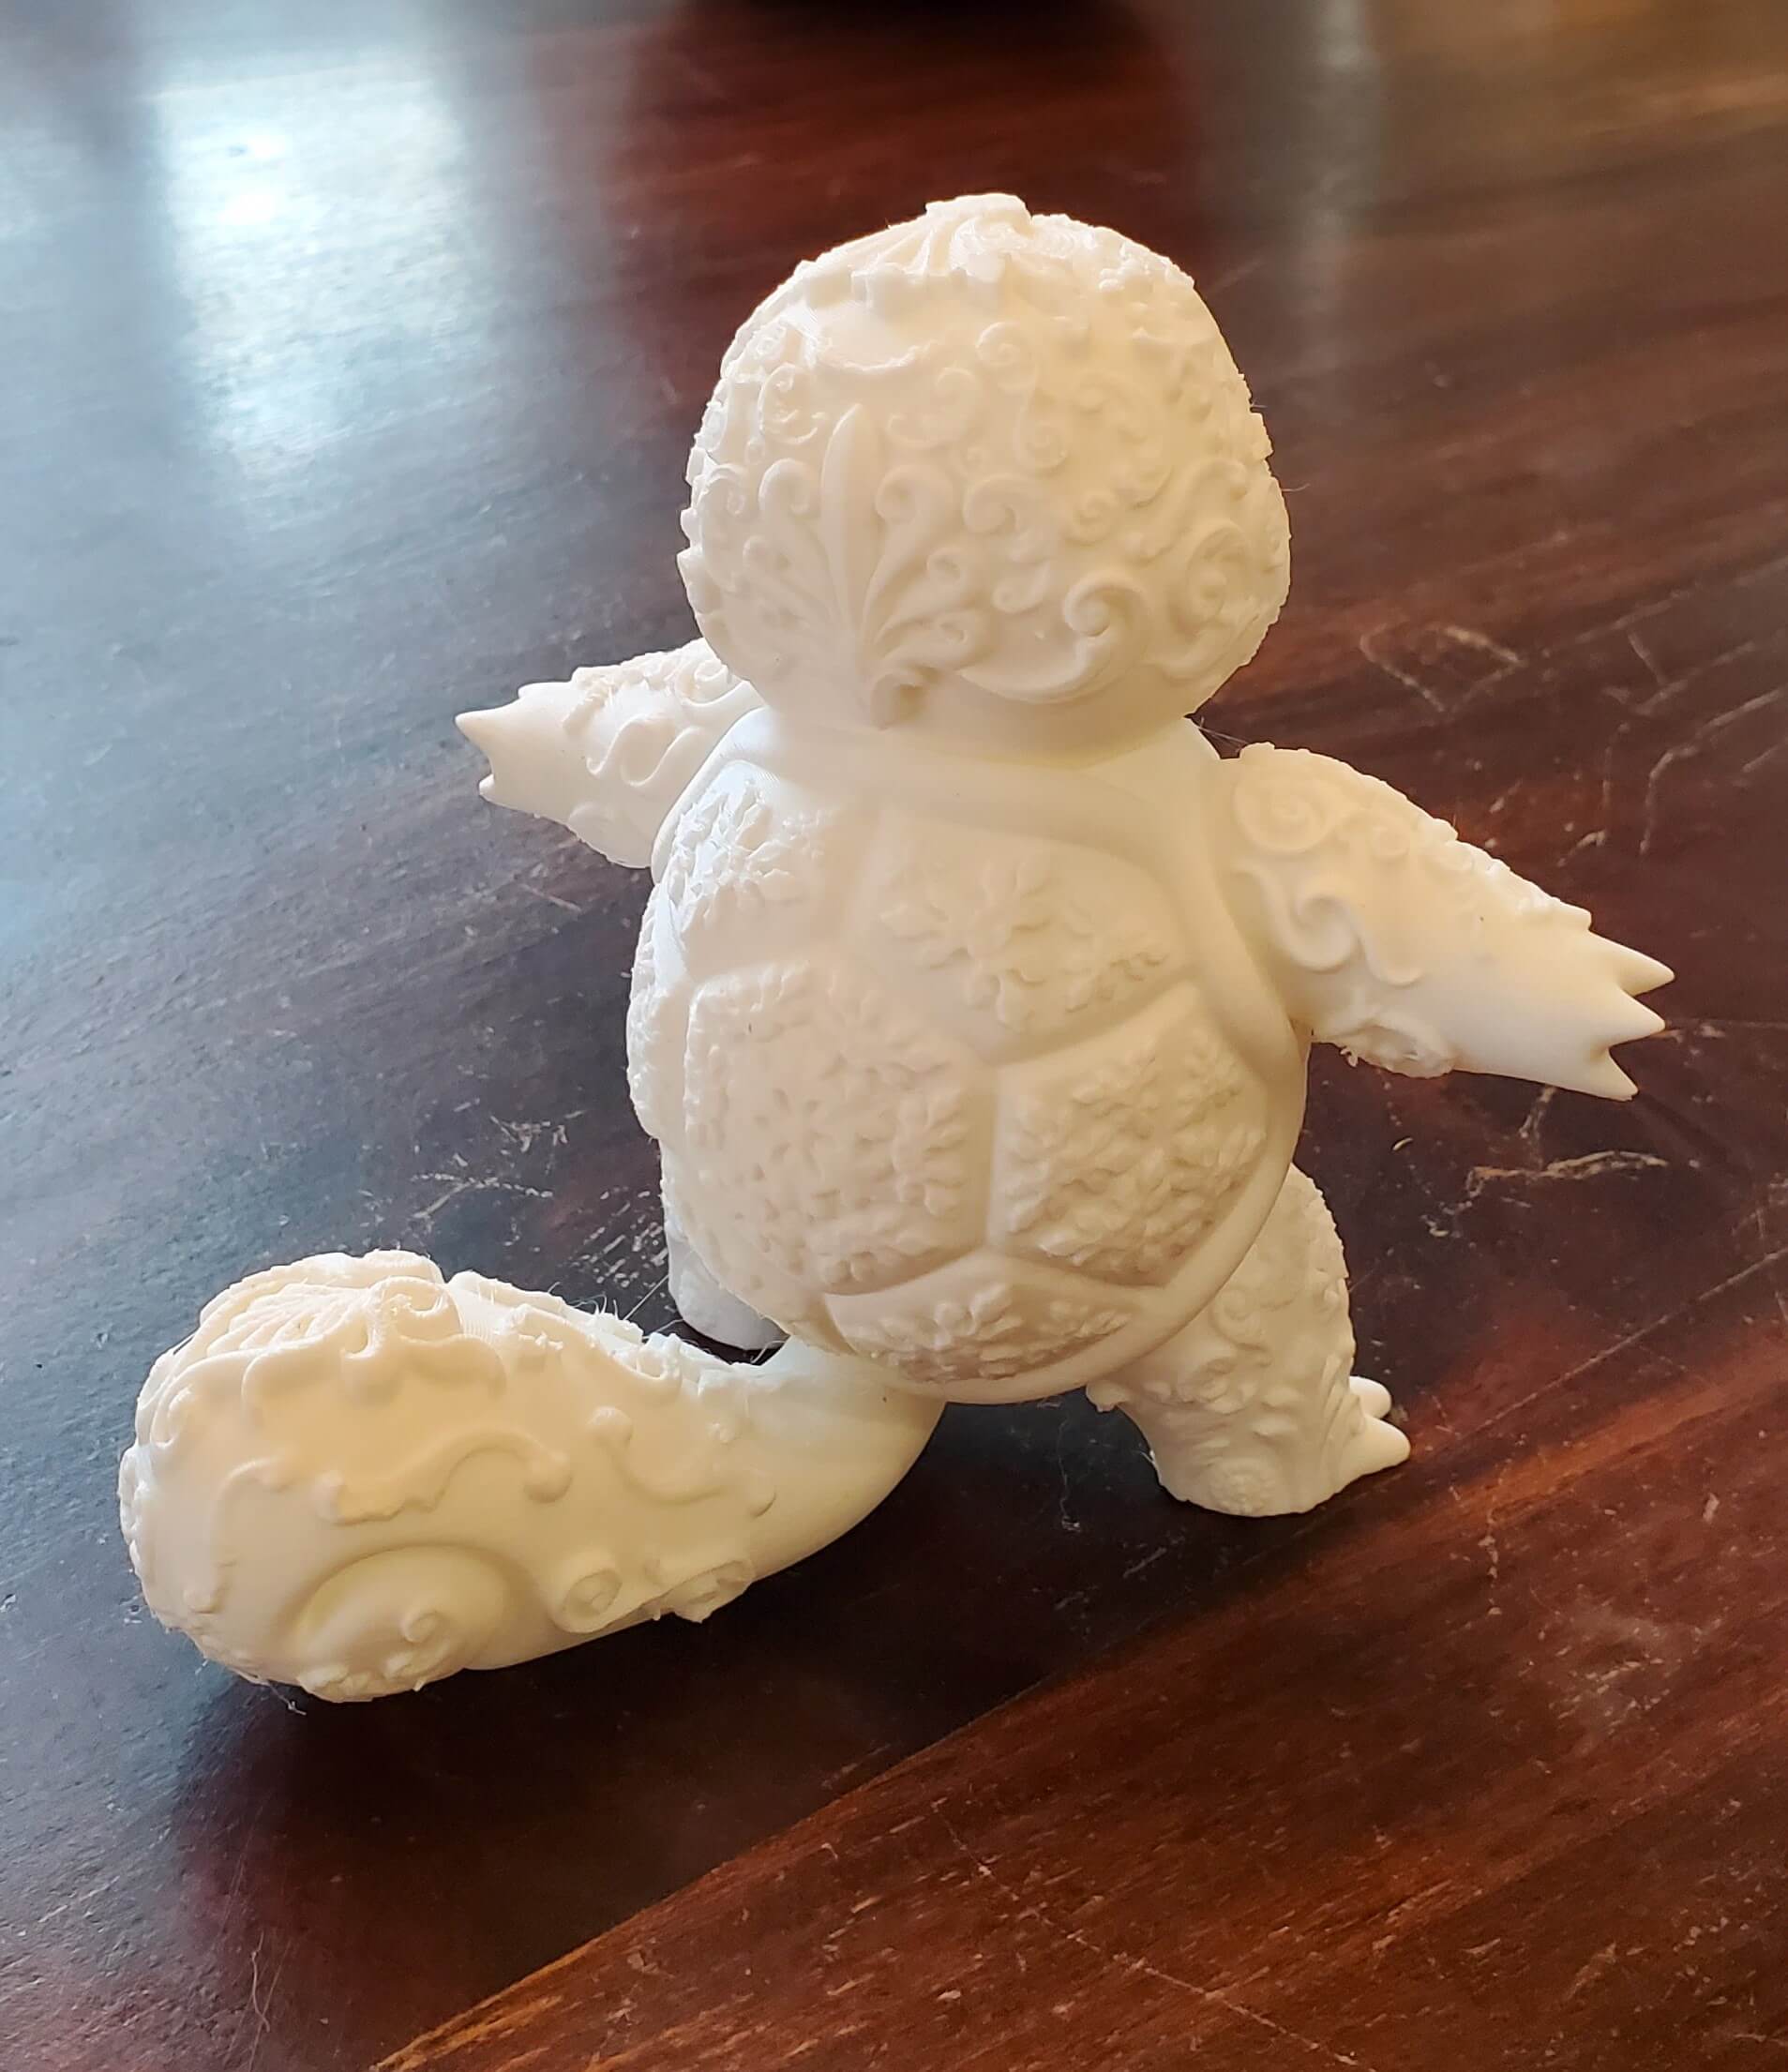

The linear supports did their job and came off mostly cleanly so that’s a win in my book. I tried tree supports as well and they didn’t really work, so that’s something that could use tweaking.
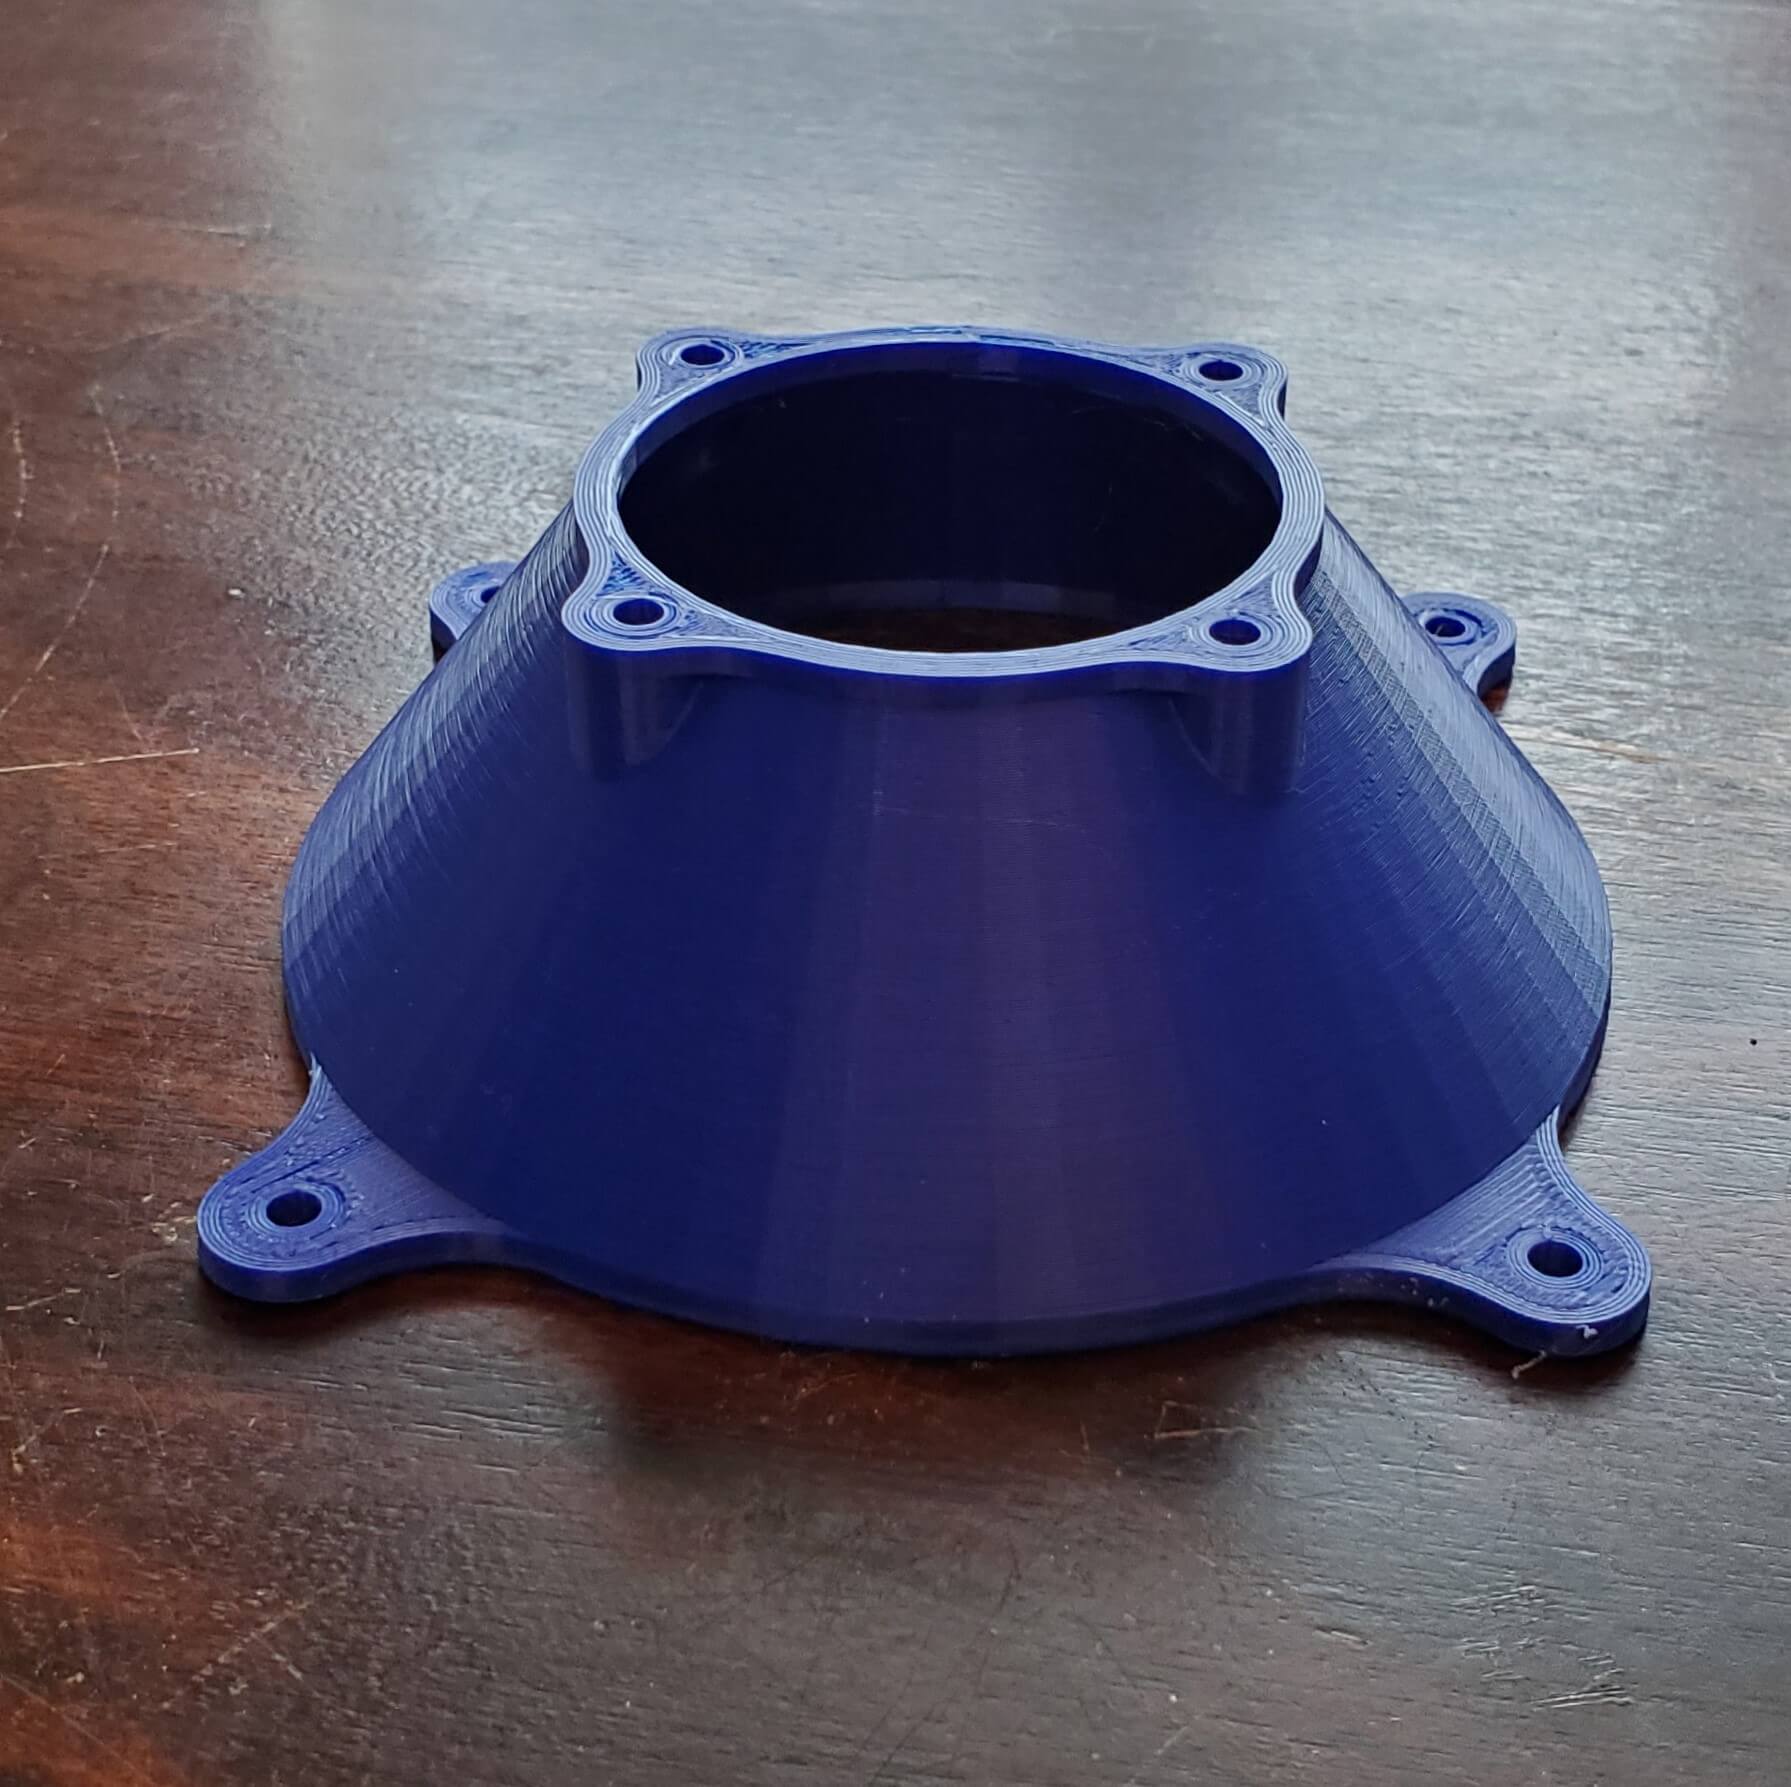
As an industrial 3D printer, the C3 Pro should be able to churn out industrial parts. So I tested a couple. Brackets are a common industrial part, and this reducer would function just fine.

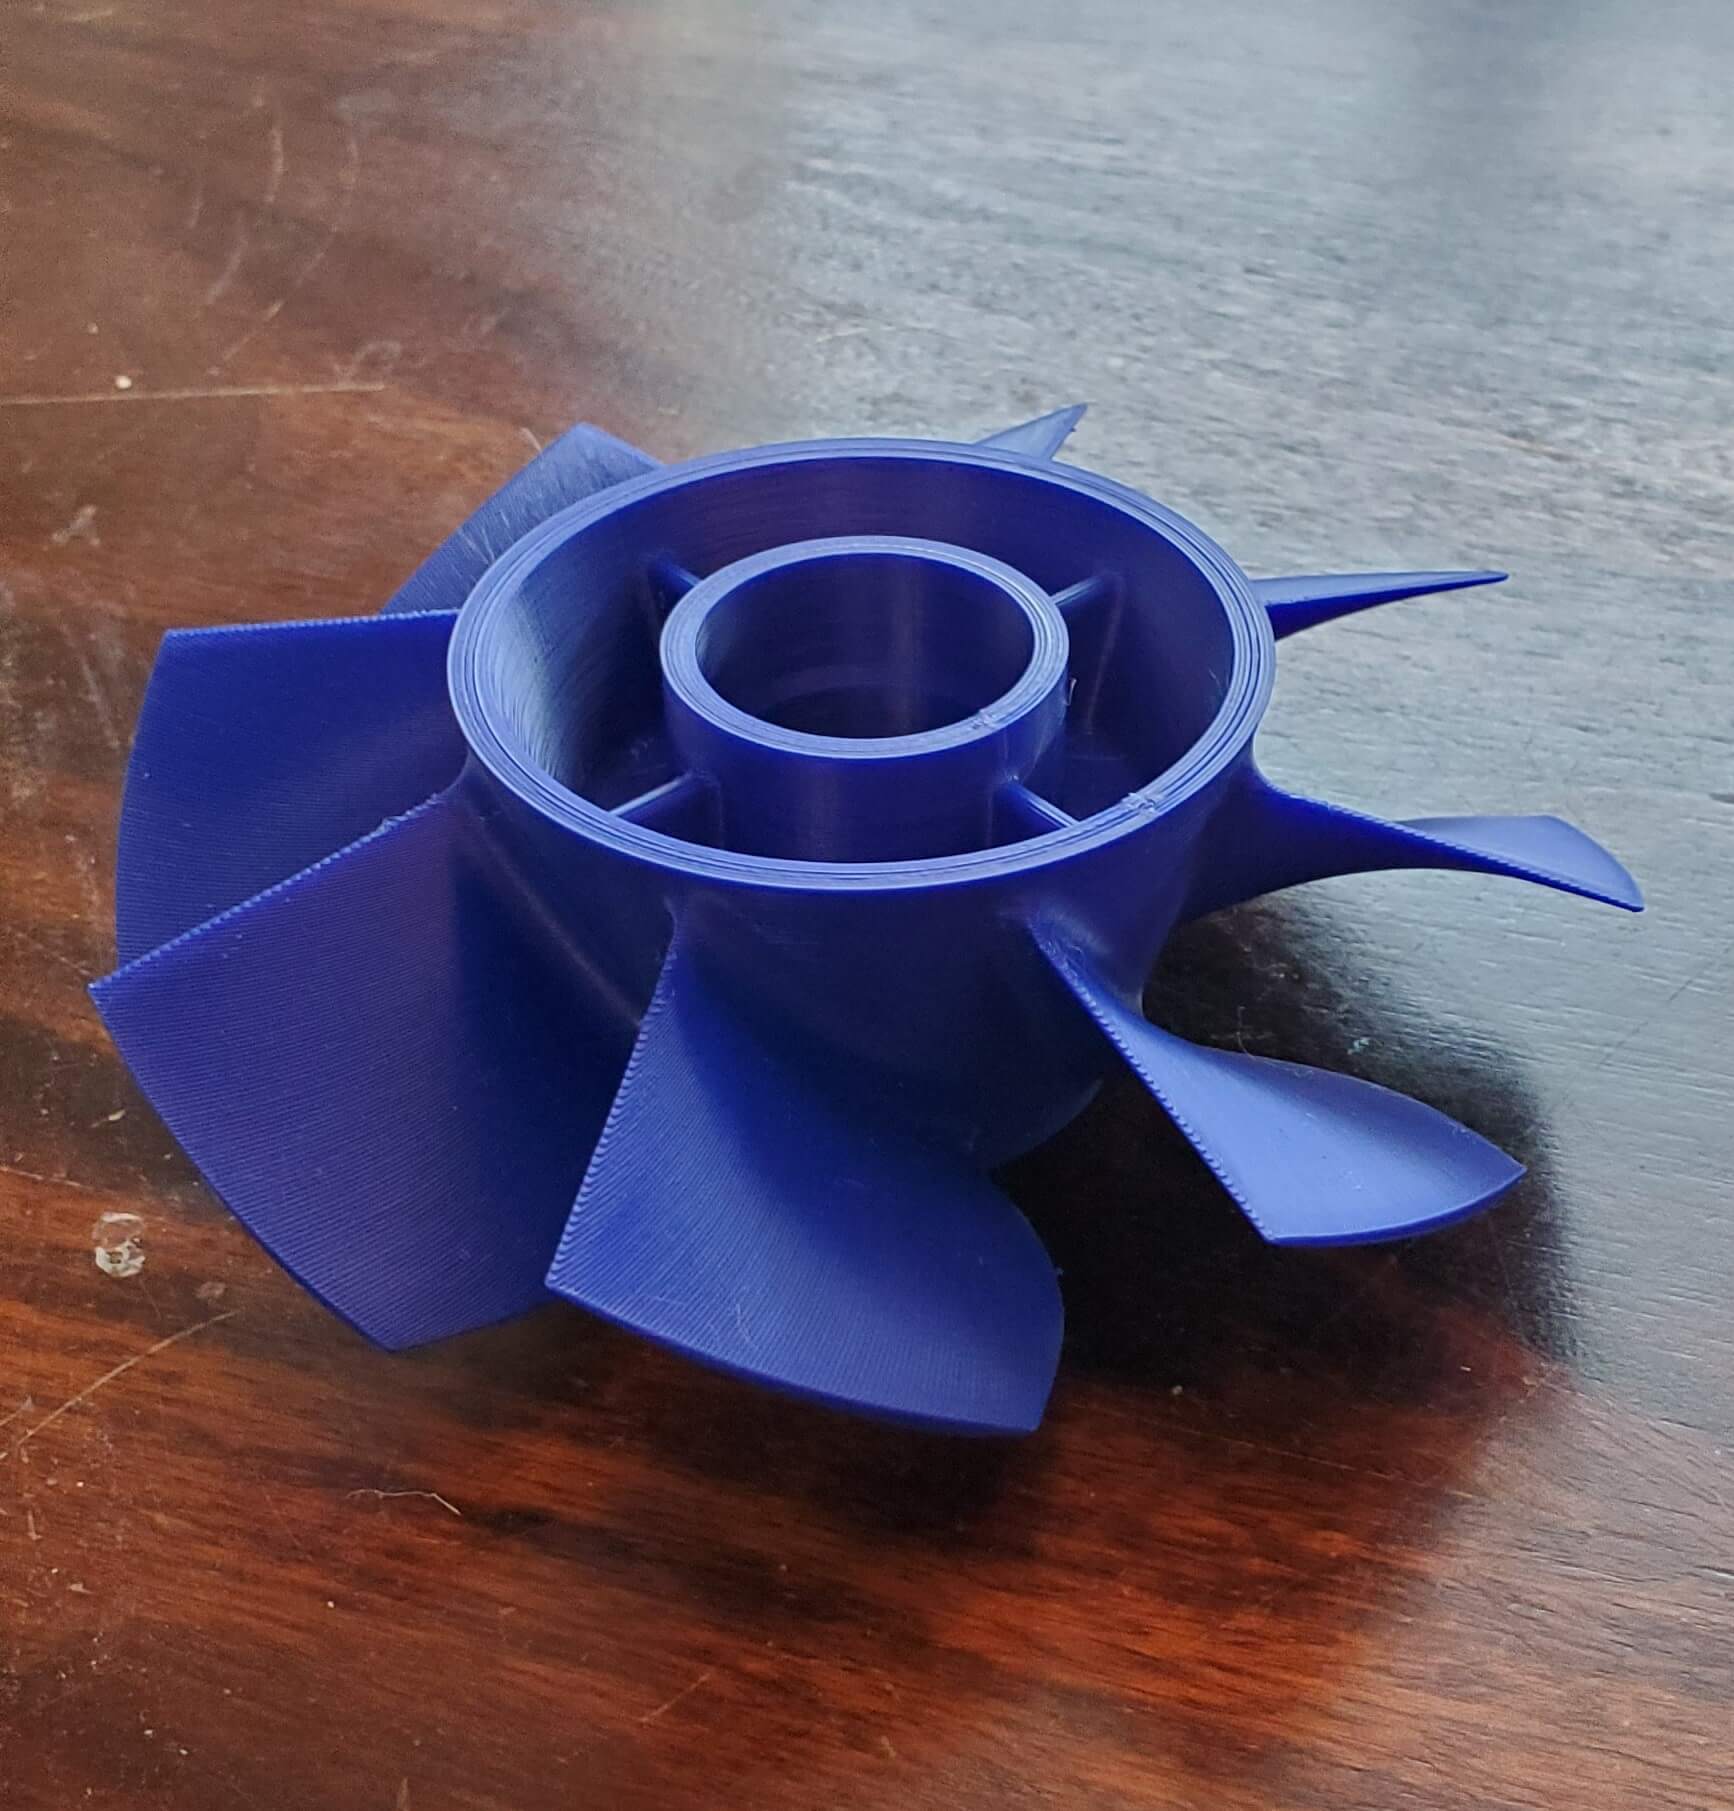
This propeller came out wonderfully, with little effort to remove the supports.
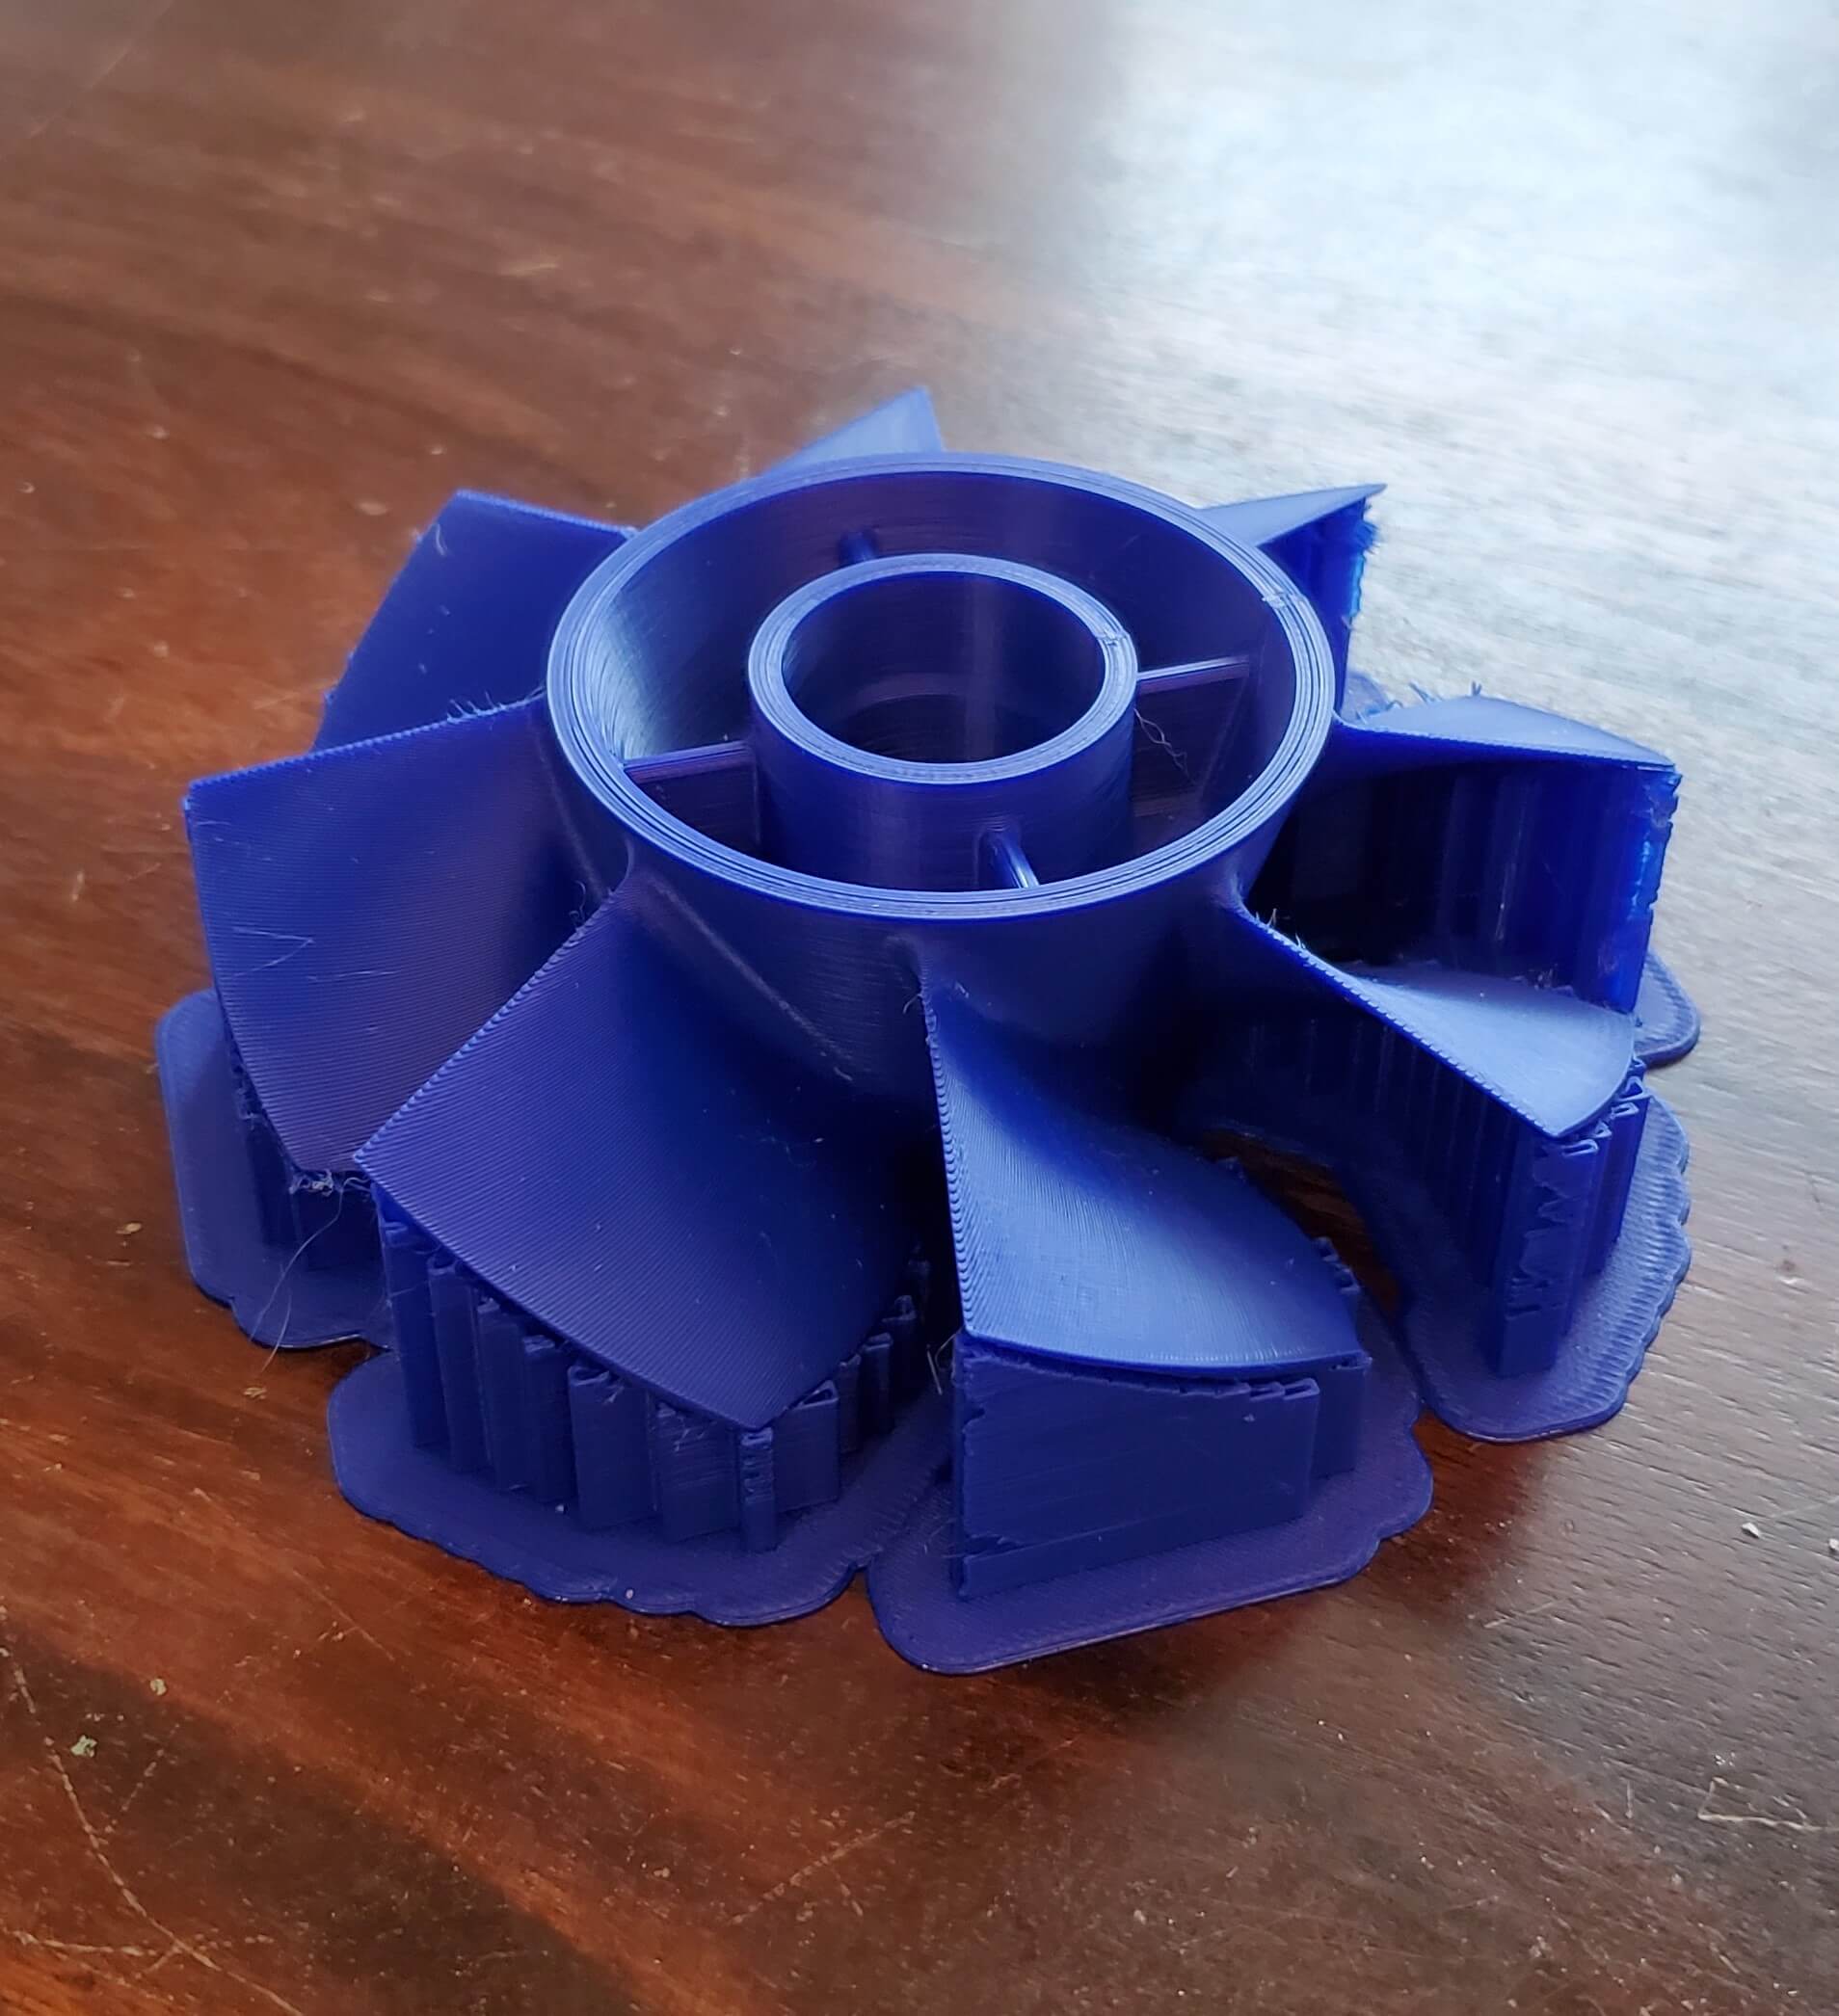


This is a great time to show you the new extruders since maintenance is a big part of industrial machinery operation.
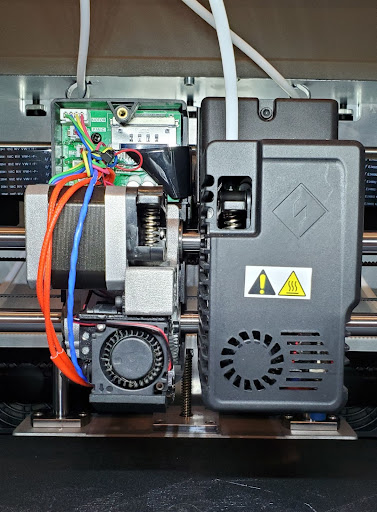

I removed the shroud from the left extruder to reveal how accessible the innards are. Accessing jammed filament is much easier on this model, and the part cooling is superior as well. And the major components can be quickly swapped out with a couple plugs.
And since we have two cats, we can’t have a Christmas tree. At least, not a traditional one. That’s why I printed our Christmas Tree this year!
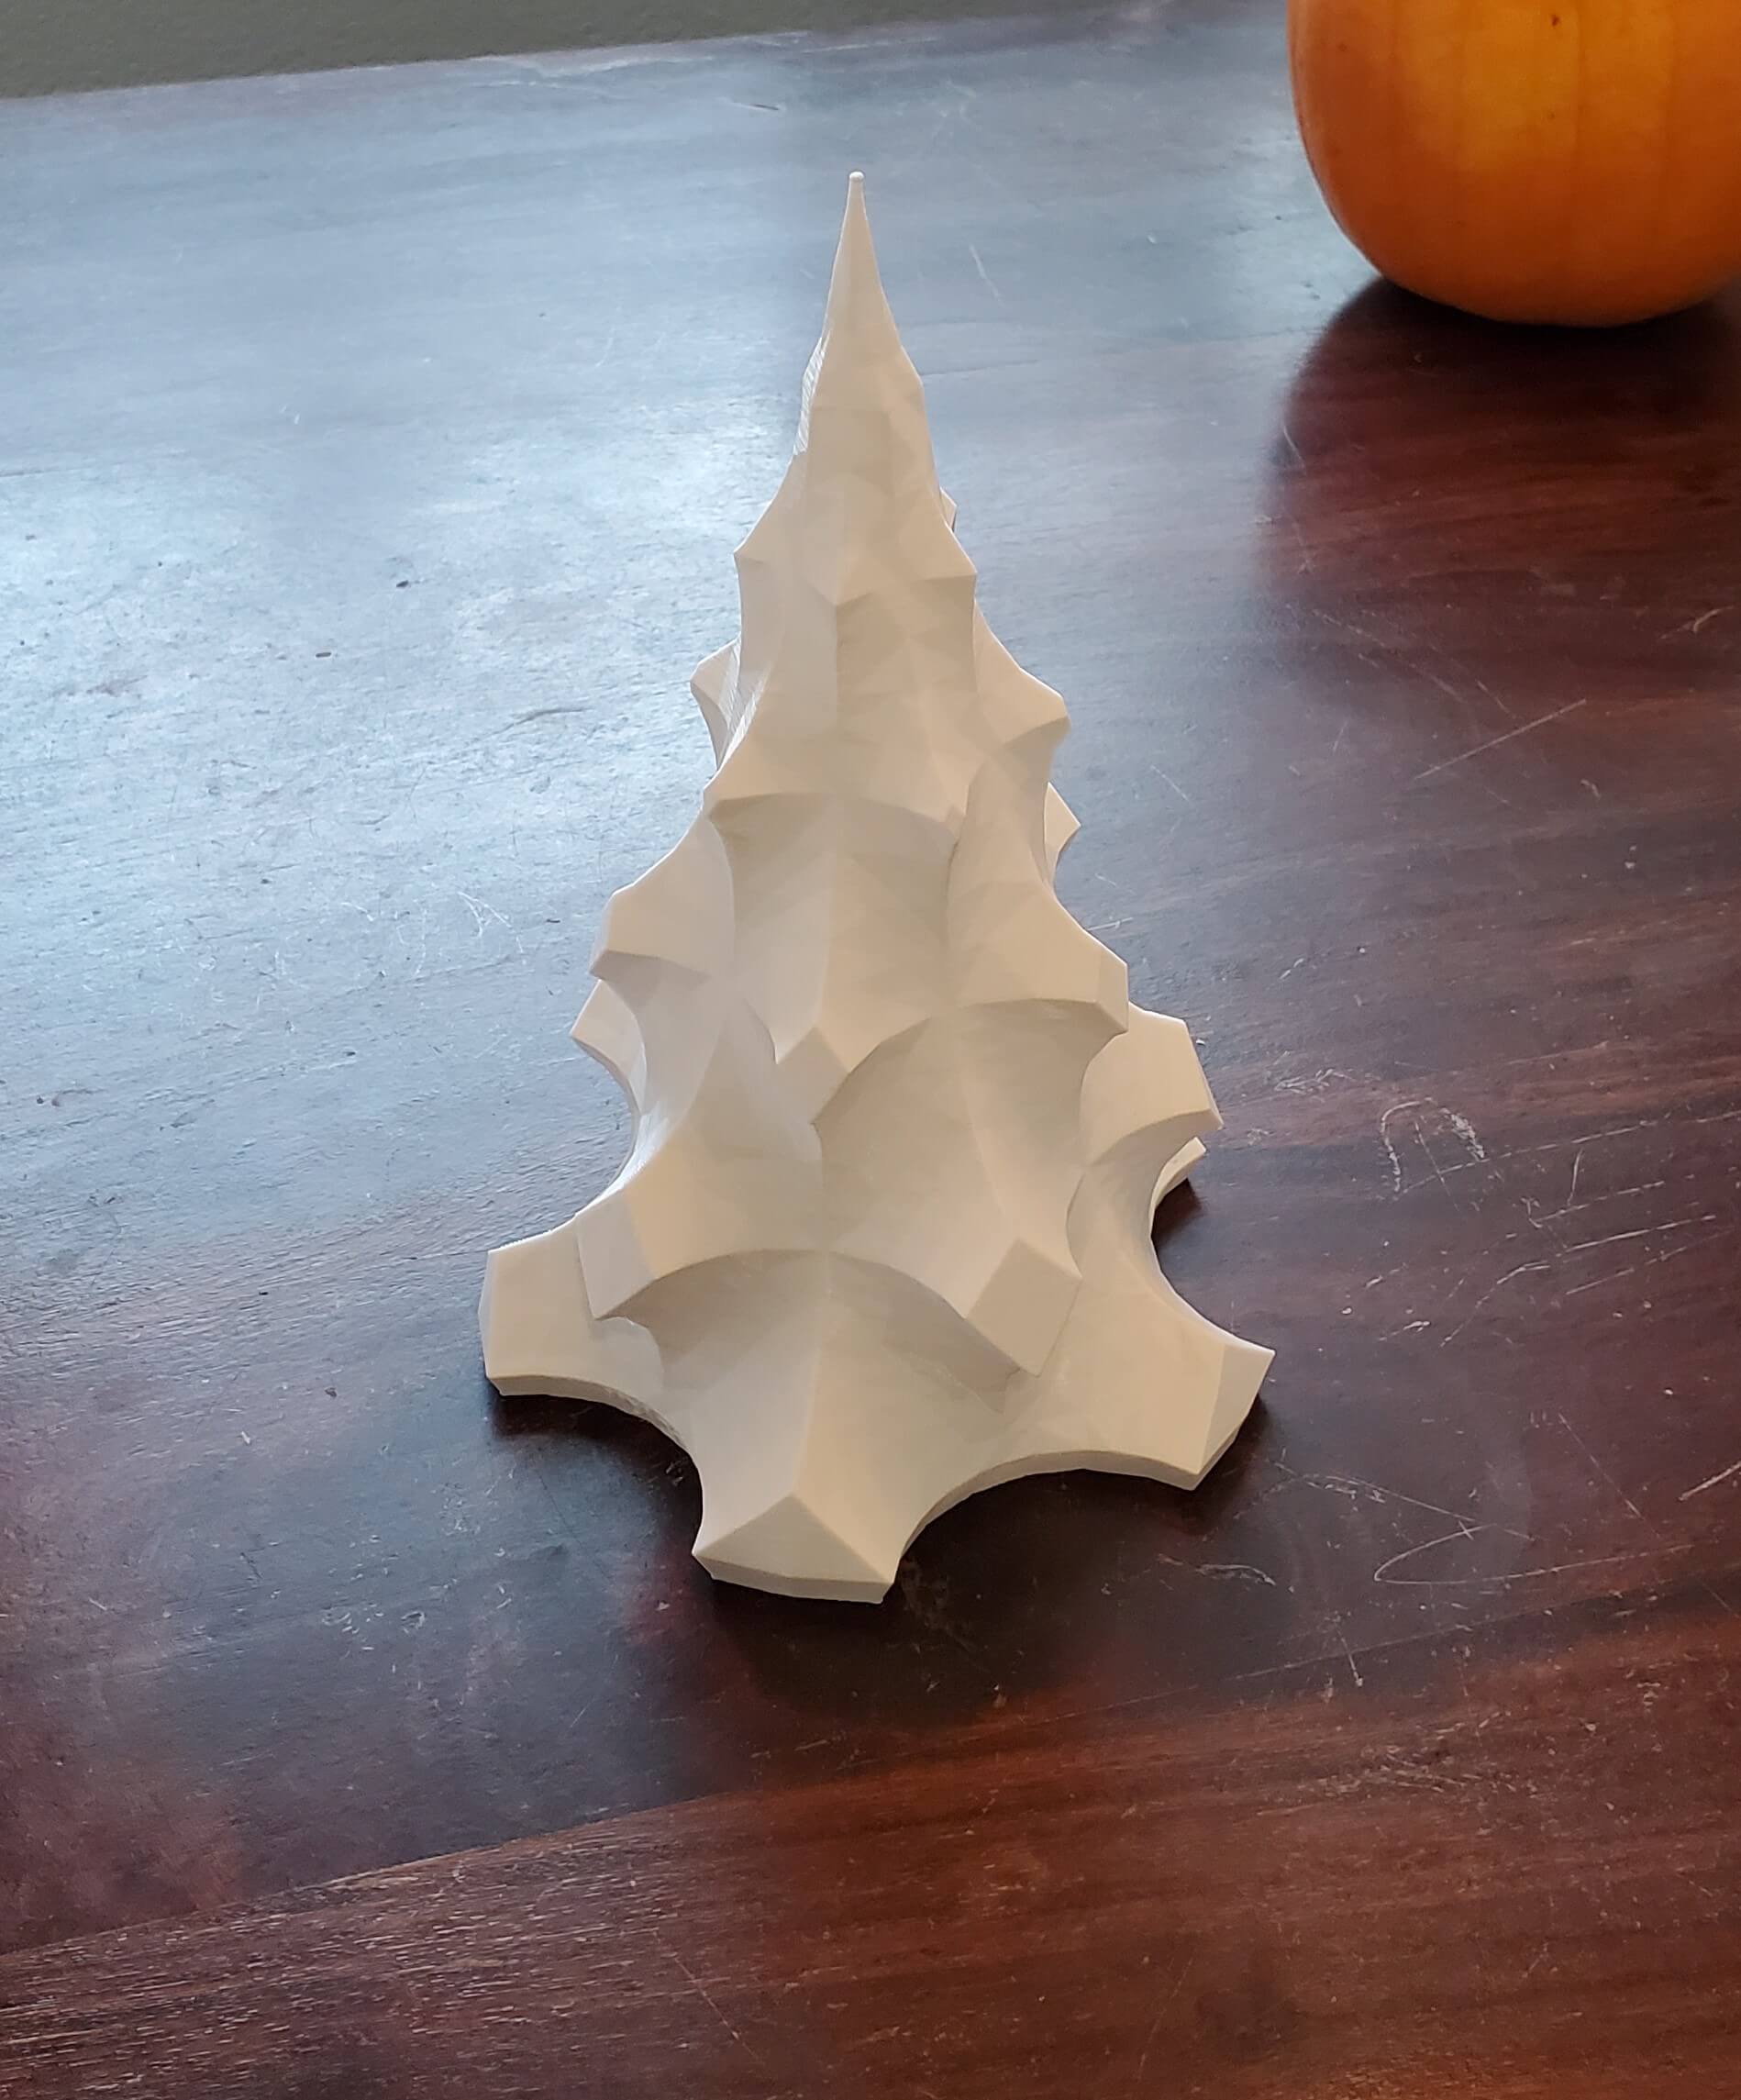

I did this also to print something as tall as the printer could. That’s a relevant test, right? When I put a light under it, it will look much more festive.
Since this printer is so new, the slice profiles are still being developed for more materials. As of now, there are only profiles for PLA, PETG, PC, and ABS. I don’t have any PC but I did test ABS to print these Coat Hangers.

They came out great and should work well on the outside of my house to train some ivy growth.
No 3D printer review is complete without a high-quality print test. The T-800 Endoskull from one of my favorite movies was up to the task.
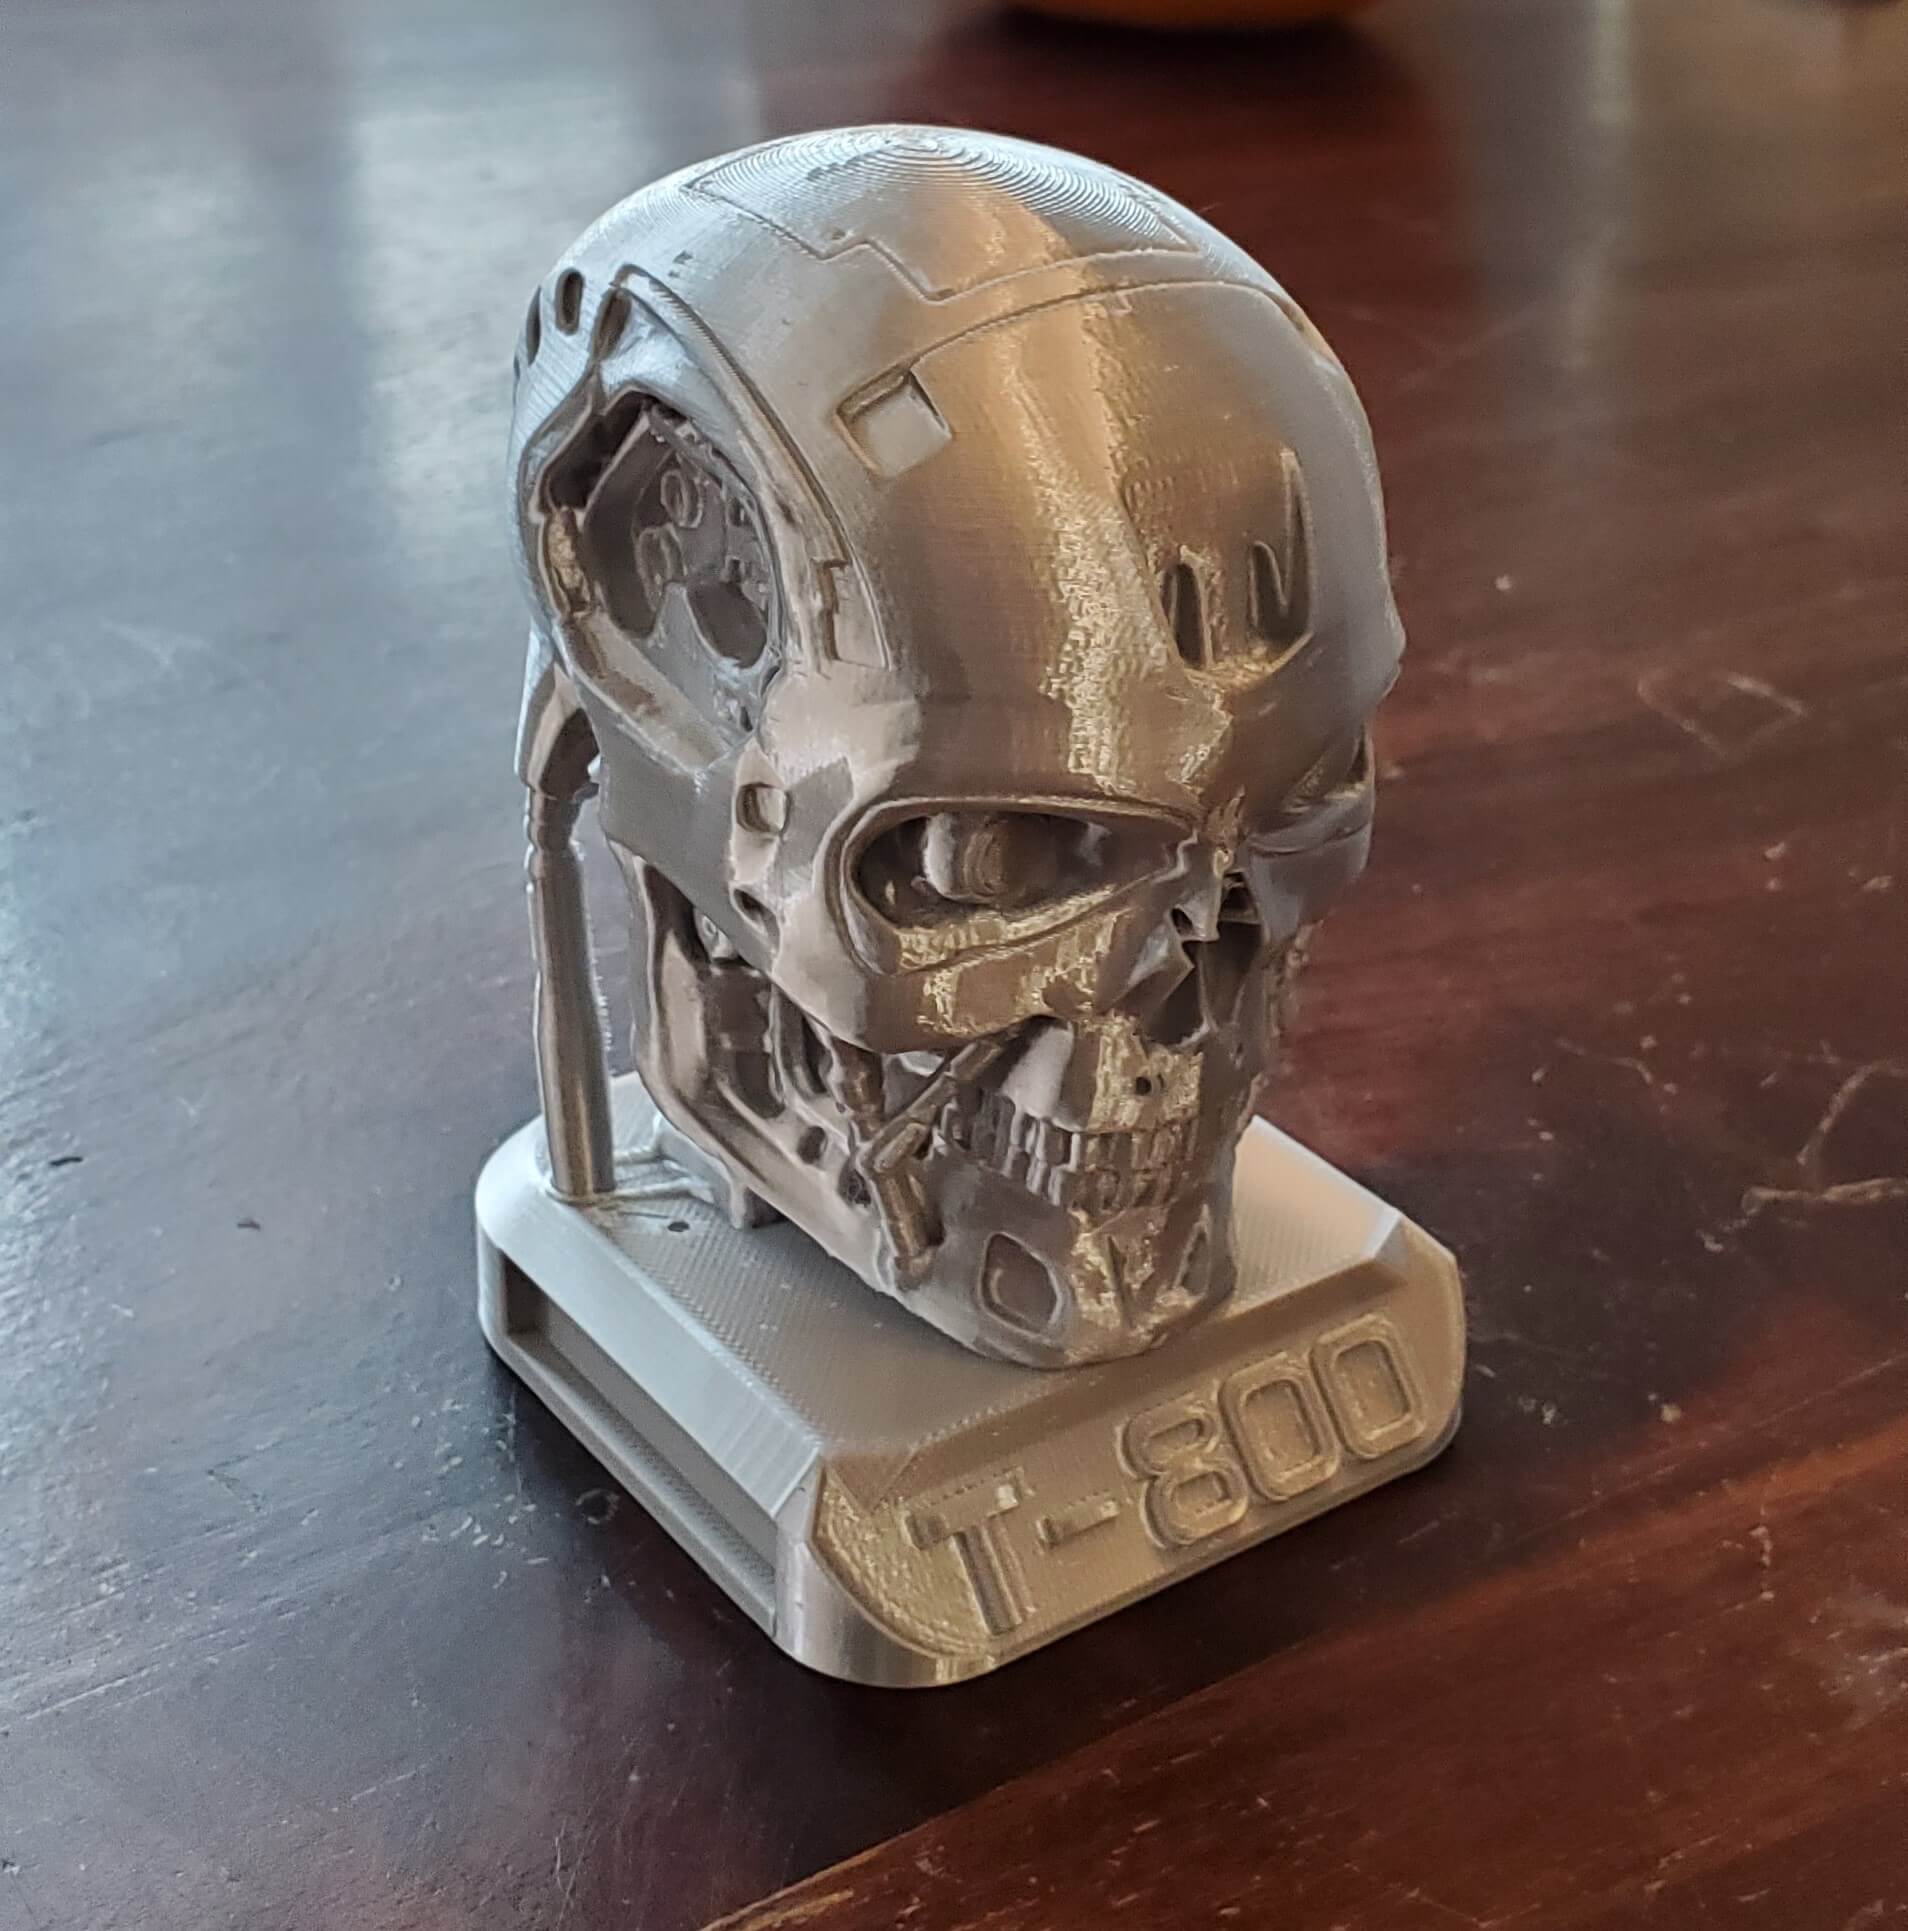

It’s exquisite. Silk silver PLA is definitely the ideal material for this model. And this was printed with 0.12mm layers, so it can do even better than this. Additionally, I decided to print this one with a raft and was blown away by the results: the raft peeled off easily and the bottom of the print is completely smooth. There’s no texture whatsoever, something I’ve never seen with a raft before. I guess I’m a raft convert.
Conclusion
So did Flashforge really upgrade the Creator 3 with this Pro model? Well, this is my new favorite printer if that tells you anything. They fixed everything that really bothered me: the camera works through FlashPrint, rafts aren’t necessary, and users have more control over the fans, which dictate how loud the machine is. Additionally, the heated bed only takes 5 minutes to heat up to 100°C. It printed everything correctly on the first try, even dual-color prints. I know that it can handle more materials than I tested but I wanted to stick to the official profiles; I even ran a bit of nylon through it and it extruded fine. Everything good about the C3 is in the C3 Pro plus some improvements. One of those improvements thankfully didn’t appear in this review, but the extruders were replaced with more serviceable versions. Meaning, when a clog happens – not if, but when – the extruders are easier to take apart and fix. That’s an important consideration for a professional piece of equipment where downtime is money. Since I have other Flashforge printers, I was also able to use the multi-machine control tools that make cloud printing and print farm management a breeze; a single click can send print commands to multiple printers. At times, I feel like I’m in a sci-fi movie, clicking a button and then hearing machines whir into life, doing my bidding.