While our review of the Flashforge Guider 2S is still fresh in your mind, we’ve got back to work and put its big brother, the Creator 3, to the test. Both of these printers are targeted to professional and industrial users by featuring sturdy frames, enclosed build chambers, and the ability to print a wide range of functional materials with a hotend that goes up to 300°C, but what distinguishes the Creator 3 is its IDEX system, which stands for independent dual extruder.
On most dual-extruder 3D printers, the two extruders are mounted right next to each other on the same X and Y bars. Where one extruder goes, so goes the other. On the Creator 3, the extruders share a Y bar but they each have their own X bar so they can move left and right independently. Such a configuration enables some nice functionality gains, like mirror printing and duplicate printing. Those are just two of the things I test in this review, so let’s start at the beginning.
Setup
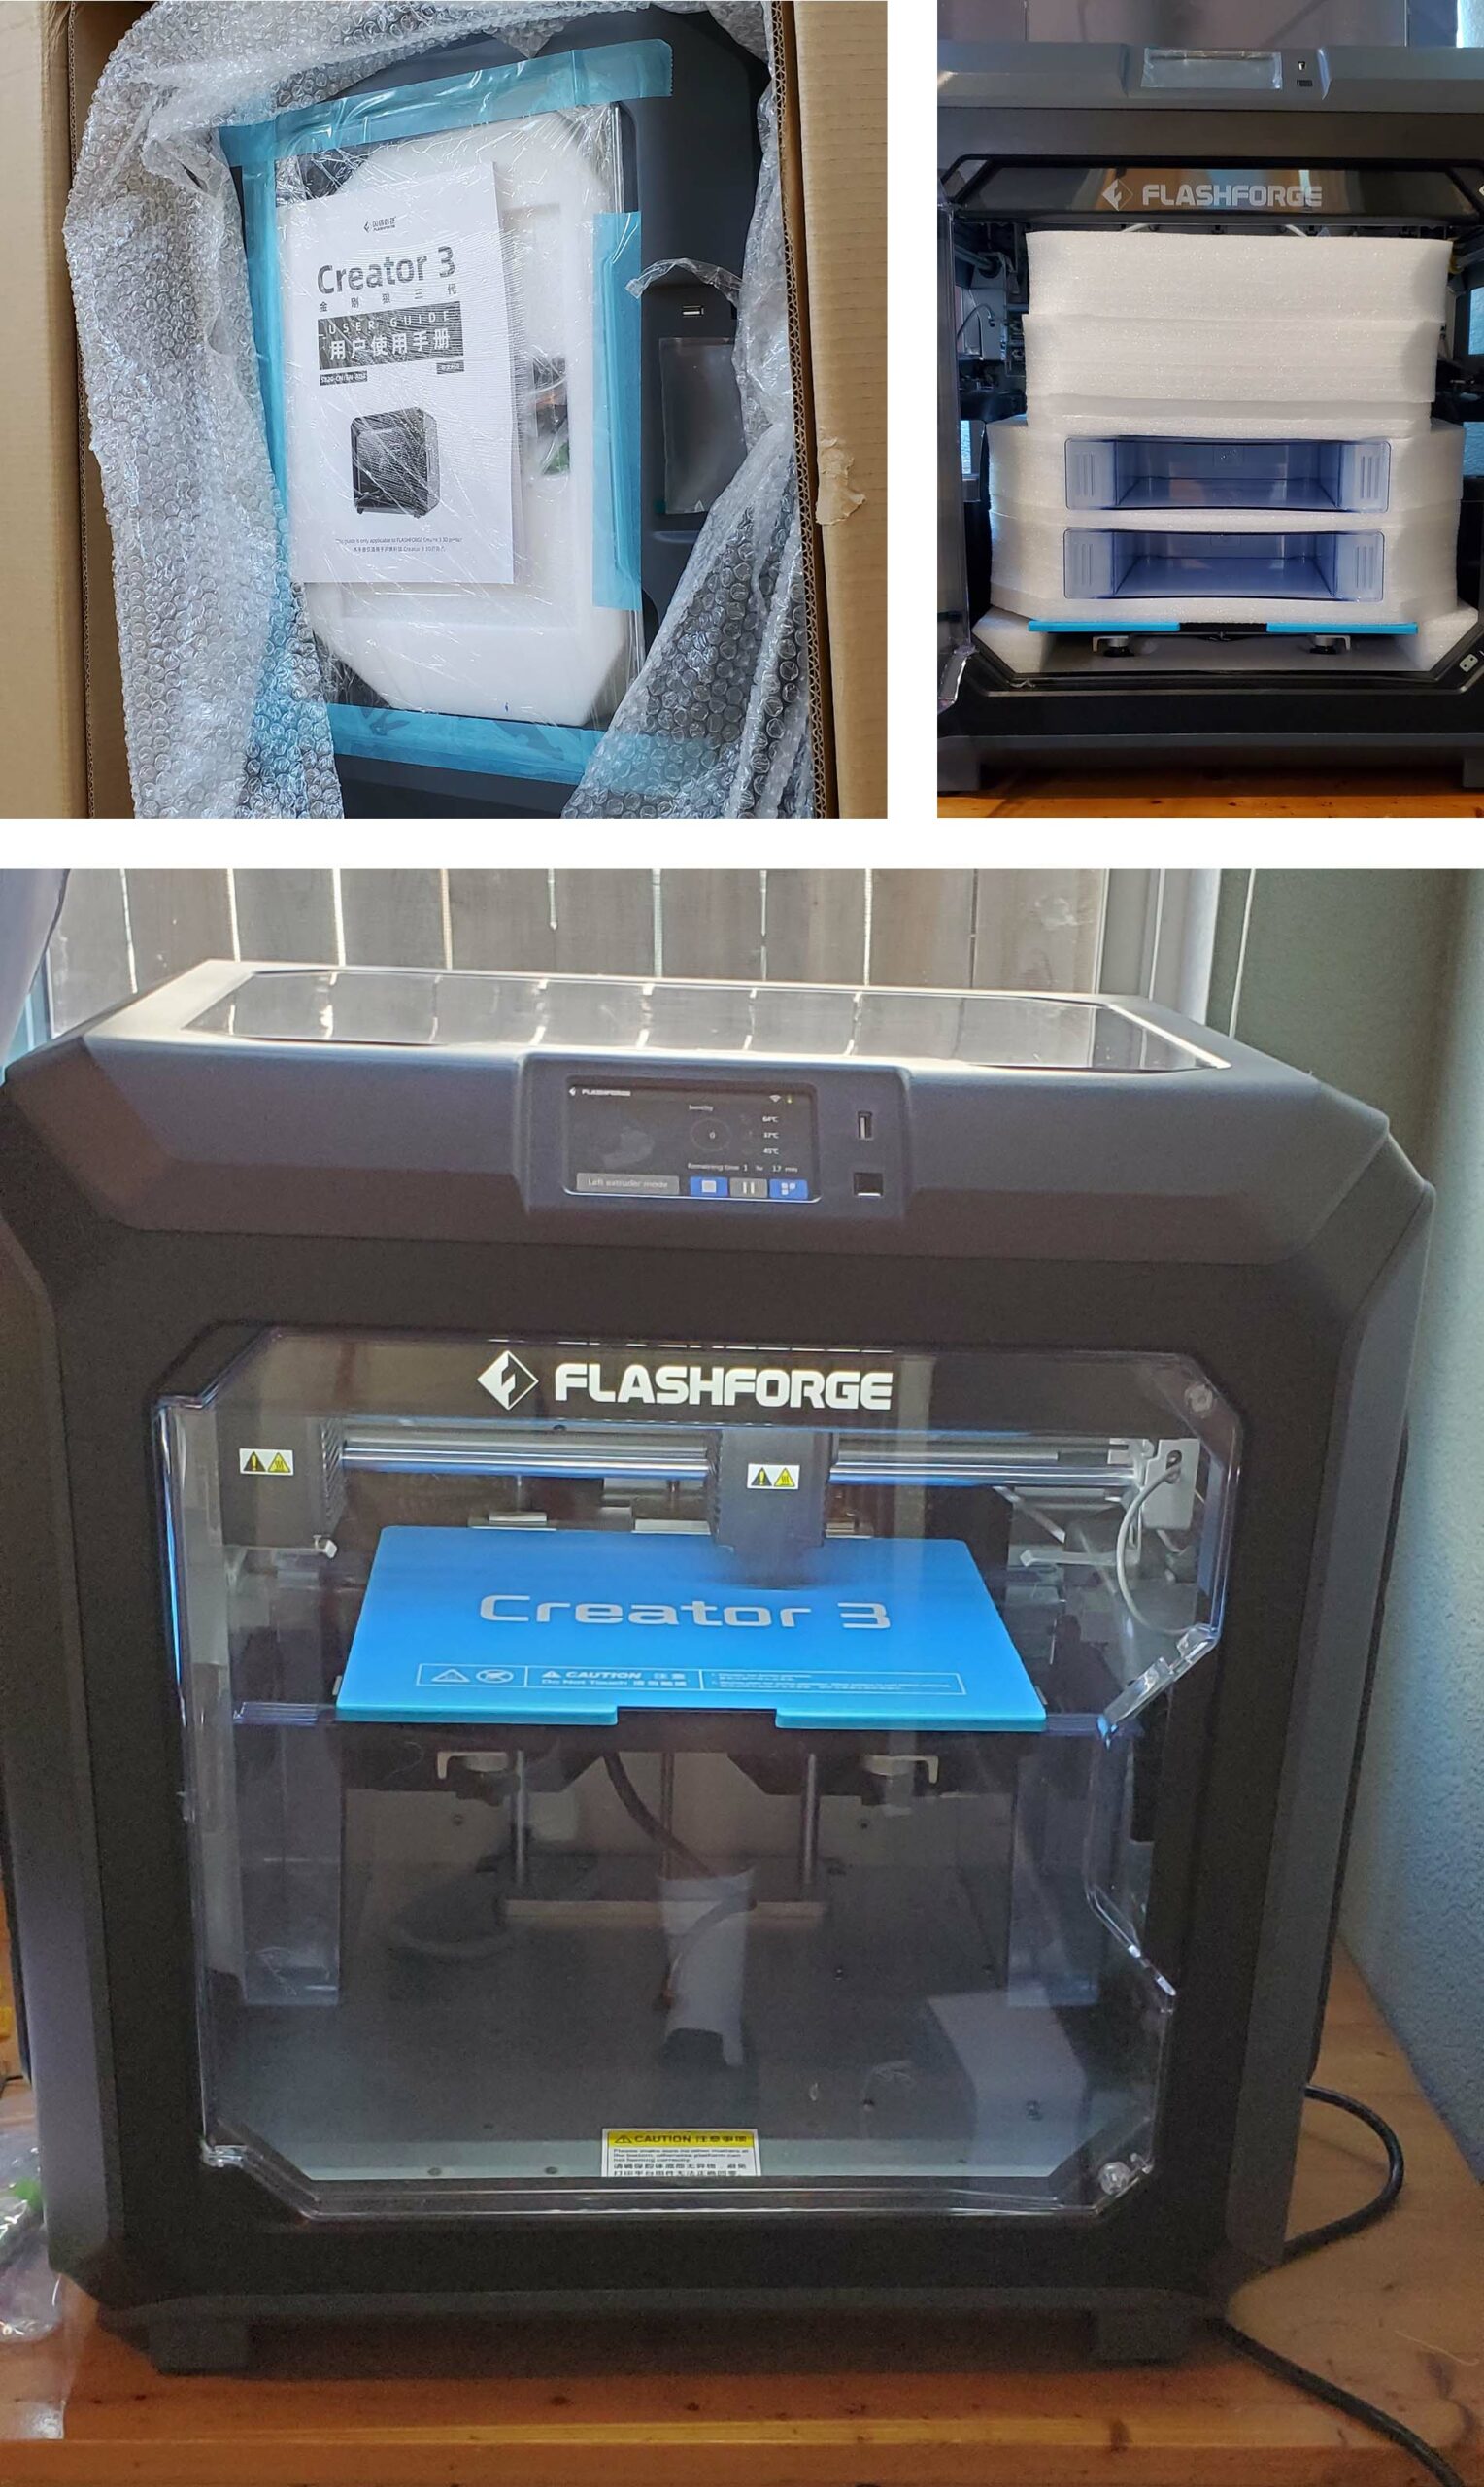
Unboxing the printer was straightforward, though lifting it out of the box requires two people due to its size and weight. I thought the 2S was heavy at 30kg but the Creator 3 is the real heavyweight at 40kg. The lift handles are also located at the bottom, not really helping matters. After getting it onto the table, the remaining setup was short and simple; there are a few inserts and clips to remove but everything is assembled besides the two material purge catches that clip into the inside.
Even more so than the 2S, the Creator 3 is a slick looking machine. It’s very tidy and self-contained in ways that most 3D printers are not.
Filament spools fit neatly into each side, and the included covers snap-in flush with the side of the body. Similarly, the filament tubes don’t extend out above the frame; the lid is flat and flush with the frame.


Both of those design features provide an aesthetic difference that is appreciably more professional than most printers with their filament spools dangling off the side and their guide tubes arching through the sky. But the features offer functional benefits as well. The spool holders are the best I’ve seen as they accommodate standard 1kg spools from all vendors (that I tested) and line them up perfectly to feed the filament into the guide tubes. This design prevents wobble and twist in the spool, which in turn prevents knots from forming in the filament. Small things like that add up to significant value after hundreds of hours of printing.
The Creator 3 comes with a heated, removable and flexible steel build plate which makes it very easy to remove your parts from the print bed. Levelling the bed is guided with the aid of a height probe, and there are only two levelling knobs under the bed so it’s a quick process. The printer probes the bed and then instructs the user via the touchscreen how much to turn each knob, with rather precise directions like “Turn the left knob counterclockwise 280°.” The knobs have 45° increments marked on them to make it fairly easy. Another round of probing confirms levelness.
Loading filament involves directing the printer to heat the nozzle and pushing the filament into the hole. For most materials, it’s a breeze. You have to be a little more deliberate with flexible materials but it’s still pretty easy.
The Wi-Fi is incredibly fast to get connected and works without a hitch through the FlashPrint slicing software that’s included. This is the first printer I’ve worked with where I never used the USB drive to move print files to the printer because the Wi-Fi is just so much more convenient.
Tests
I’m psychologically compelled to print little Benchy first, so I sliced it in FlashPrint with the default print settings and sent it over Wi-Fi to the printer. The printer heated up and began printing in only a couple of minutes. To my surprise, the first layer wasn’t sticking to the bed. It seemed to be a nozzle height issue as it was too far away from the bed for the material to stick. Before I did anything else, I restored the print settings to default, resliced it, and told it to print again. Sure enough, it worked.
Before we look at the print, allow me to explain what happened. When I said before that I started with default settings, that wasn’t completely true because I always make one change, which is to disable the raft setting if it’s enabled. I avoid using rafts for a few reasons: they add print time, create filament waste, and hurt the surface quality of the bottom of the object. But rafts certainly add some value: they help keep parts from peeling, make it easier to remove parts from the bed, and they can increase print reliability by starting with a thicker layer. Rafts are a user preference, though several very popular 3D printers rely on the use of rafts and it turns out that the Creator 3 is among them. I imagine it’s to simplify the levelling process with the IDEX system, but the bed doesn’t get close enough to the nozzles to effectively print without a raft. As there are only two levelling knobs and they’re toward the front of the bed, it’s not possible to manually raise the bed without making it unlevel. The raft print settings make up for the gap by pushing a thick 0.4mm bead at a 200% extrusion ratio for the first layer of the raft. I tried tweaking the print settings to replicate the same effect but without a raft and had little success. So for this review, everything was printed with a raft. Let’s get on with the show.
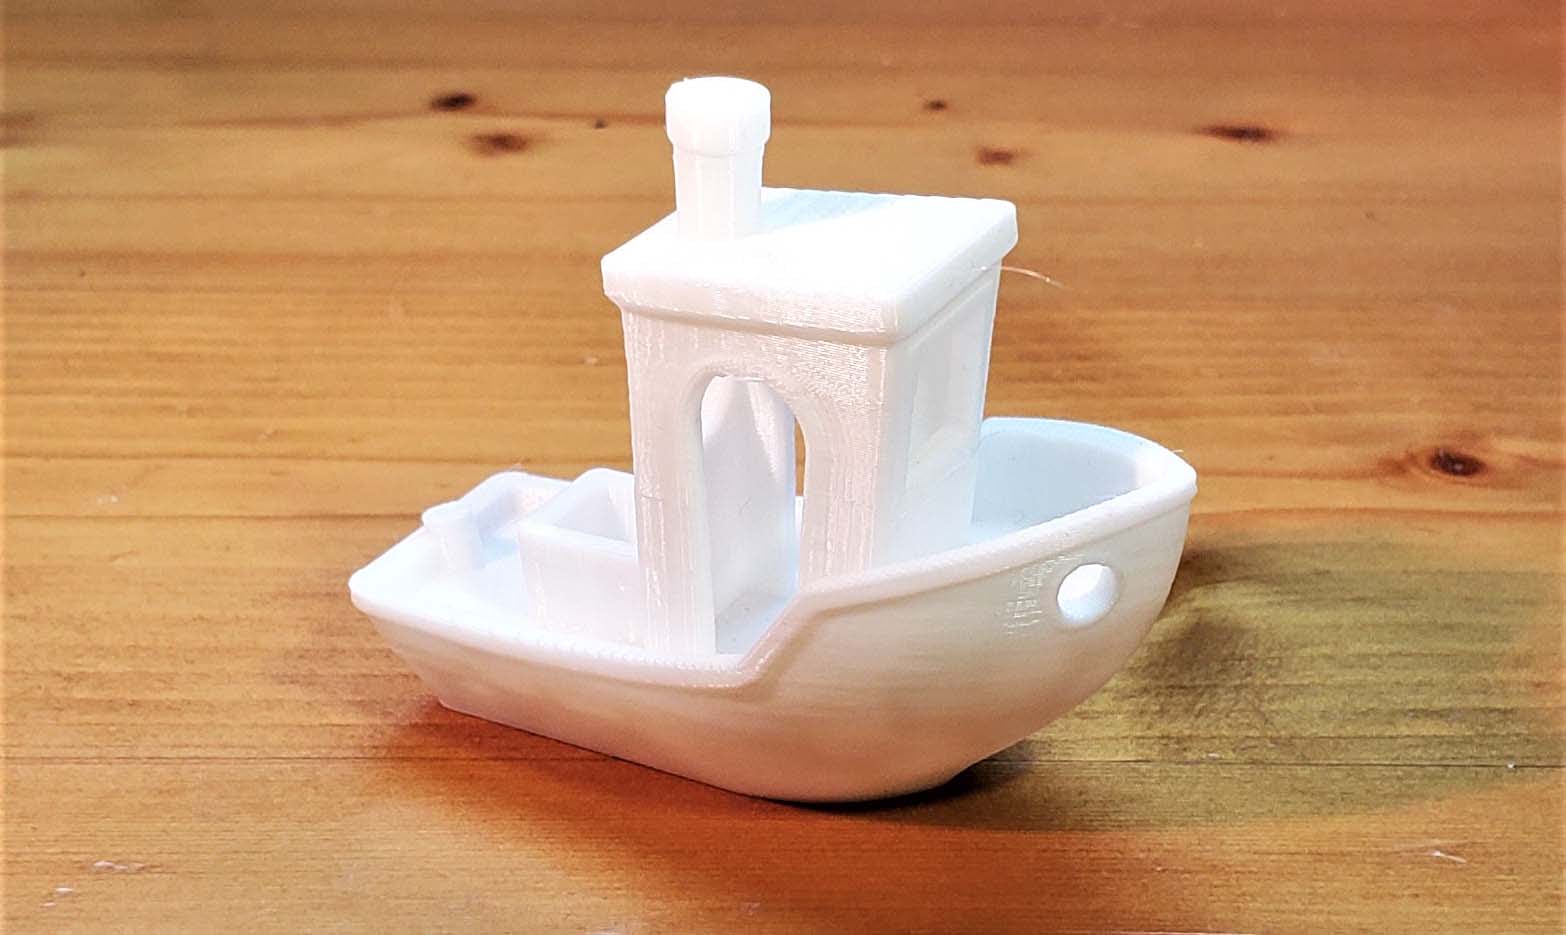
It’s a fantastic print. All of the walls are very smooth, partly because the standard print quality profile is 0.18mm. The pillars are straight and the smoke stack is clean. The hole on the front looks particularly crisp.
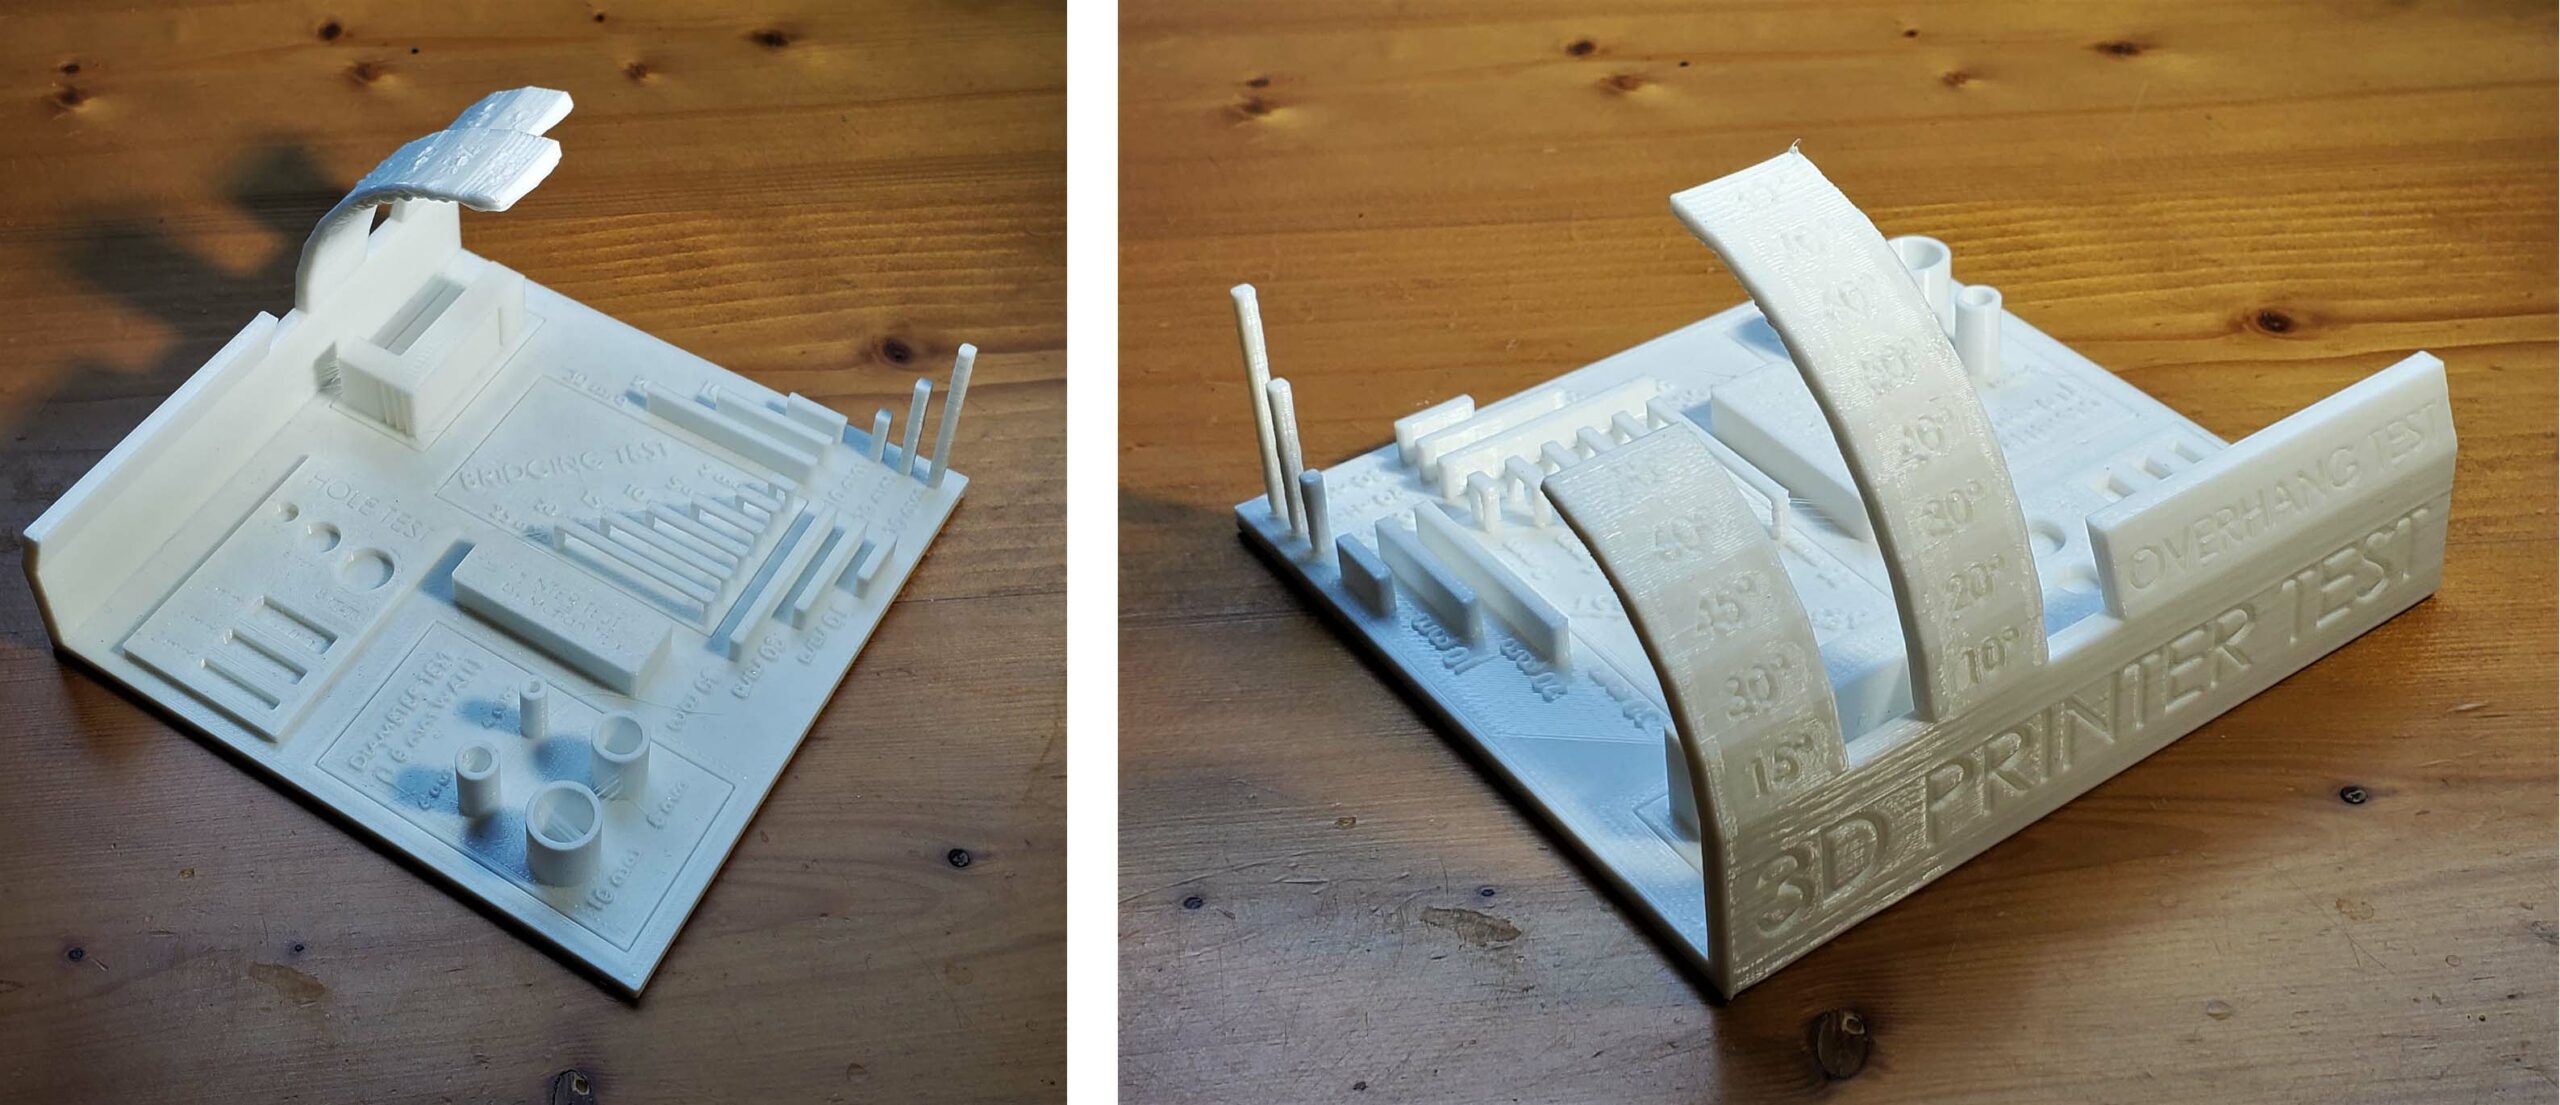
Overall, the All In One 3D Printer Test is also quite good, though one weakness was revealed: steep overhangs. Everything else looks great. The pillars are solid, thin walls are sturdy, bridges don’t sag, circles are round, and text is legible.
The difficult Bridging Test performed admirably as well with only barely-noticeable imperfections. That’s enough boring prints, let’s see what this printer can really do.
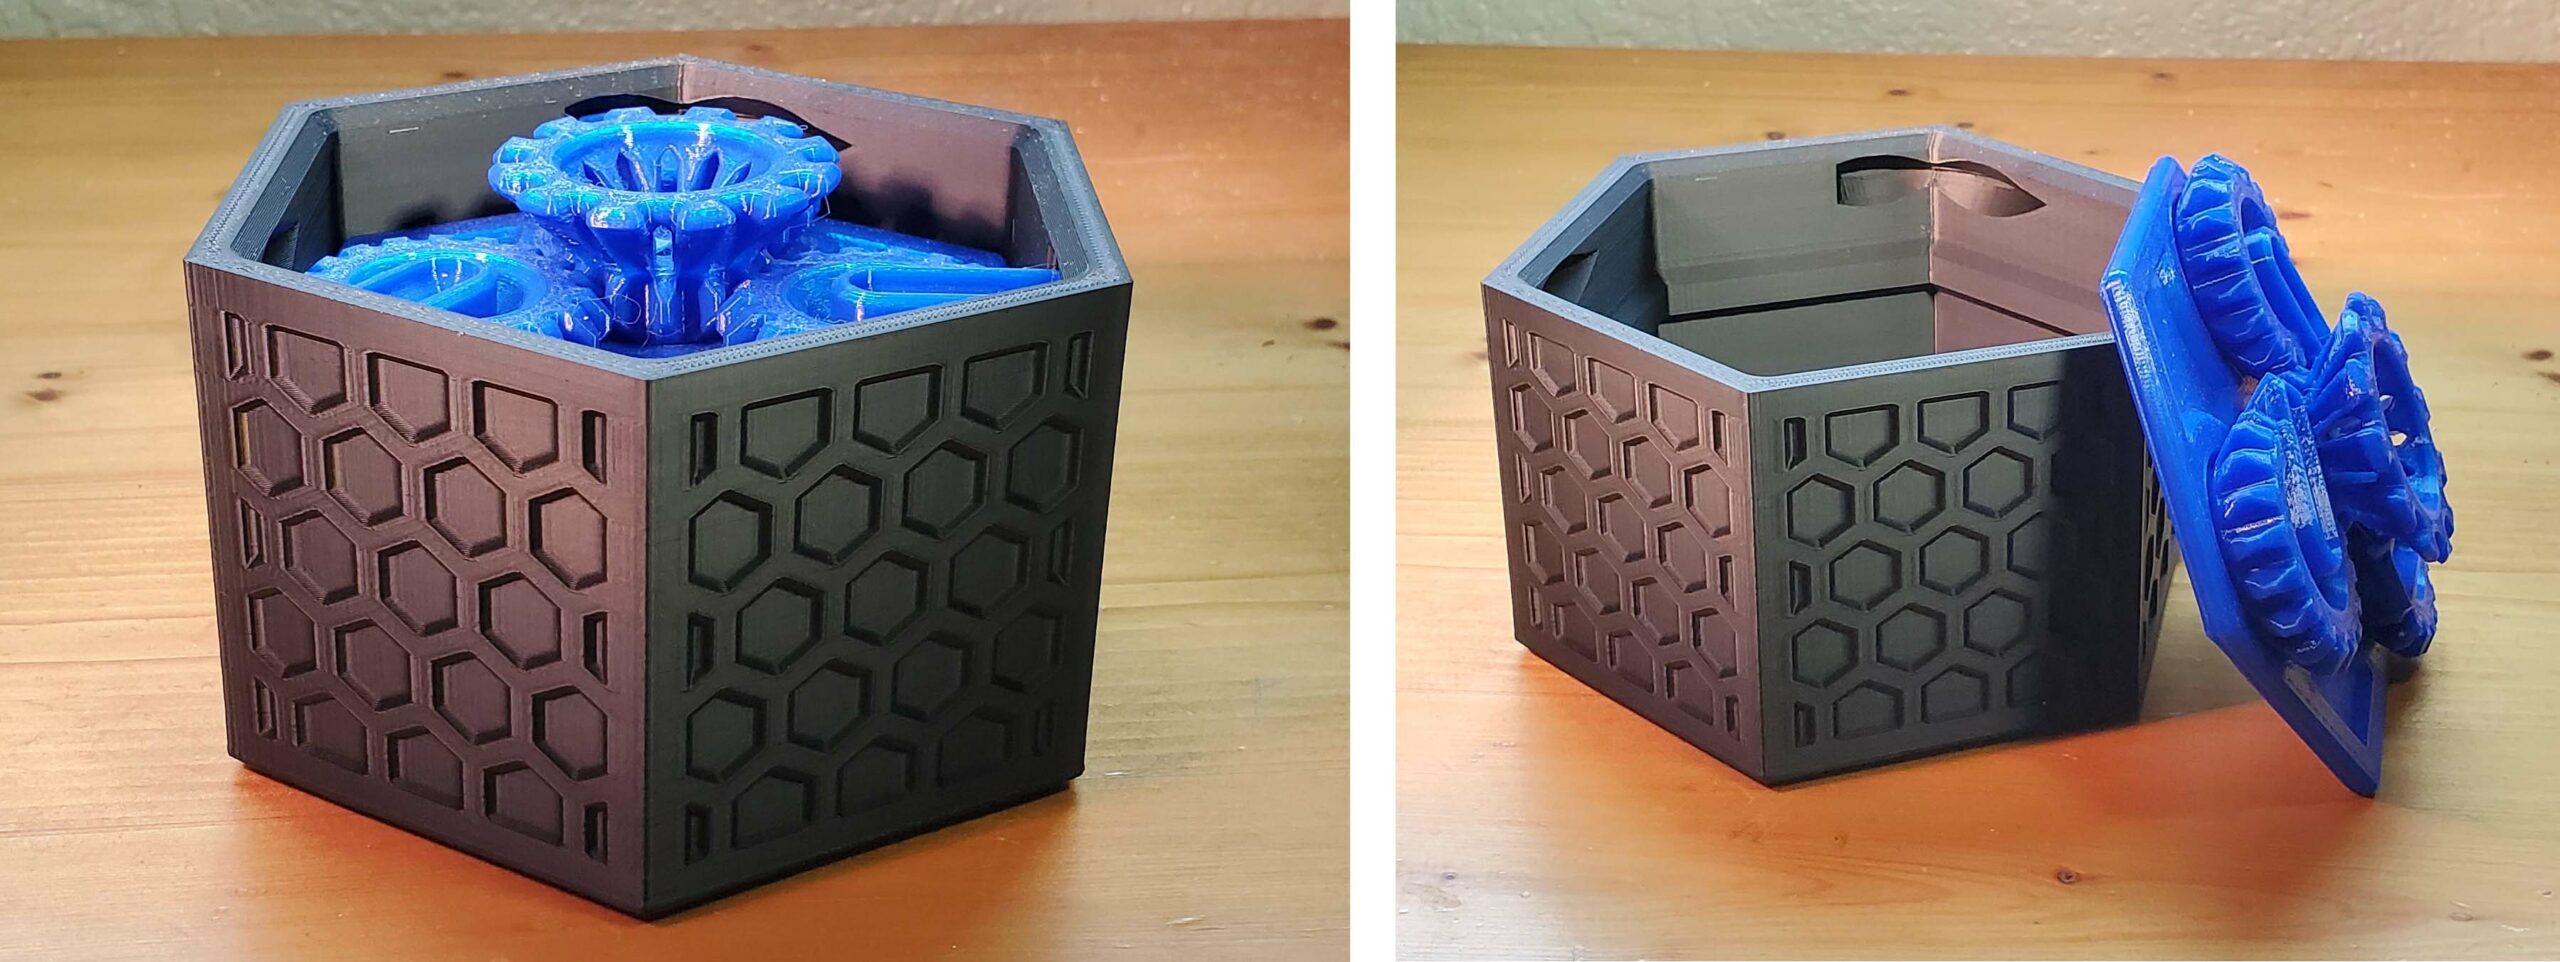
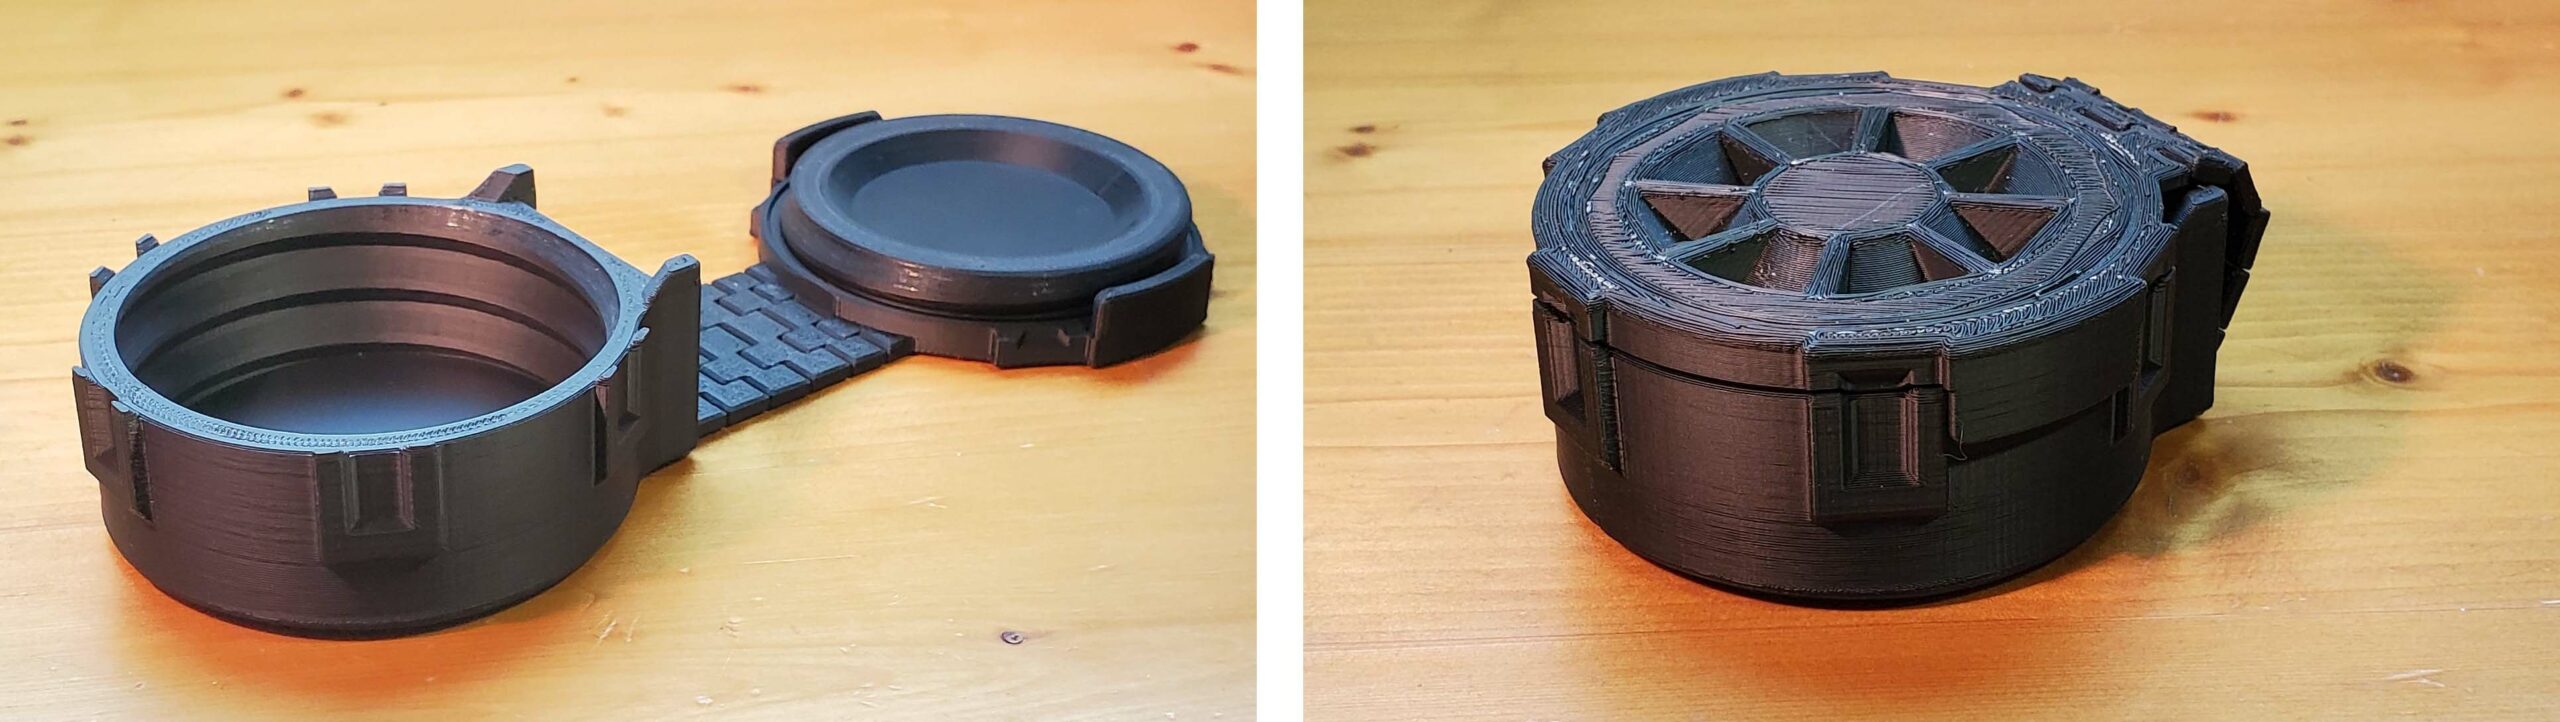
I was a tad concerned that some print-in-place moving parts may suffer from having to use rafts so I tried the Machine Canister to find out. I was glad to learn they work fine; the gears on the blue PLA lid turn smoothly. Lowering the distance between the part and the raft in the print settings is helpful for parts like this where moving parts are on the bottom.
This Chained Hatch Container also works, though it required some force to free up the twisting component as it had fused slightly. And it’s easy to see which surface was printed on the raft.
IDEX
IDEX is really the star of the show with the Creator 3. Product developers will enjoy dual-color printing, print farms will appreciate being able to print twice the parts in the same amount of time with the duplicate feature, and engineers and tooling fabricators will get a lot of use out of the mirror feature. Here, I used the mirror feature to simultaneously print both sides of this Crysknife from Dune, one of my favorite books.
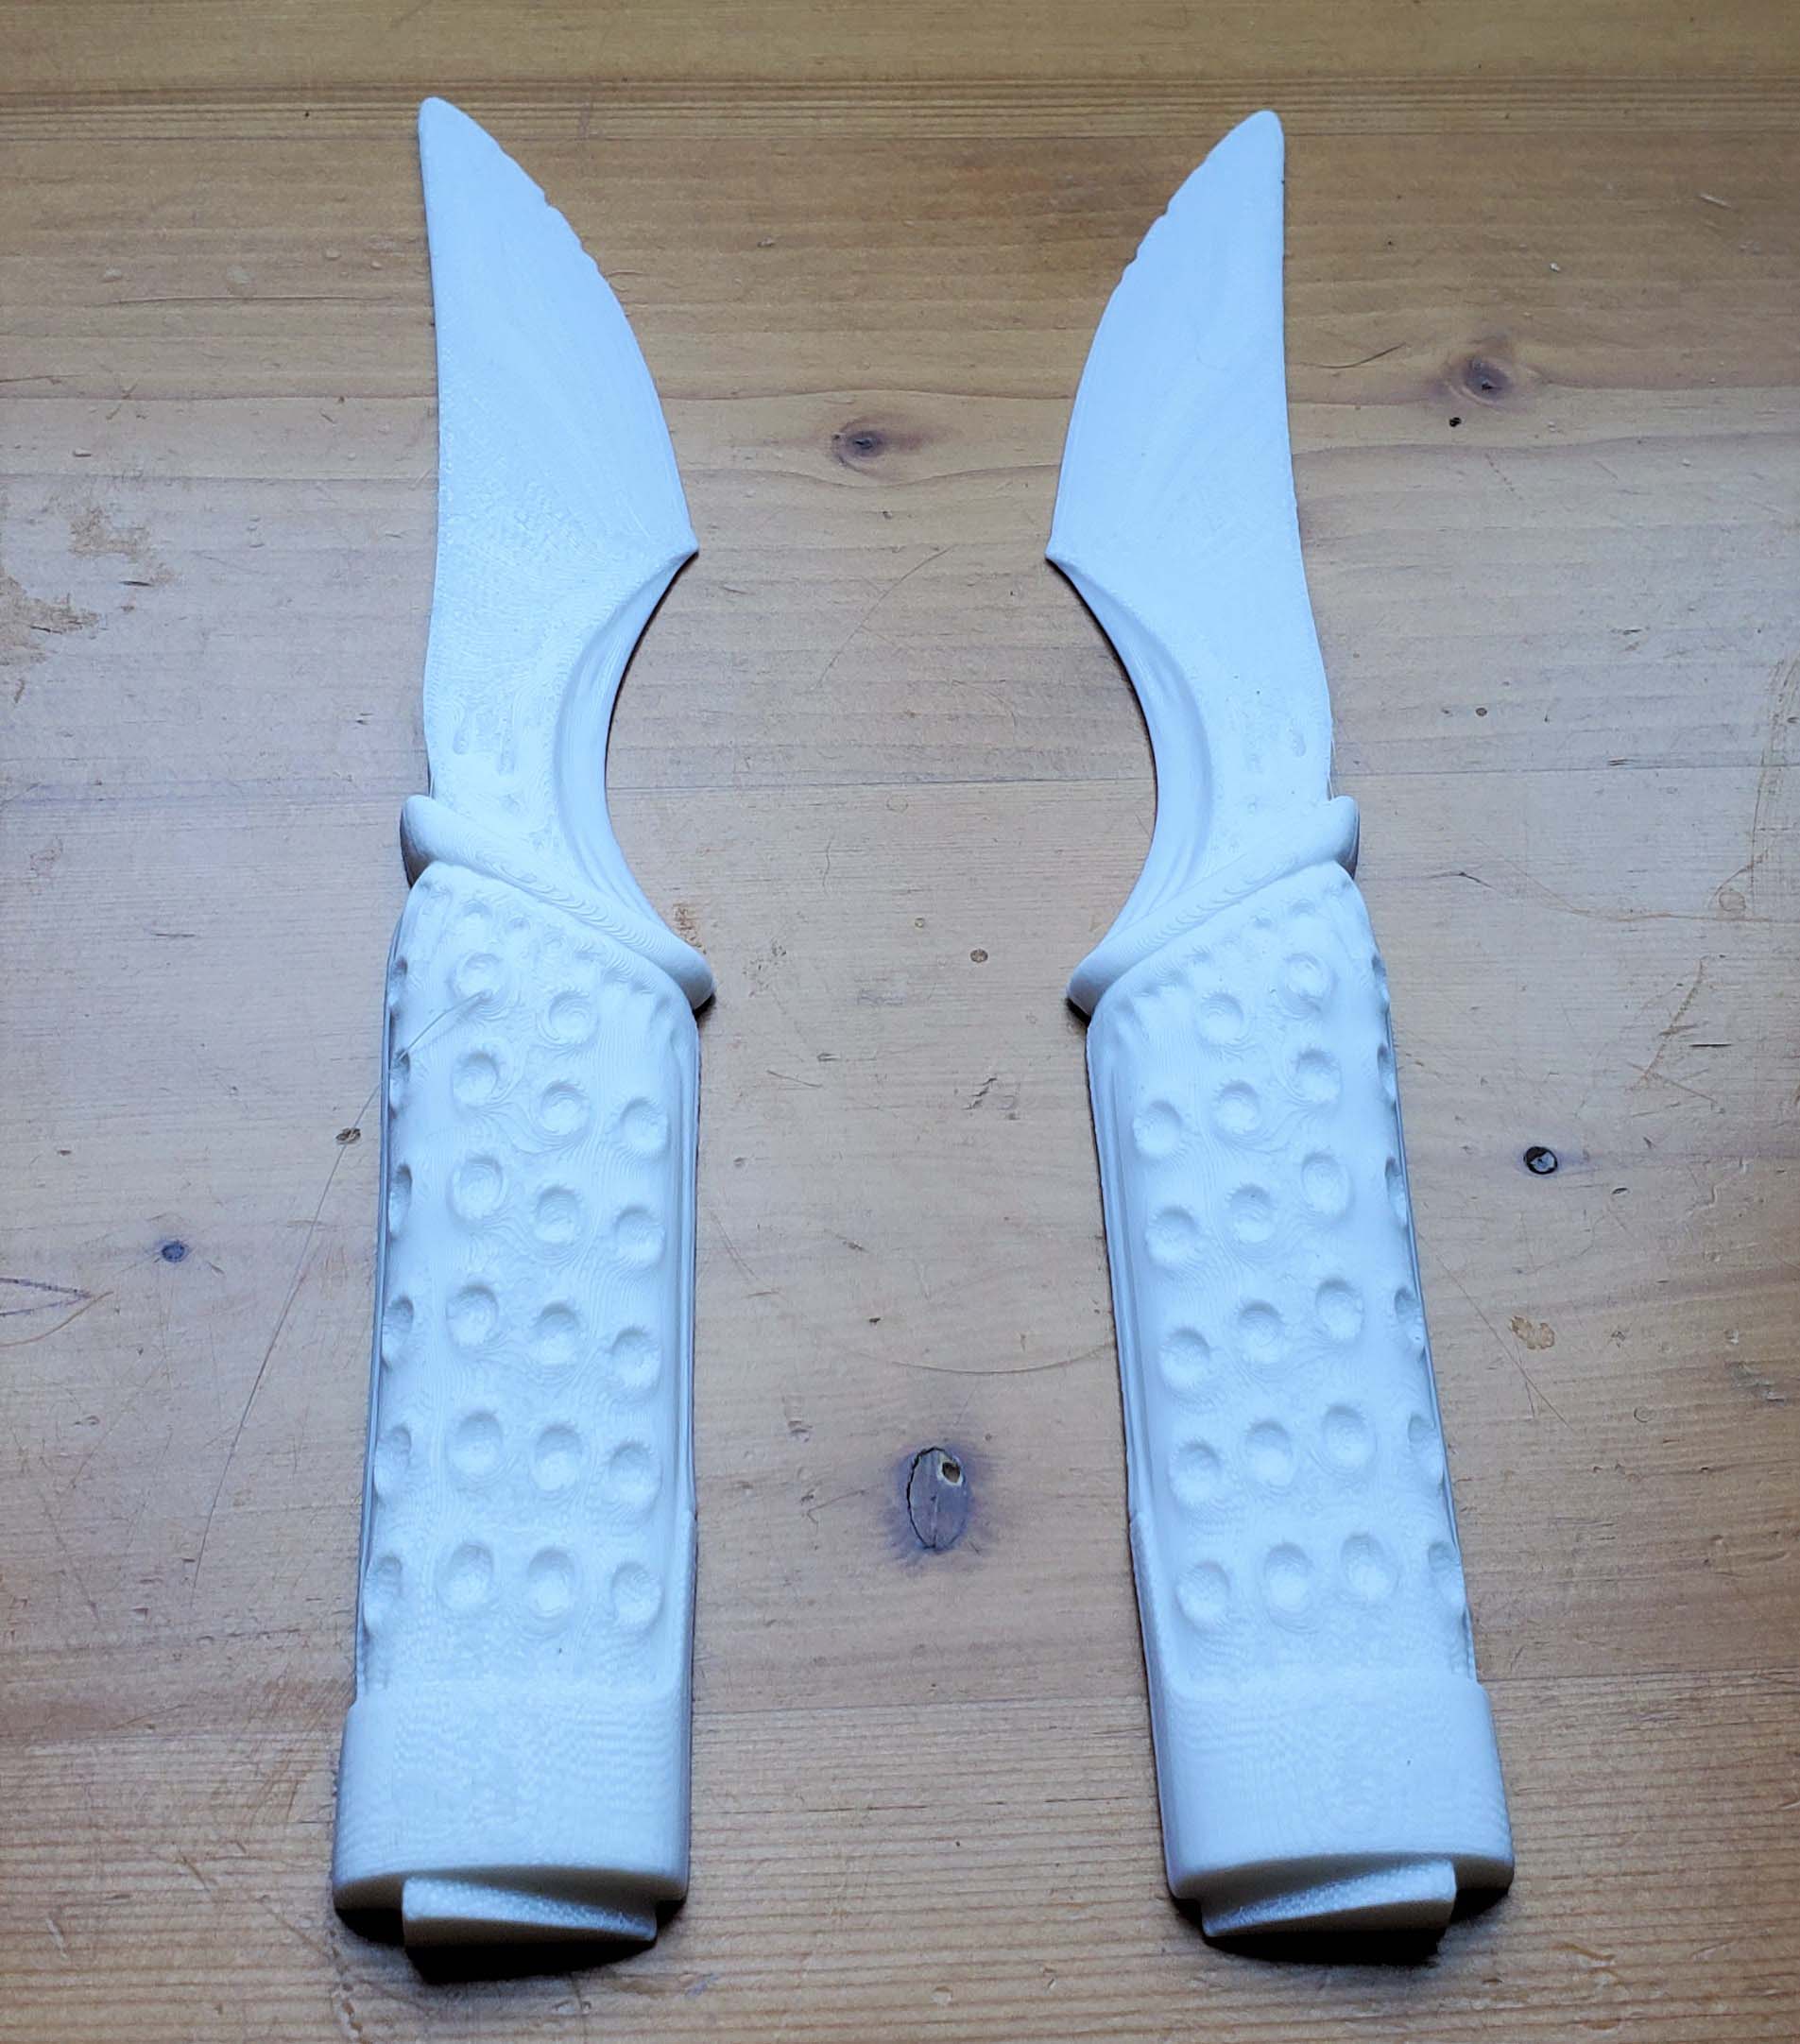
These were printed with the high quality setting of 0.12mm to help capture the details and they both look great. Being able to print left- and right-hand versions of objects at the same time is a serious value add. Prop makers, fashion designers, and automakers alike could use such a feature. Setting up a mirror print in FlashPrint is just a couple of clicks, it’s as simple as it can be made to be.
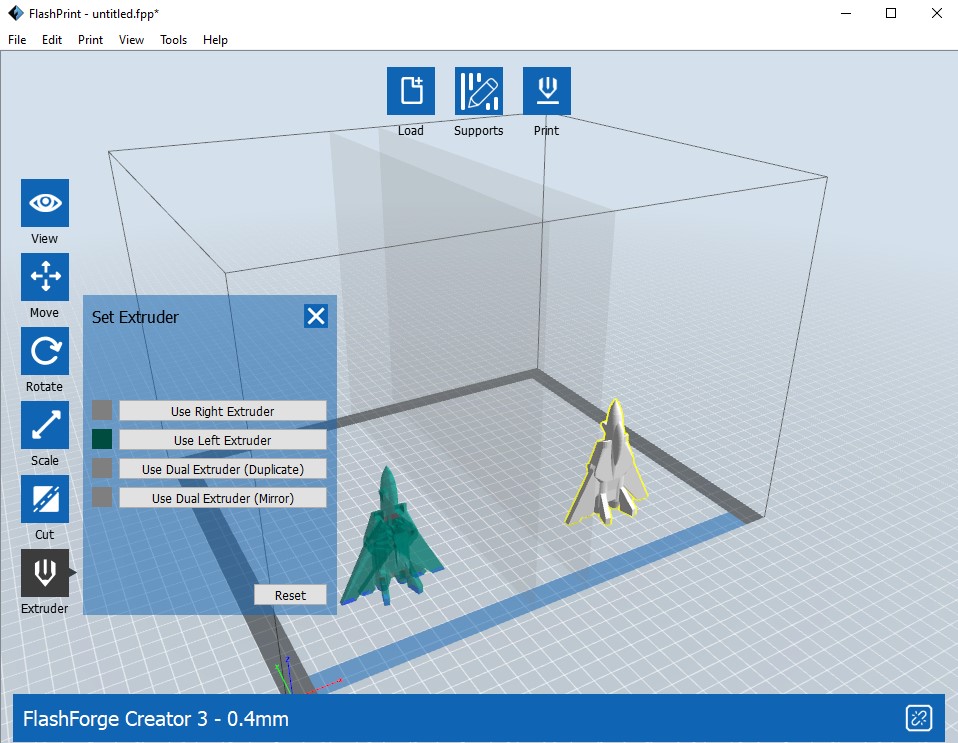

The duplicate feature is basically the same as the mirror feature but without the model flipping, so it’s great for either making a lot of an object or for making different colors of the same object. But the software allows individual control over the temperatures of the extruders, so it’s also possible to print with different materials. Though it took a bit of experimenting, I was able to print a copy of this scarab I designed in ABS and PLA at the same time.
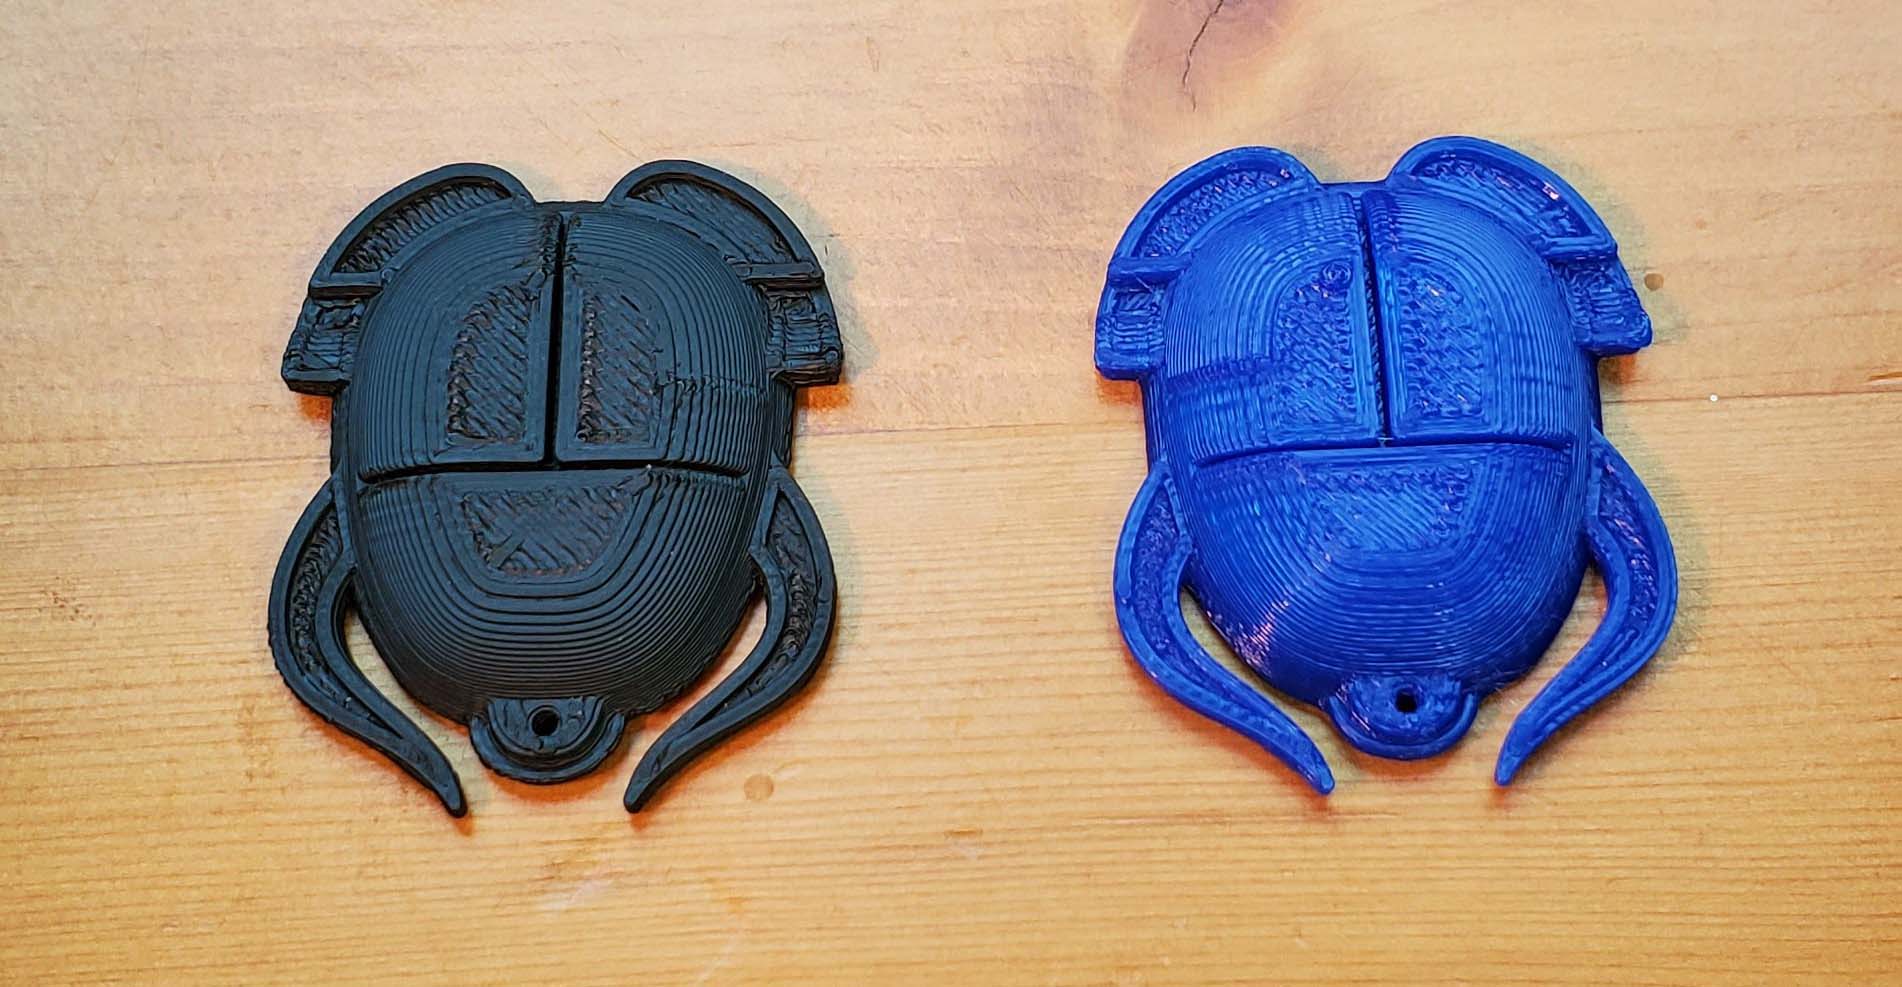
These materials have very different print settings for bed temp and extrusion ratio but I was able to find a happy medium. That’s certainly something most printers can’t do, and it’s an efficient way to test a prototype in different materials. Dual-color printing is obviously very useful in applications where monochrome is not sufficient. I tested a couple of models, including these Dual Color Dice and Dual Colored Treefrog.
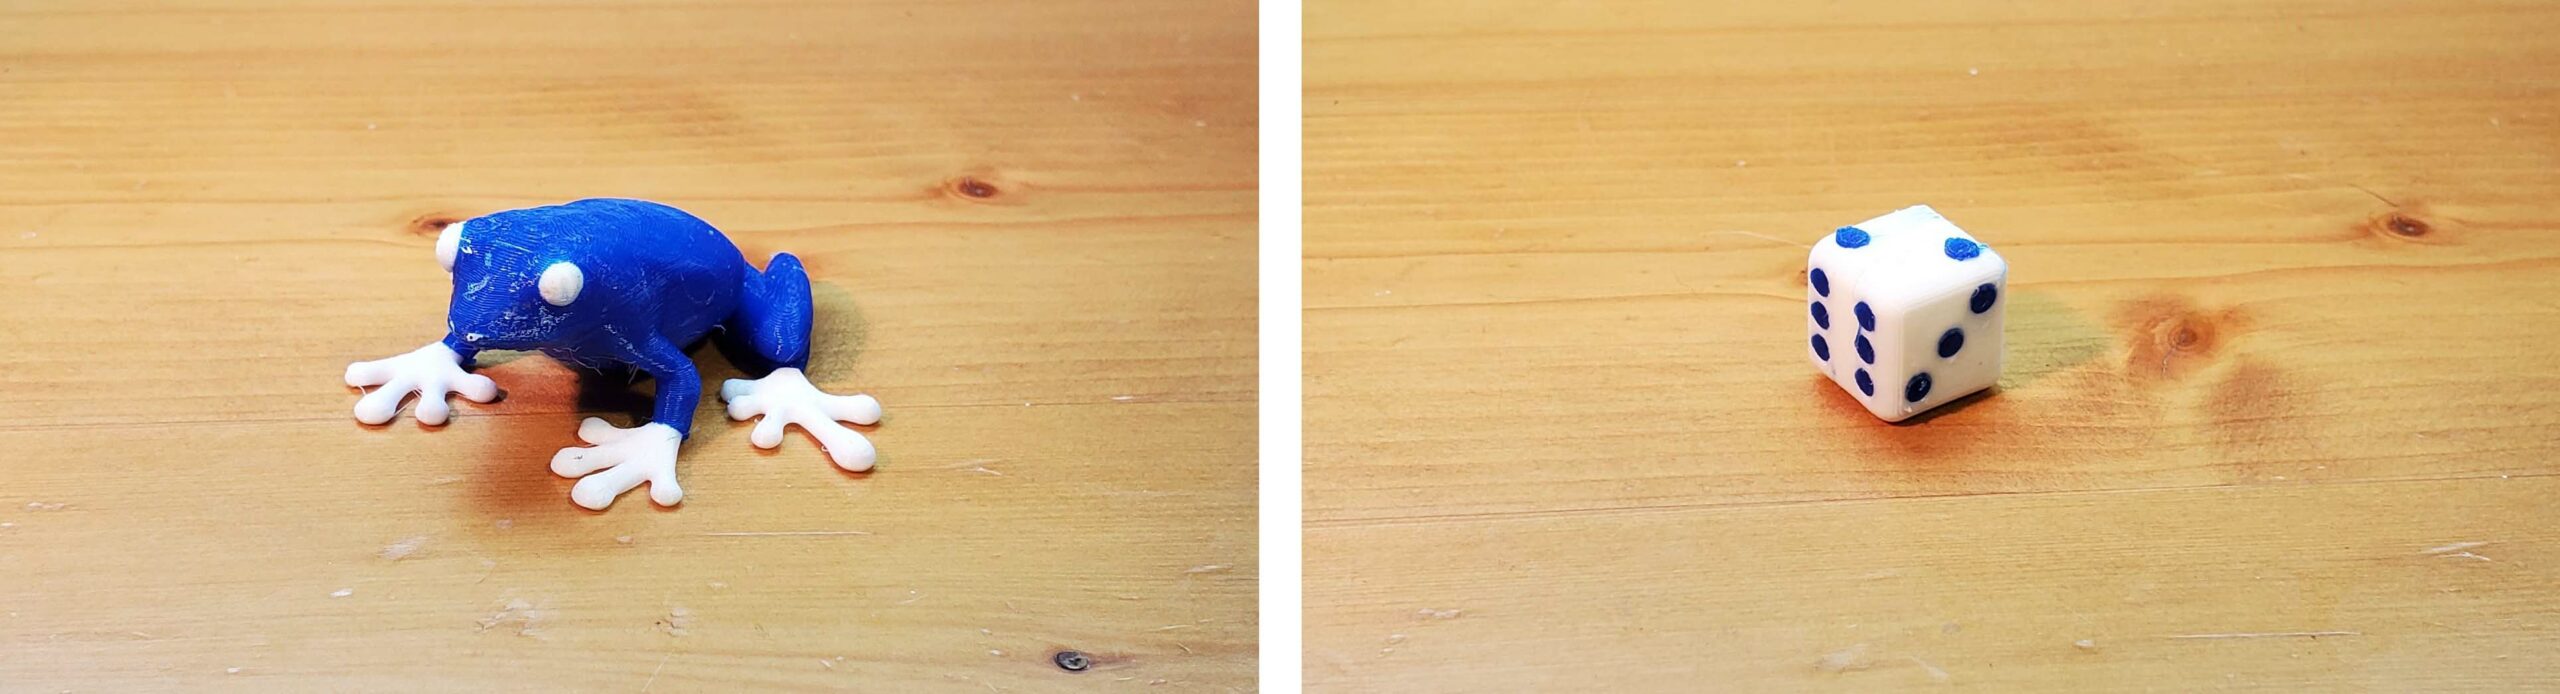
They both came out pretty well. There’s a small amount of wrong-color dotting but it’s a difficult task to nail perfectly.
Material Range
All of the IDEX capabilities passed their respective challenges so I moved on to testing different materials beyond PLA and ABS. A Bee bar needs to be colorful (to attract bees) and able to survive outdoors, so this green PETG makes a great choice.

The mason jar screws in without resistance and the top surfaces are definitely smooth enough to be water tight. The removable, flexible build plate made removing this large part completely painless.
My wallet has aged out of its usefulness so I printed this surprisingly functional Bi-fold wallet in flexible TPU.
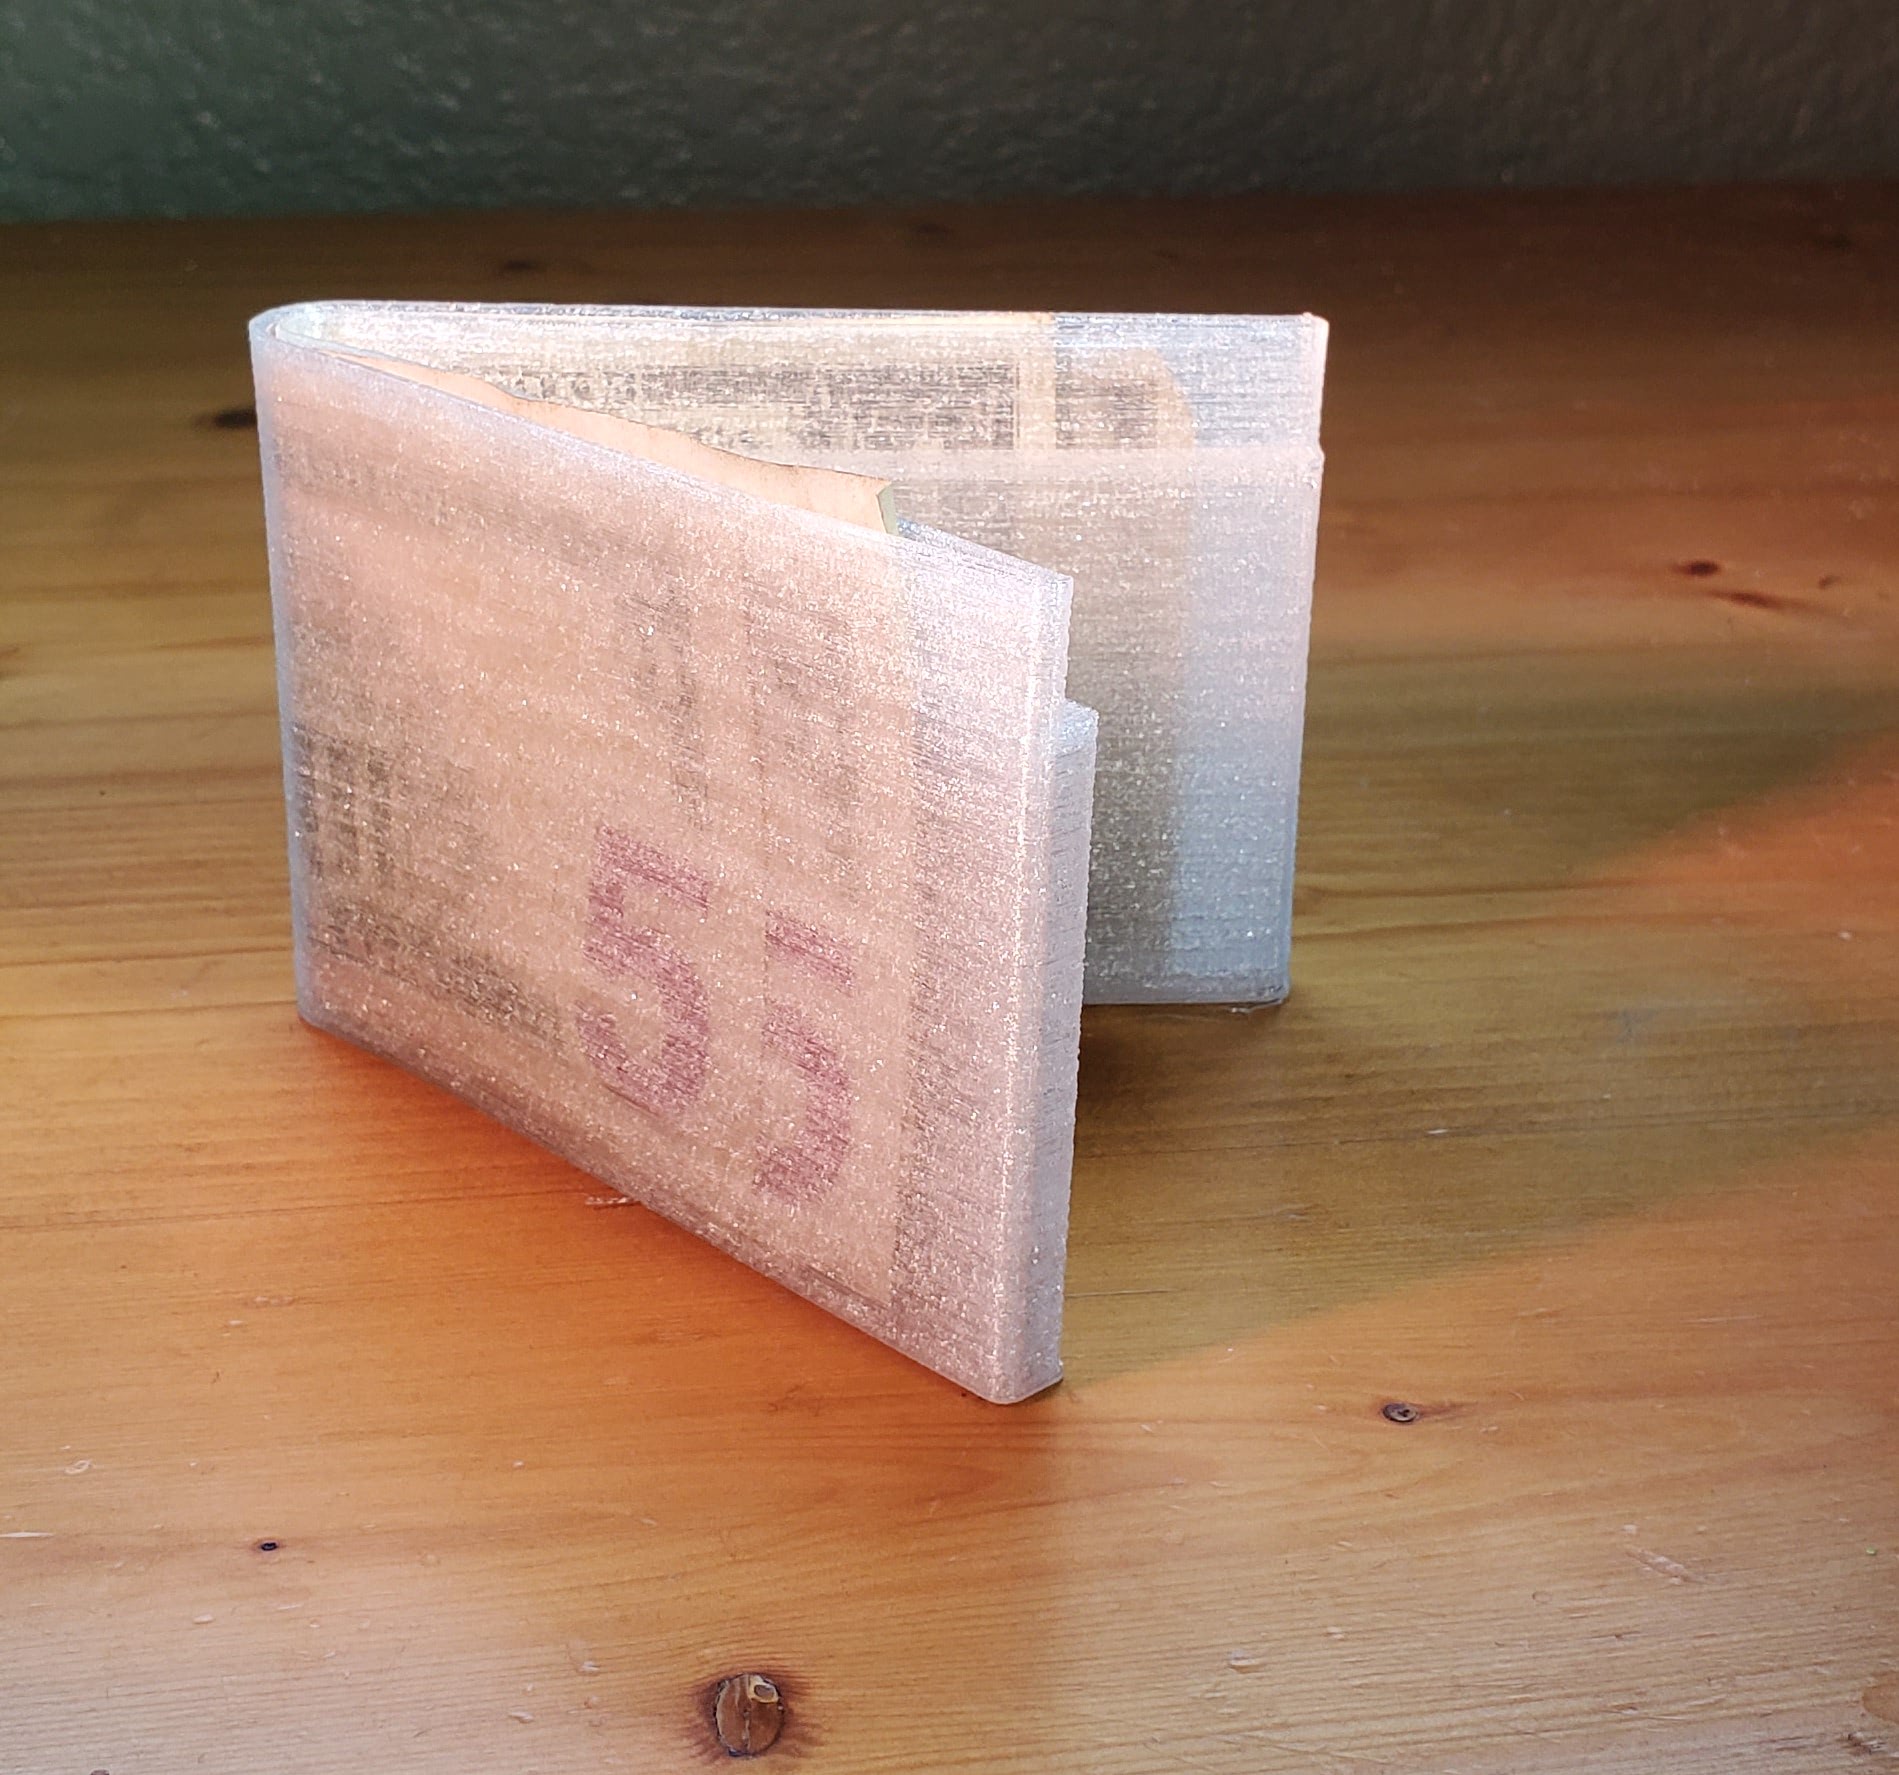
This material didn’t work right out of the gate but that’s because TPU is the most difficult to print version of all of the flexible materials. Based on the temperature range for the flexible filament that Flashforge sells as well as the temperature settings for the flexible profile in FlashPrint, it’s probably configured for TPE, which is slightly stiffer and thus easier to print. I got it to print TPU so I’m confident it can print other flexible materials. Additionally, my TPU looks like it may have absorbed some moisture so I’ll likely be reviewing a filament dryer soon.
But what really separates the Creator 3 from the pack in terms of materials is PA-CF (carbon fiber nylon).
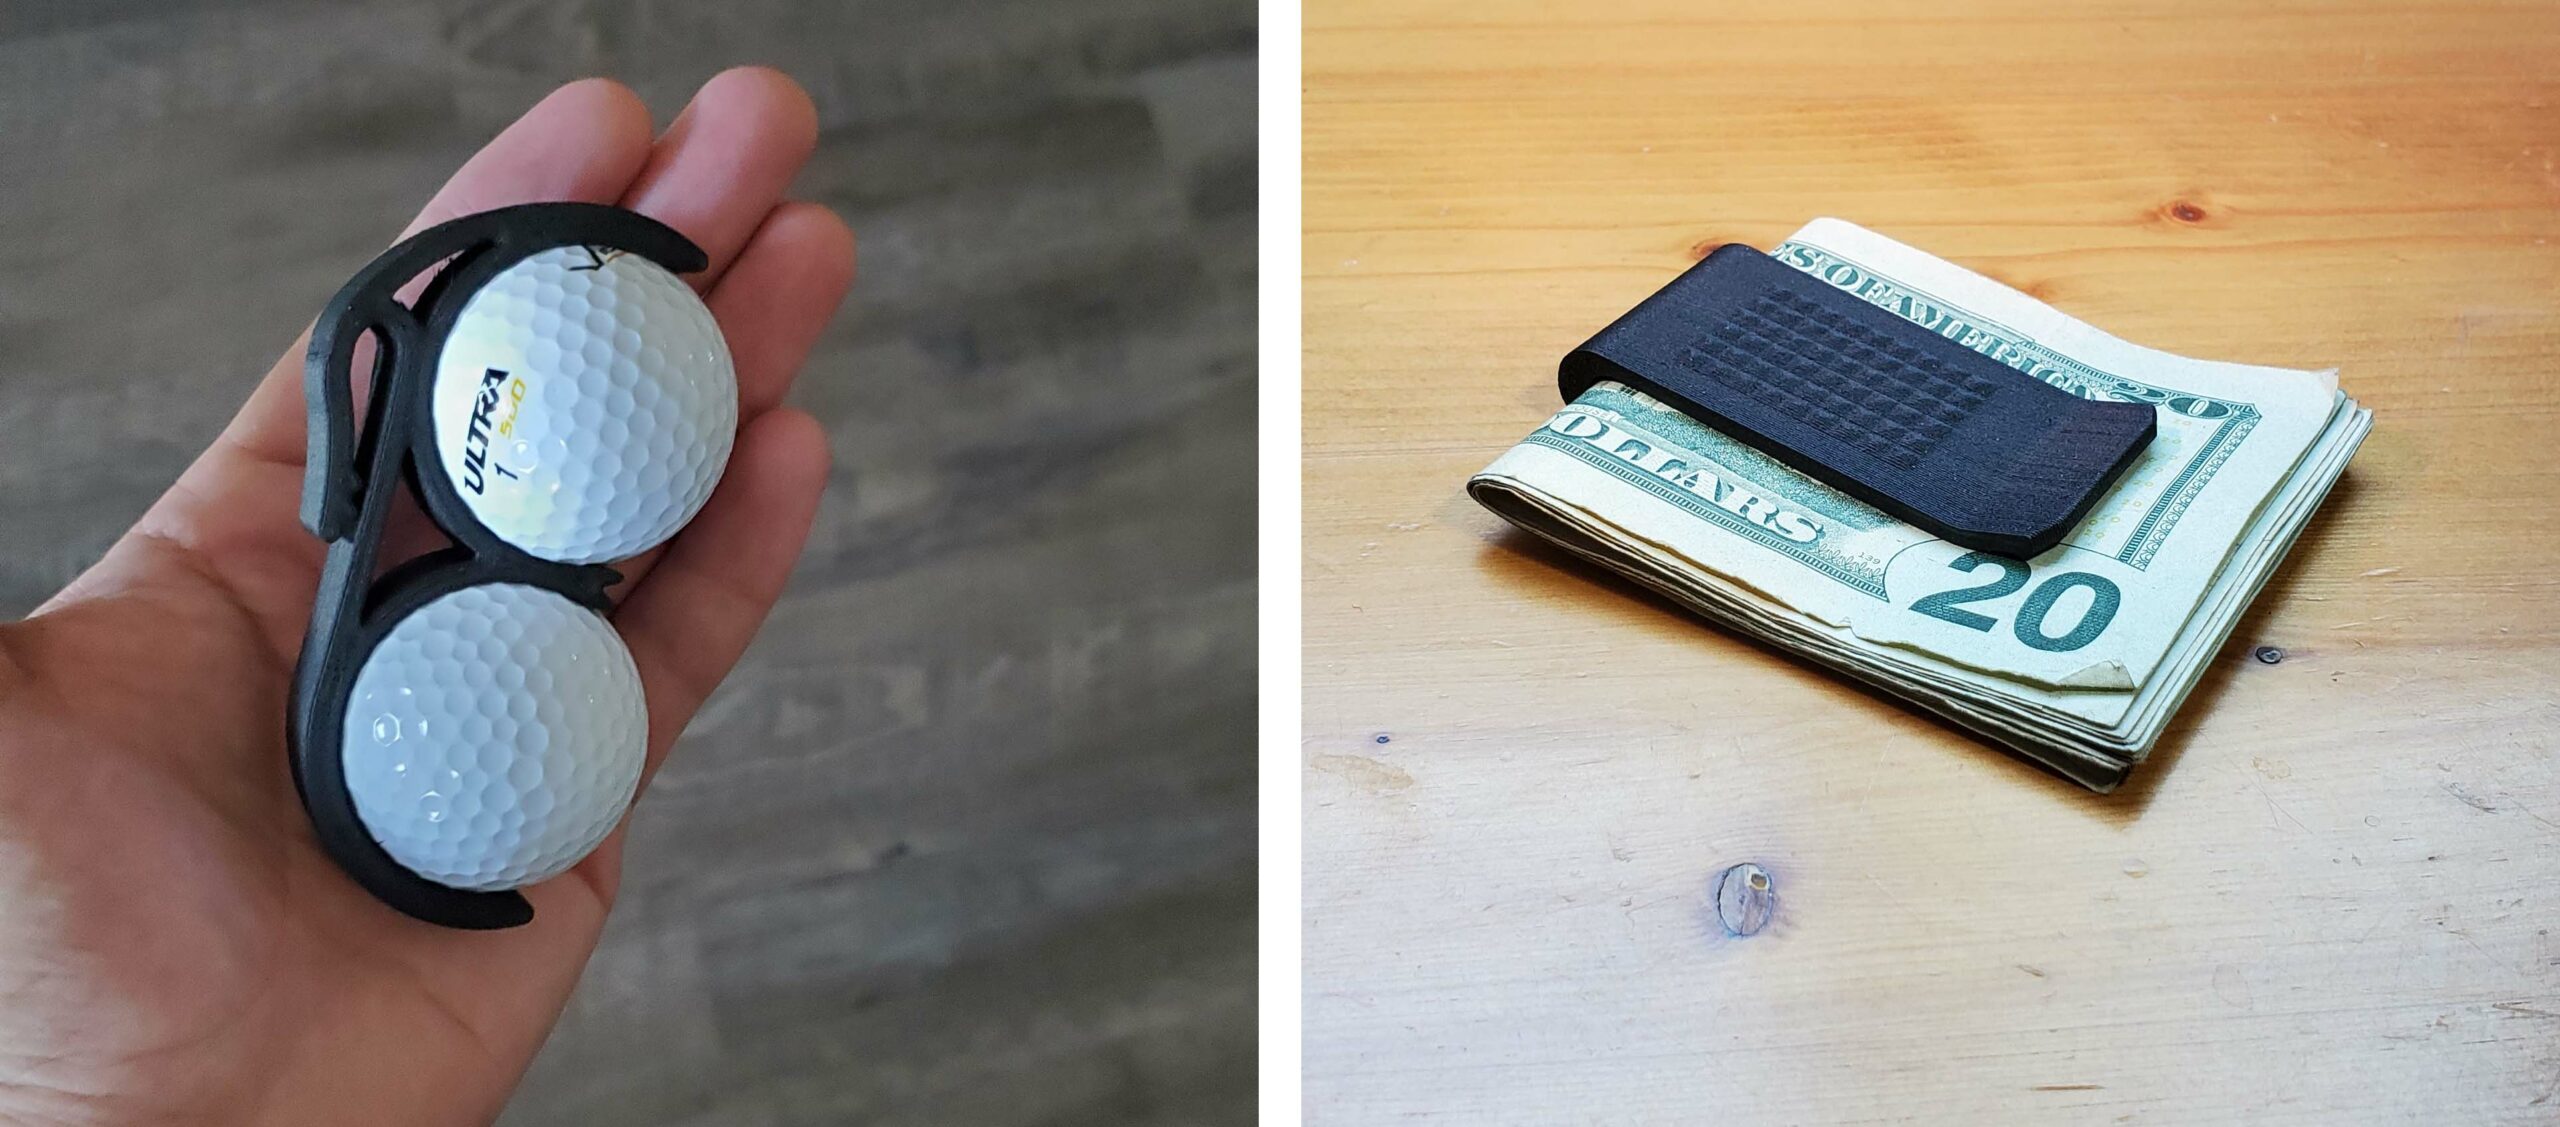
This stylish Money Clip (I really don’t want to buy a new wallet) and Golf Ball Belt Clip were printed in PA-CF with default settings and it was as easy as printing with PLA. The only difference is I don’t have to worry about these breaking.
Nozzle Kit
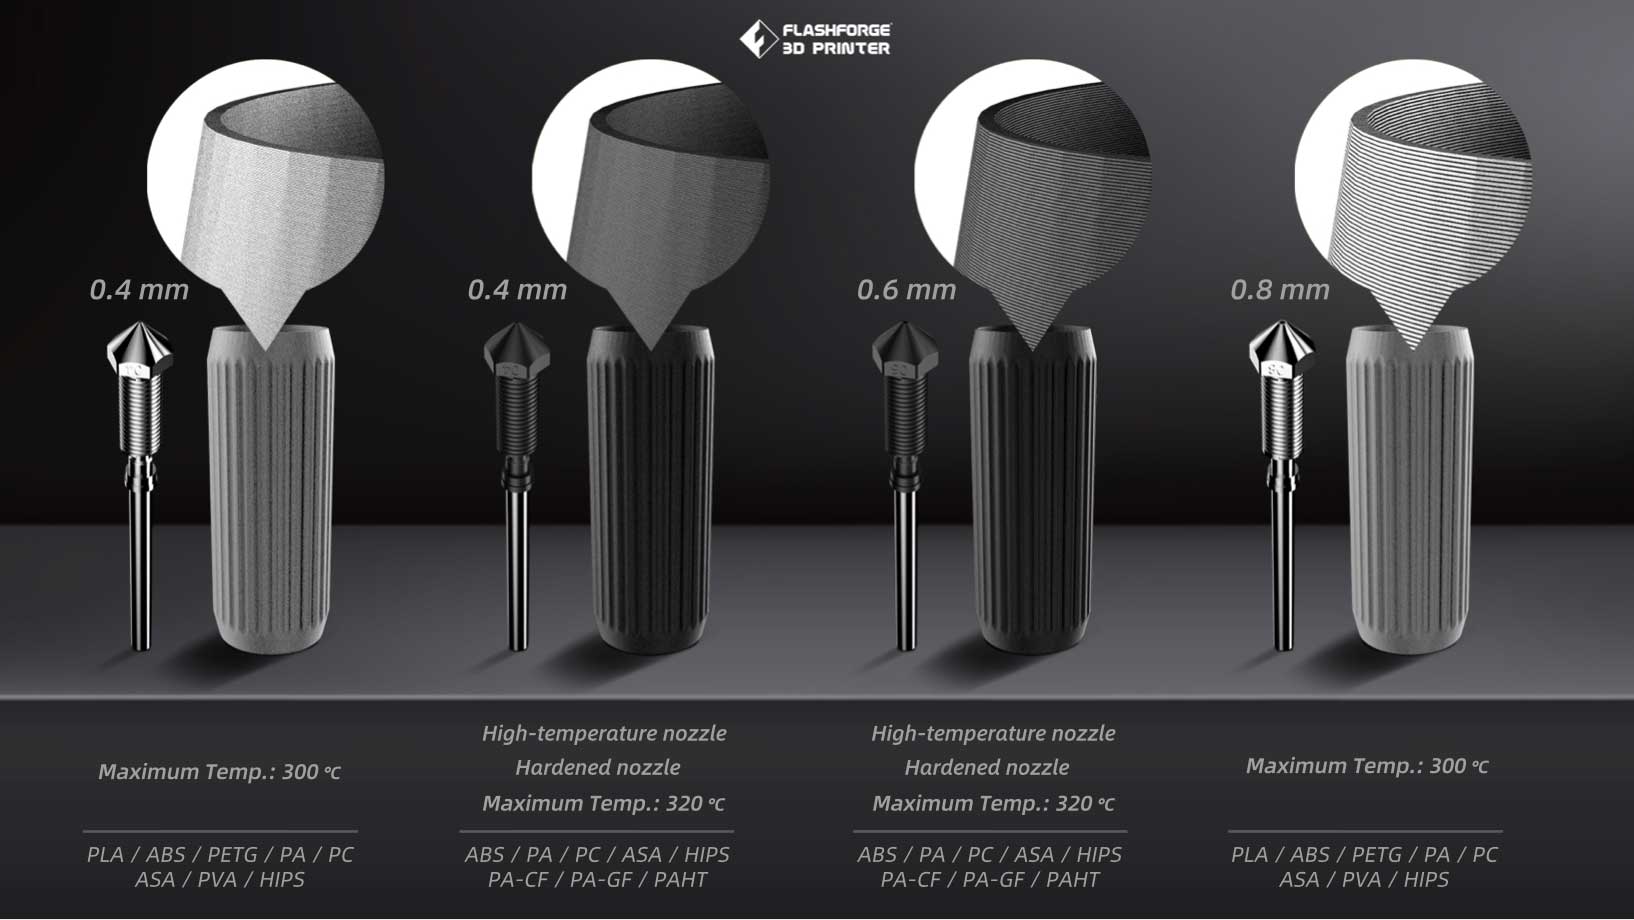
Customers can purchase an additional nozzle kit that consists of 4 different nozzles. 2 times 0.4 mm, a 0.6 mm and a 0.8 mm. Please note that this nozzle kit is not included in the original package.
Print Quality
One of the settings in FlashPrint caught my eye that I had to investigate: the hyper print profile. The layer height is set to 0.08mm, which is getting into the quality range of resin printers. It’s true that FDM printers can do better than 0.1mm but they aren’t usually shipped with profiles to do so. The option is currently only available for PLA but I copied the settings to ABS and printed this lovely Skull Ring.
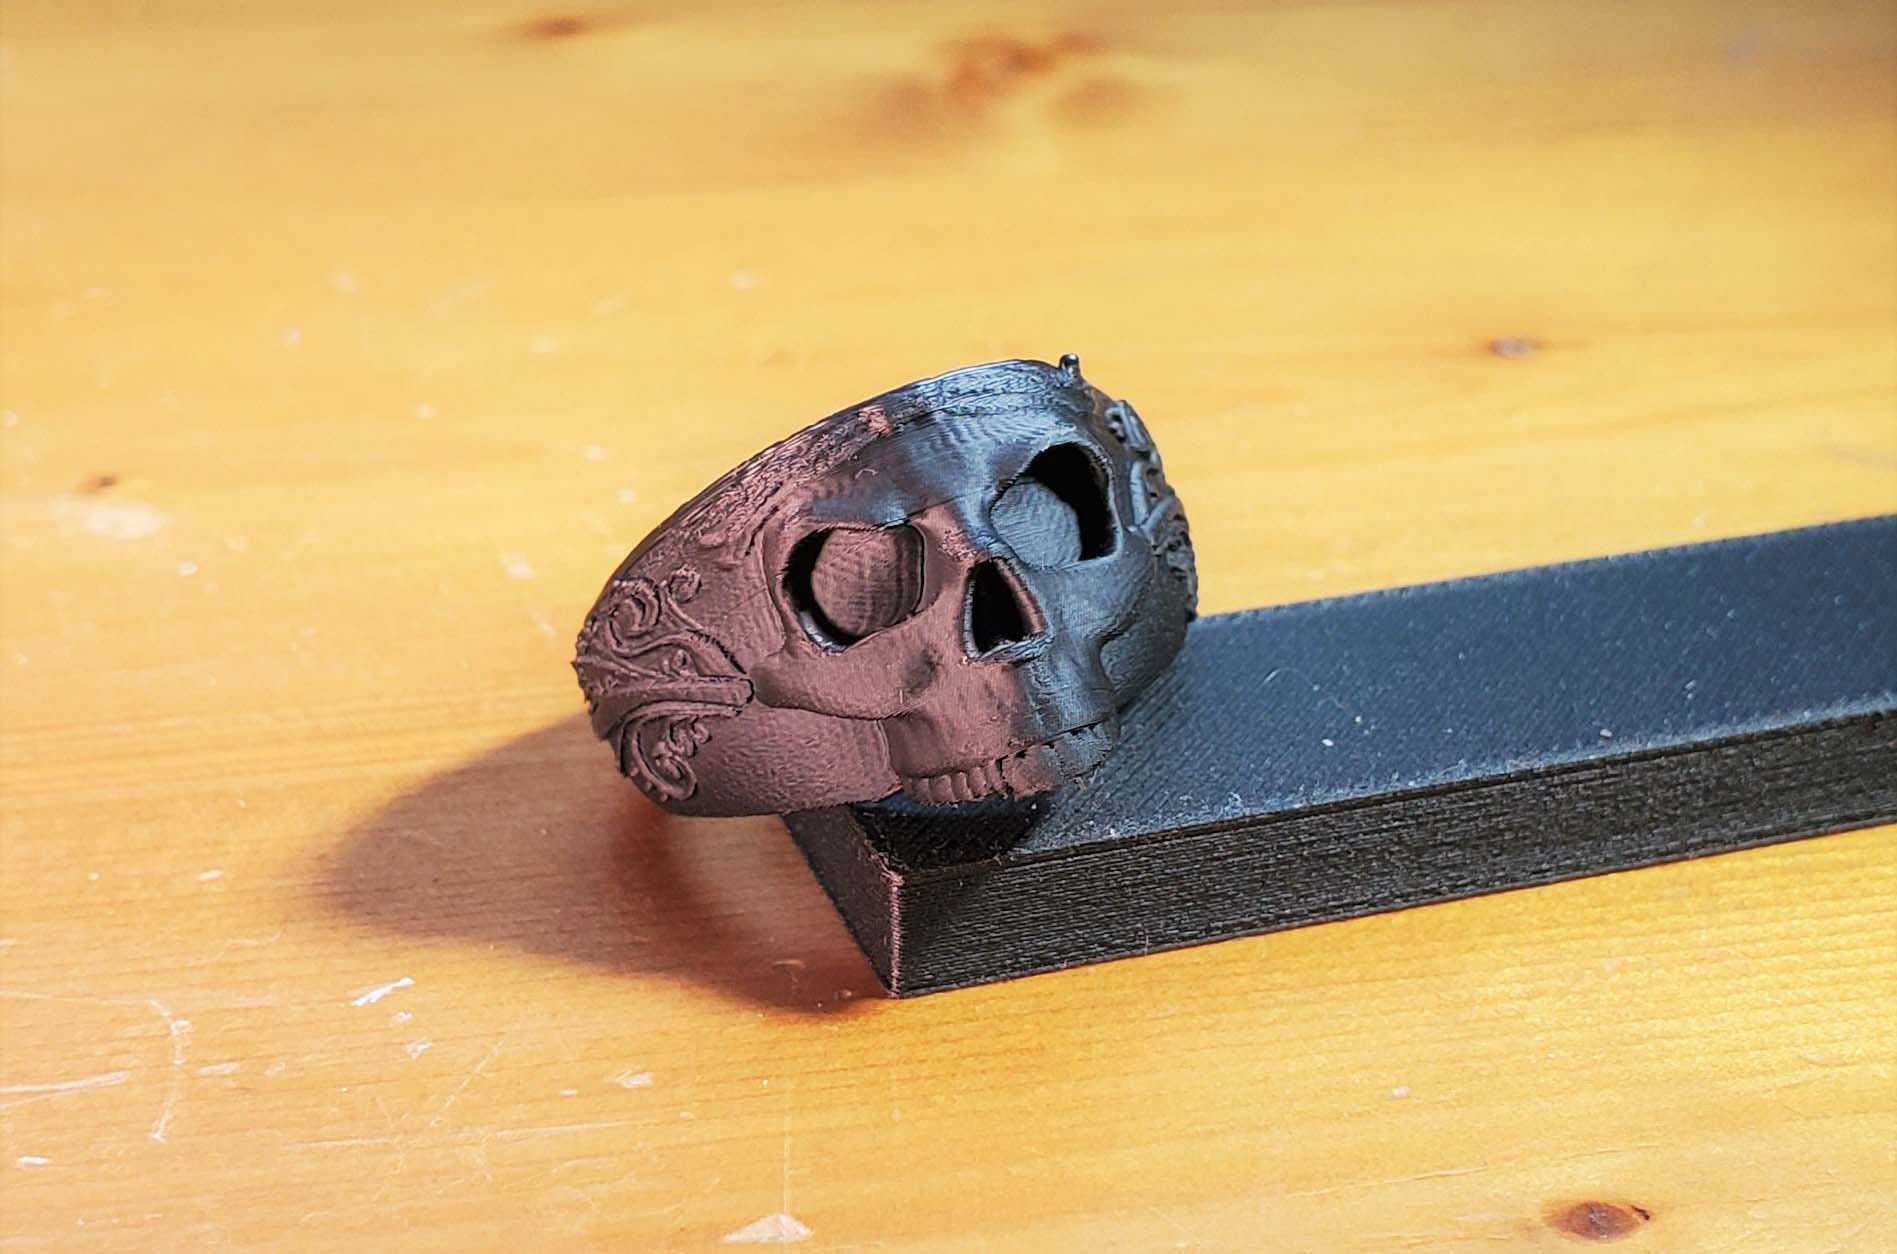
I literally said wow when I pulled this off the bed. The amount of fine detail captured is impressive to say the least. I also wanted to test the quality on the opposite end of the spectrum: a larger part printed quickly with thicker layers.
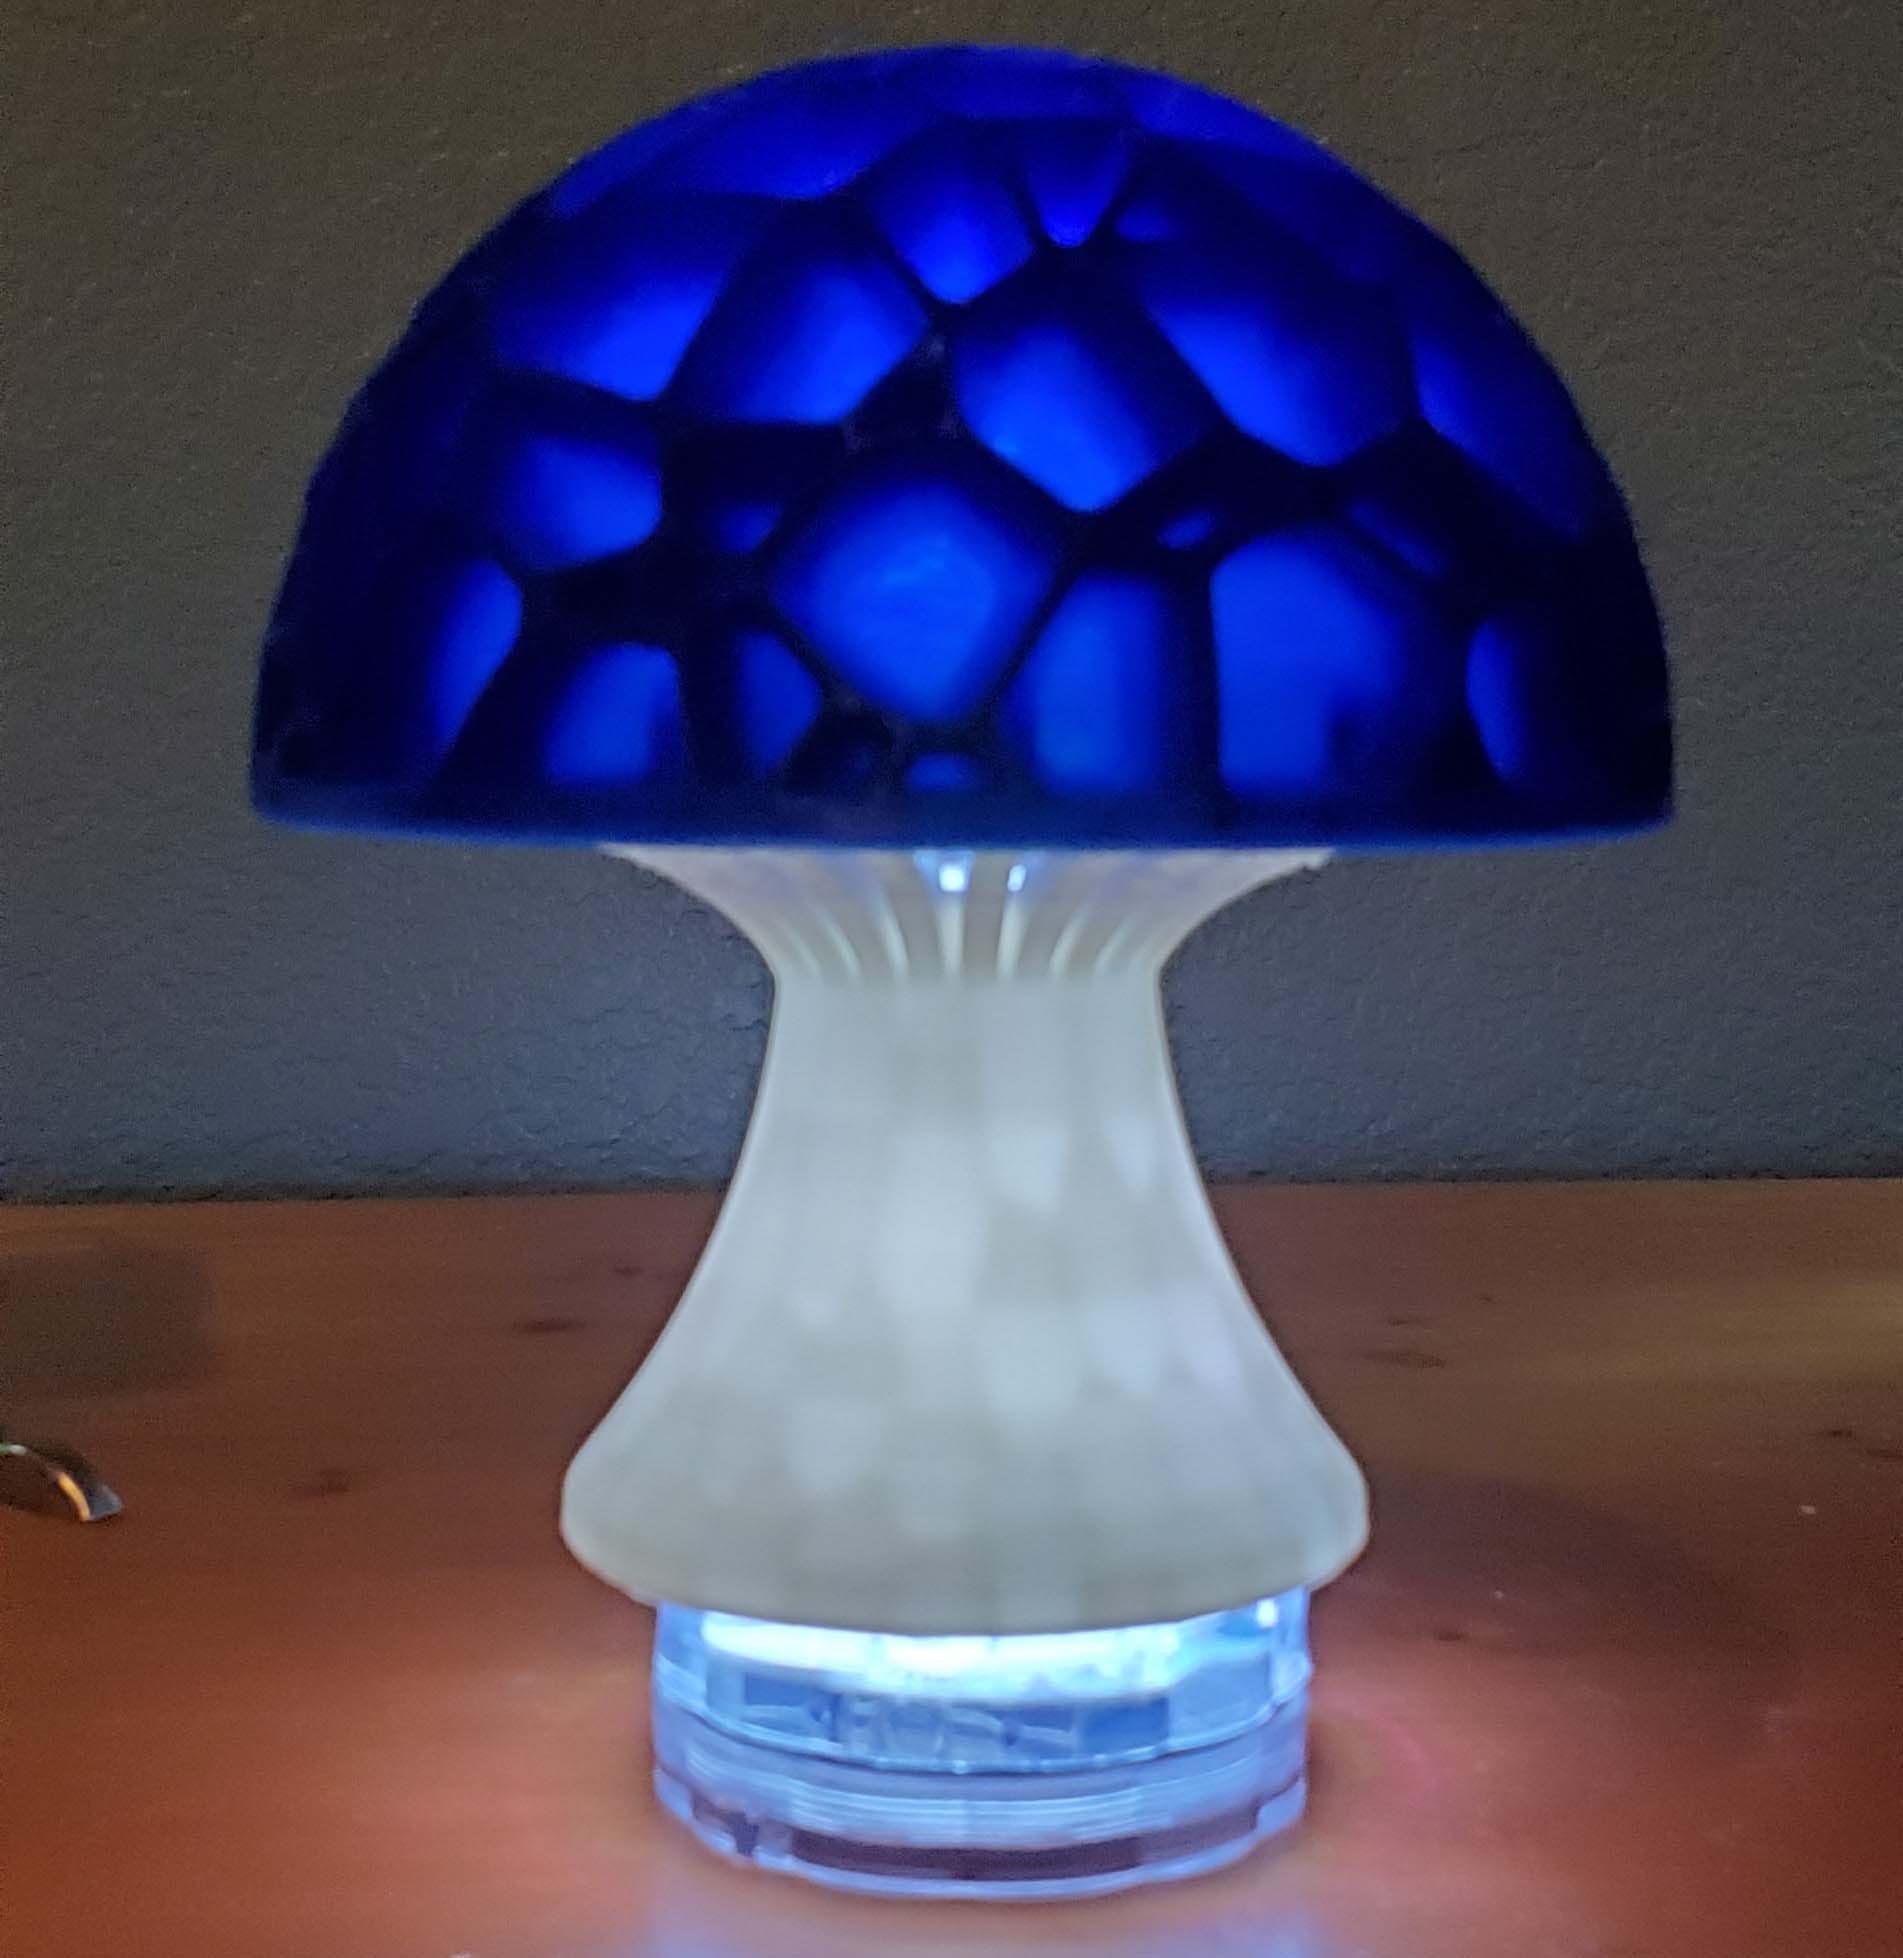
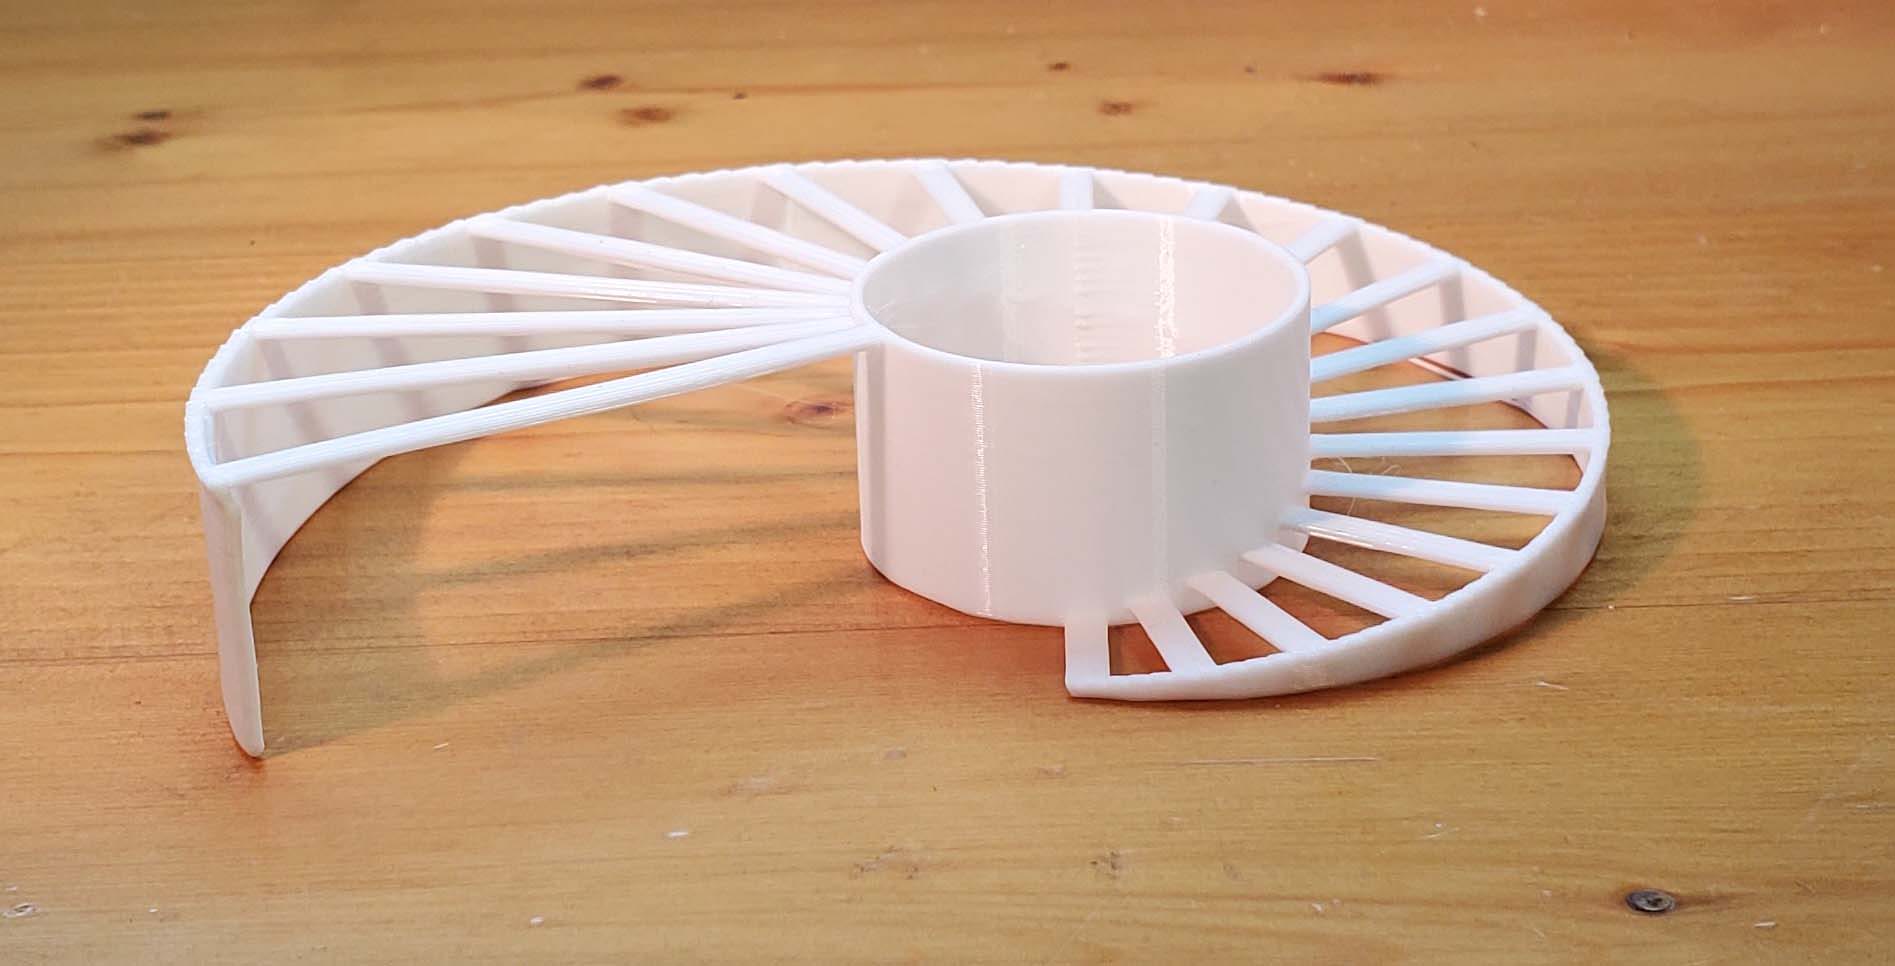
This Voronoi mushroom lamp was printed with 0.3mm layers and took only 13 hours. It’s still rather smooth too. Finally, I wanted to test the Creator 3’s ability to print in high detail over an extended period.
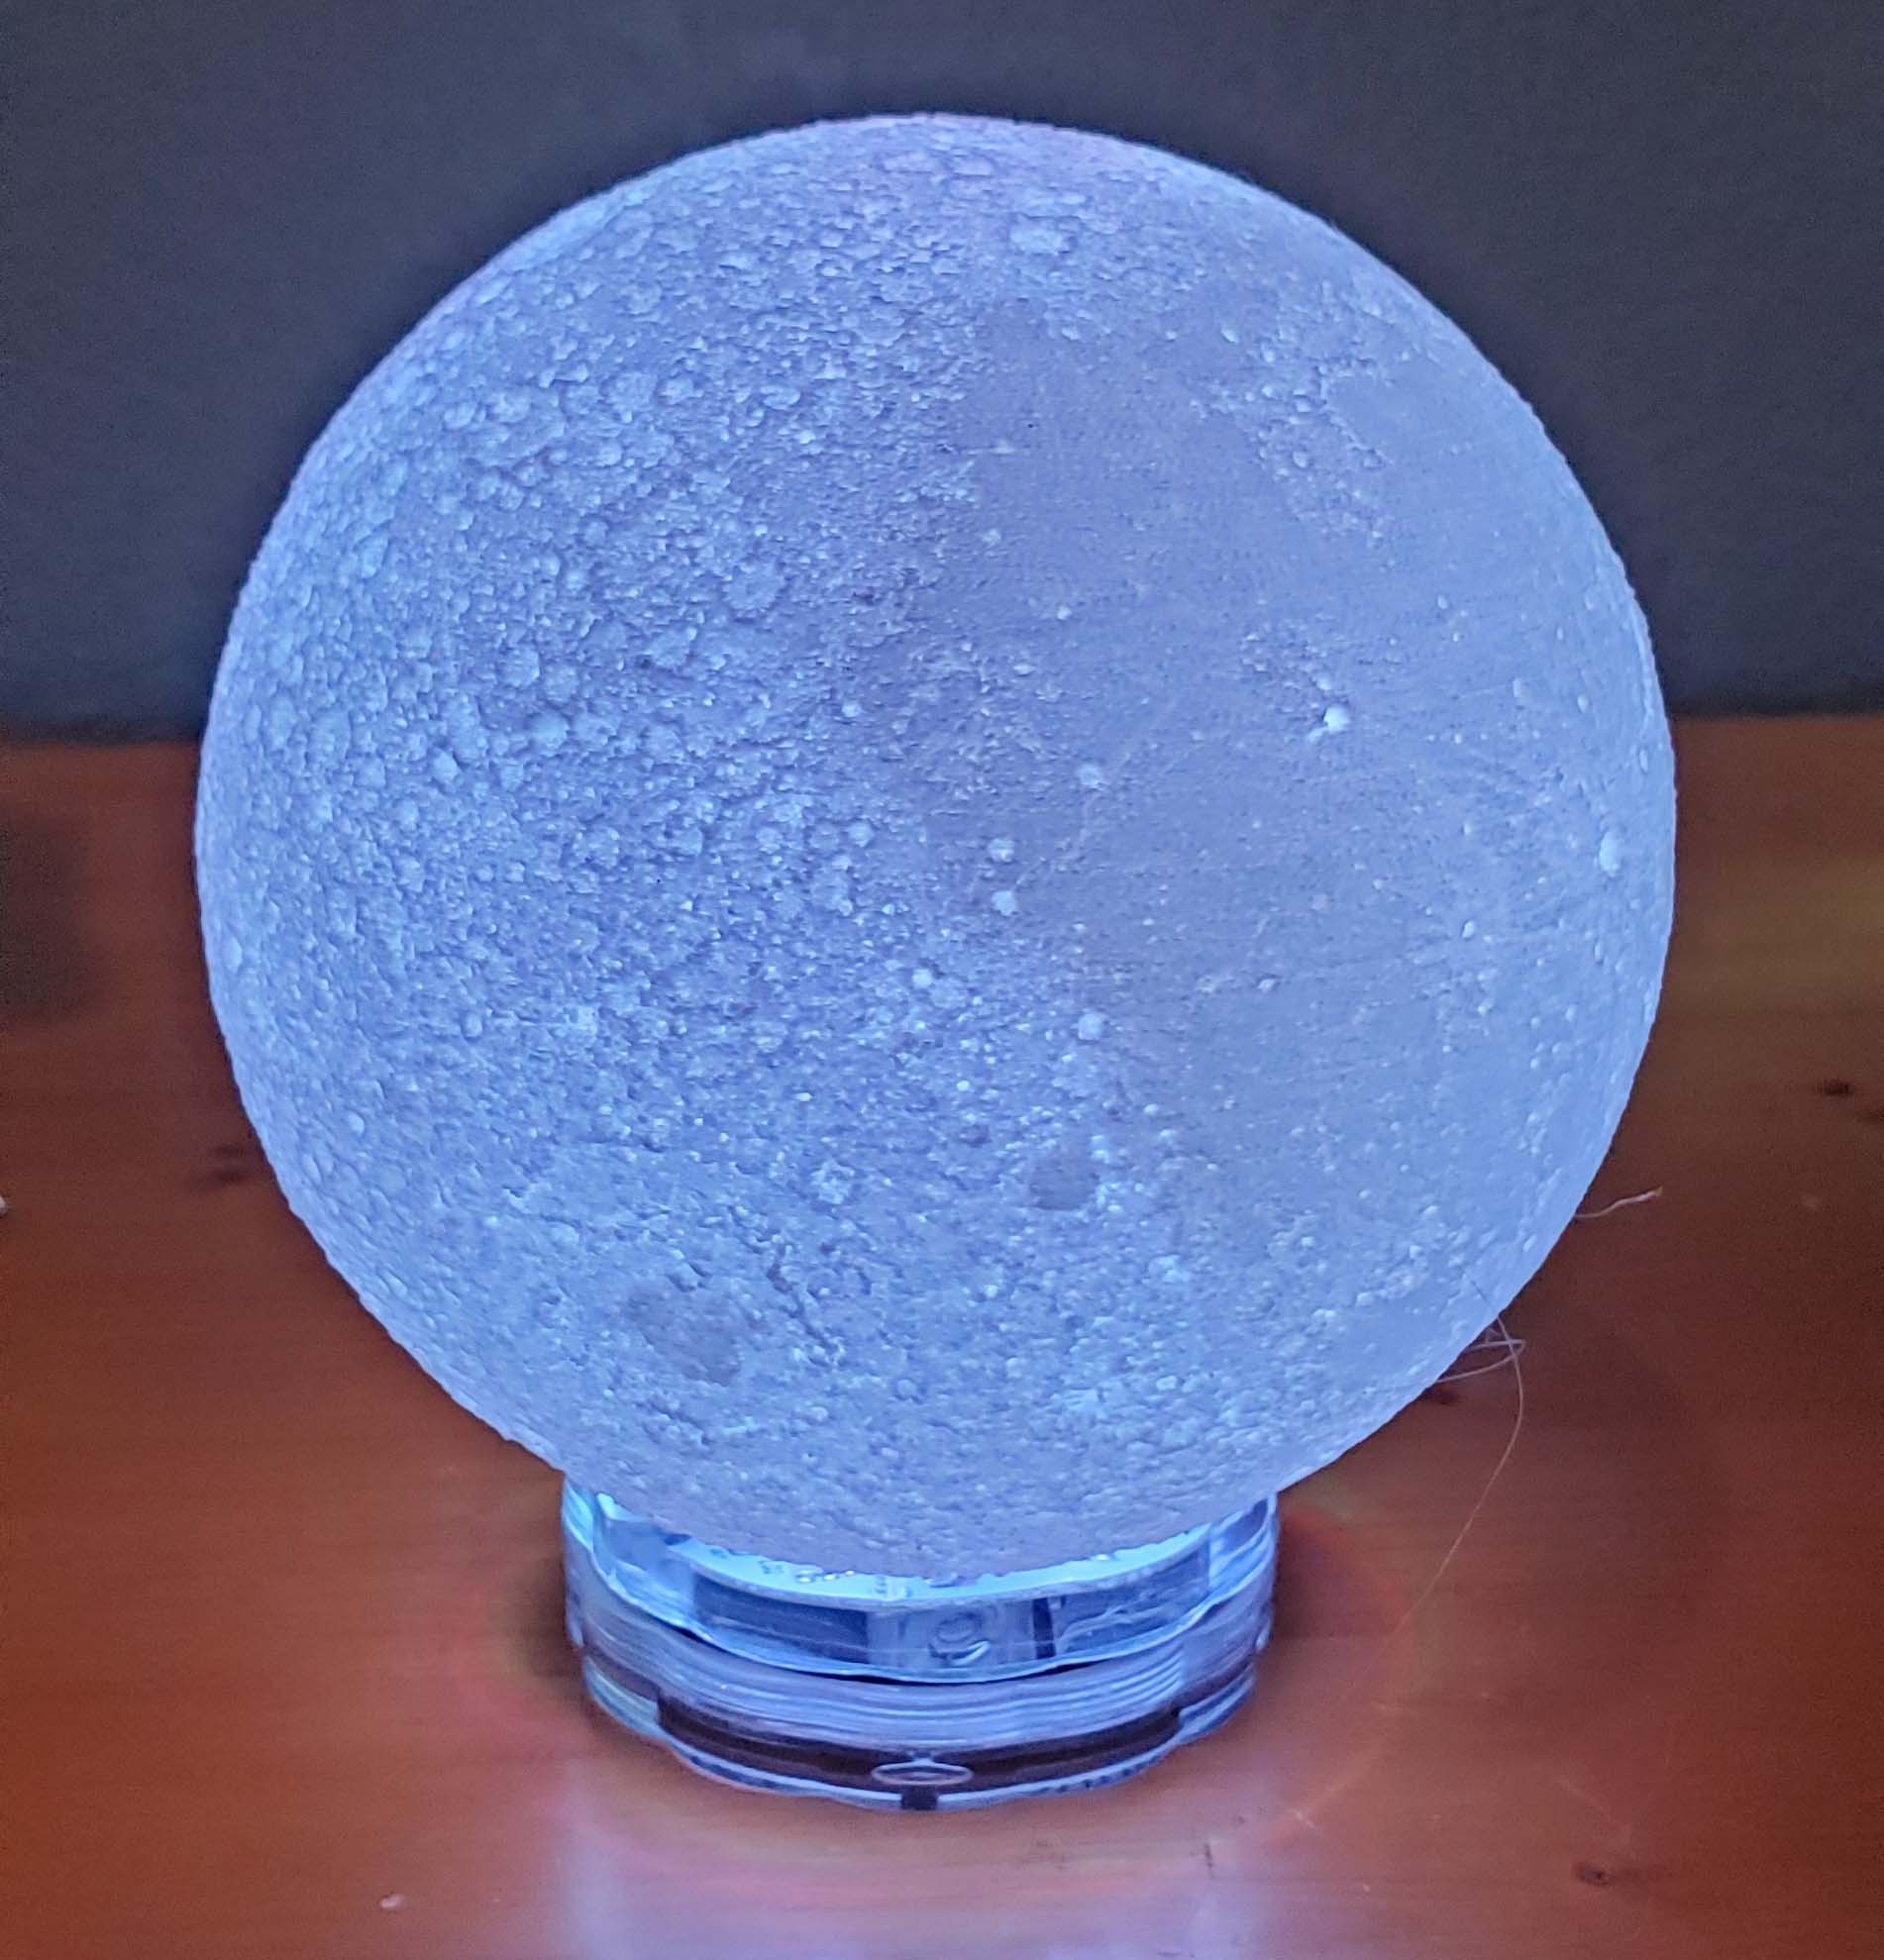
The High Detailed Moon Lamp suited the task perfectly. This 5” model was printed with 0.15mm layers and took about 20 hours to complete. It’s absolutely stunning in person. When I thought I was looking at layer lines, it was actually just a feature of the moon.
My Verdict
My only complaints with this printer are that rafts are required and the camera only works through a combination of OctoPrint and Polar Cloud, which is too much of a hassle to get working on a Windows PC because OctoPrint is meant to work with Raspberry Pi. It’s also kind of loud with its four air filtration fans. Otherwise, I thoroughly enjoyed working with this machine.
The Creator 3 is a feature-rich 3D printer that’s more than capable of printing whatever is thrown at it. Even though it can handle industrial-grade materials, it’s incredibly user friendly. The print profiles work well right out of the box. IDEX printing provides so much more functionality than other dual-extruder printers. And the all-metal frame and heavy duty linear bars make this printer reliable while enabling it to produce highly detailed prints. A large swath of SMEs (small to medium enterprises) could benefit from having a Creator 3 in their corner.