Hands-On Review
The Mole 3D Scanner
It’s our first product review of the year, and also our first product review from our glorious new workshop / testing ground, and what better way to start with a newly released 3D scanner!
The Mole is a new structured light scanner from 3DMakerpro, who manufacture a variety of popular 3D scanners from consumers and professionals alike. It has a high level of accuracy, and is capable of producing both geometric and color scans for exporting as STL, OBJ and PLY file formats.
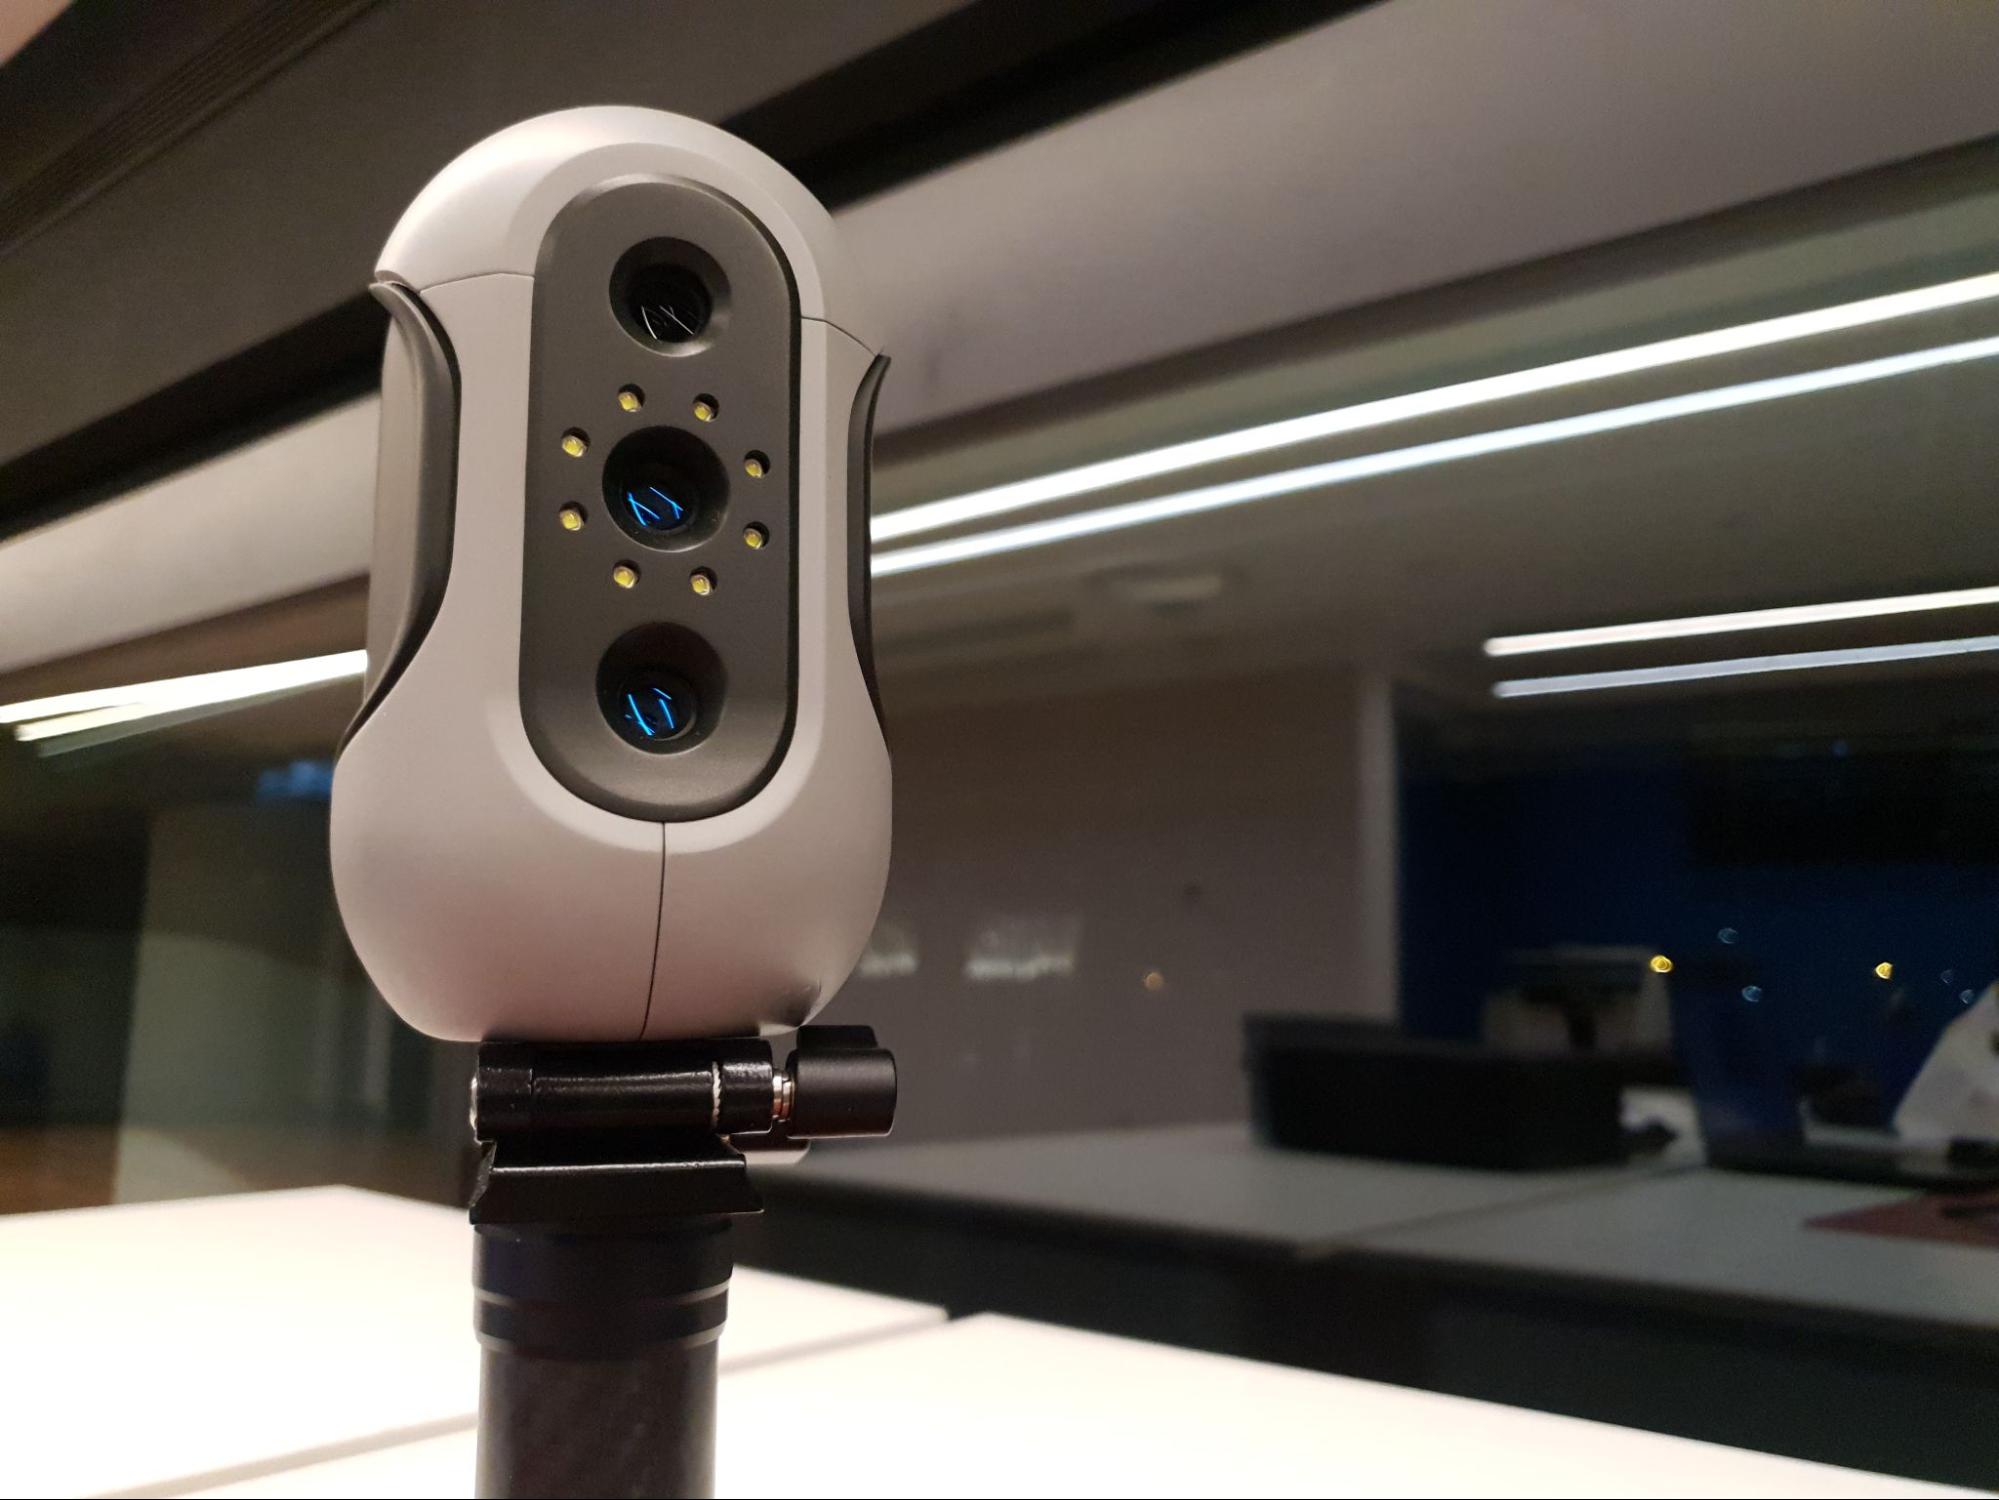
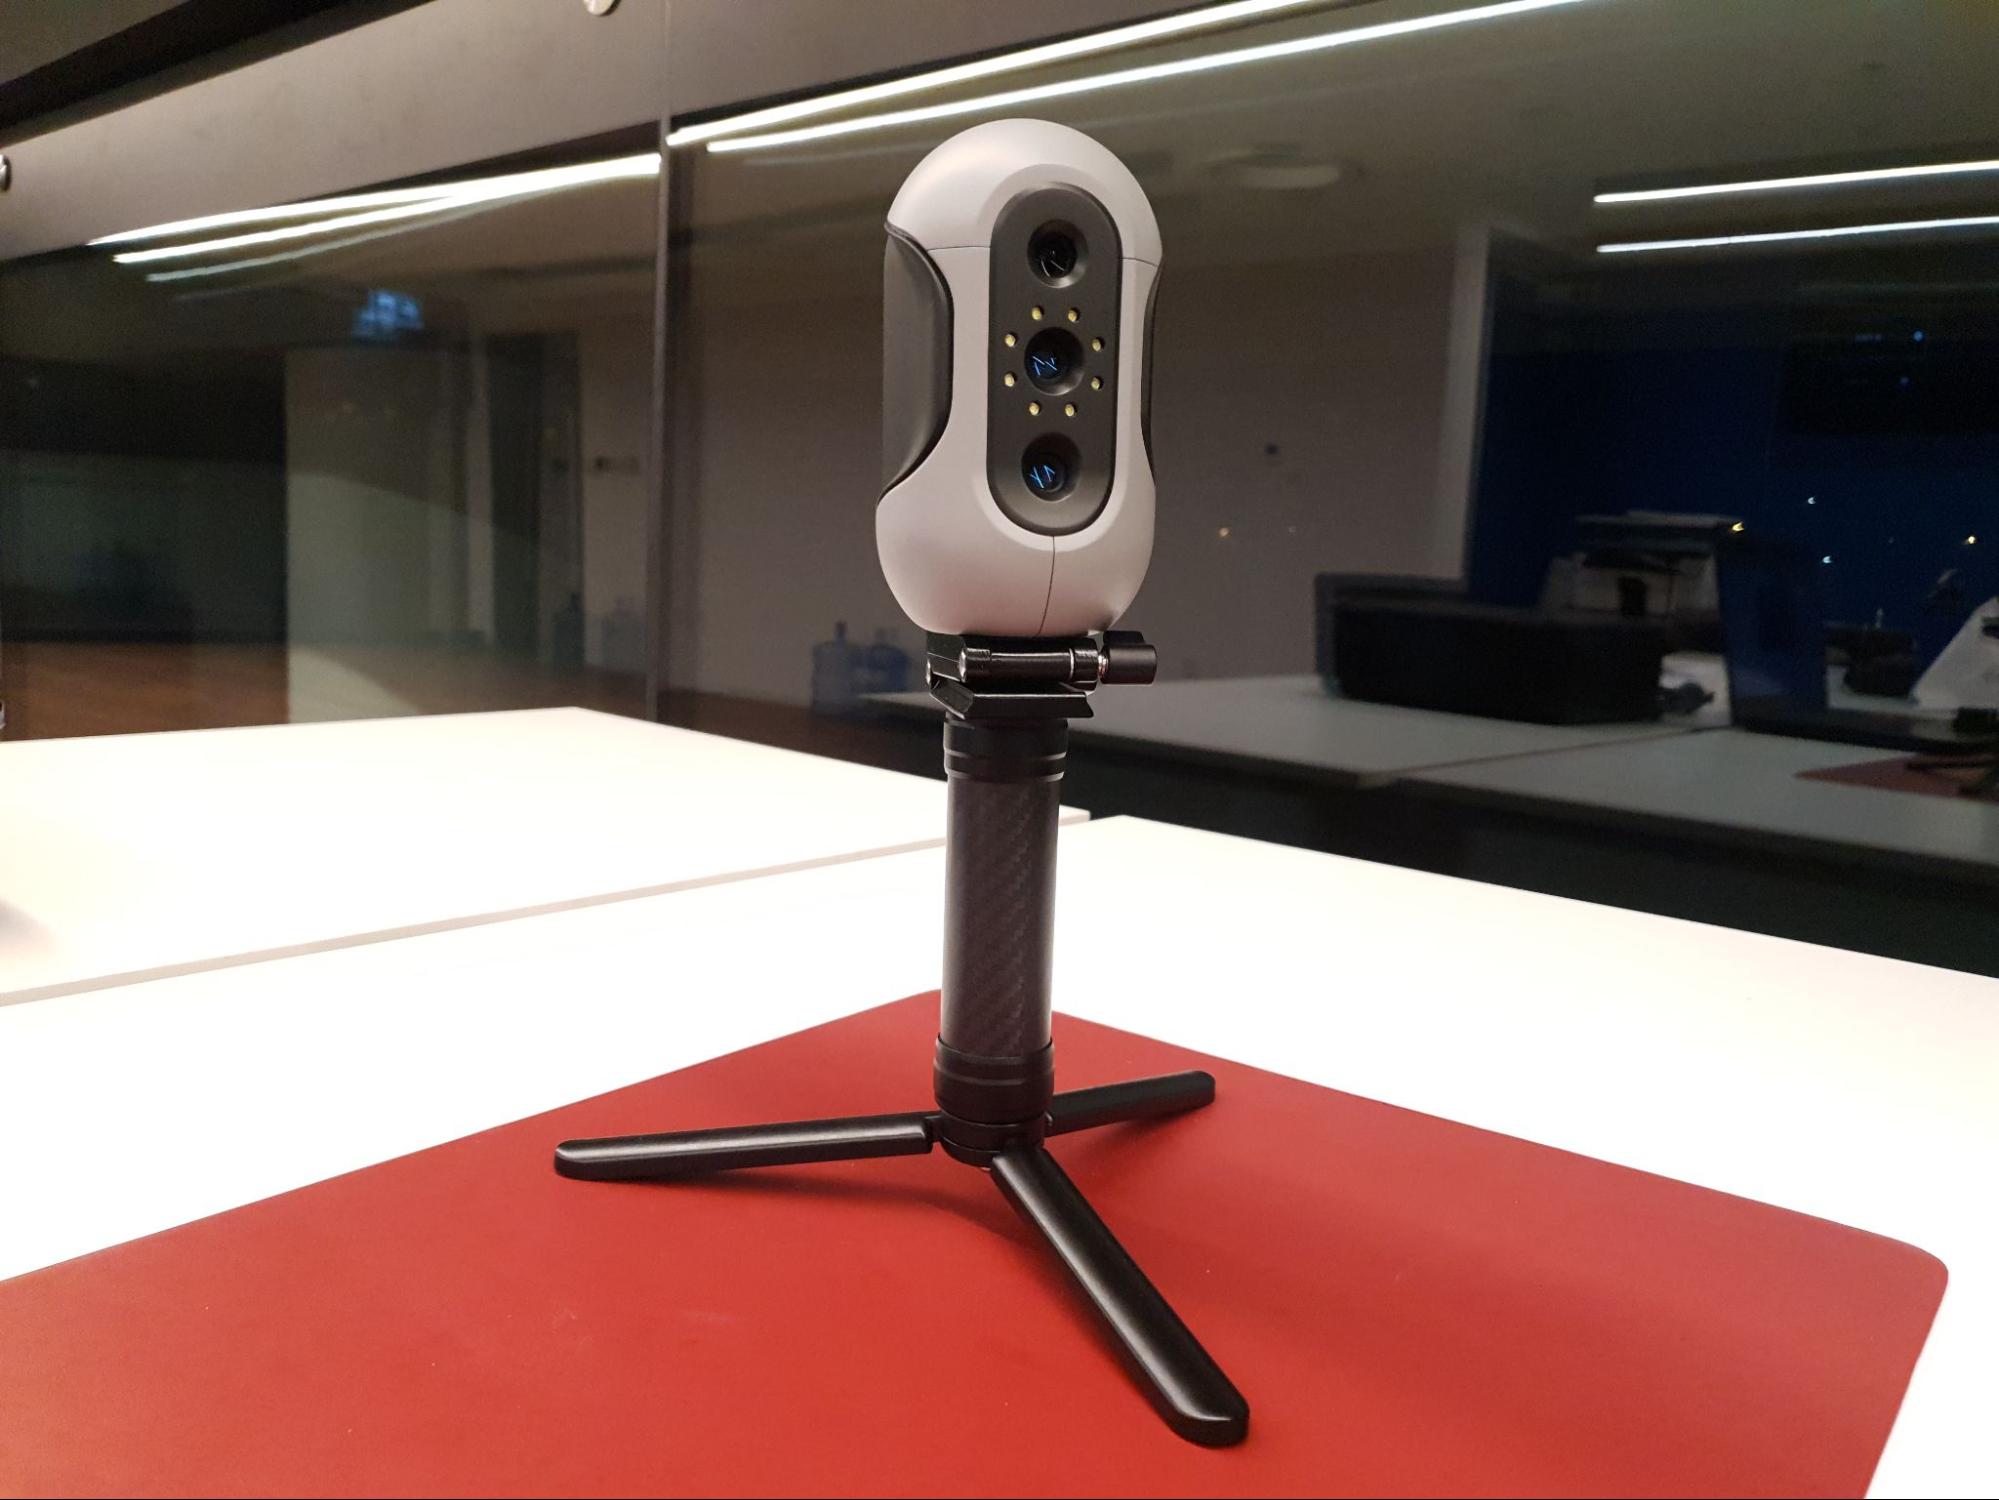
You can see the Mole mounted on its tripod in the picture below.

Overview
The Mole has several great features, including up to 0.05mm accuracy, black object scanning, and multispectral technology.
In addition, it features no-marker scanning thanks to an intelligent algorithm meaning you can scan an object as easily as shooting a video. This is useful for scanning bigger objects without the need to add stickers all over it for reference.
According to the pamphlet, you can even scan objects as big as a car door or a bumper with The Mole.
Before we take a look inside the box and crack on with the review, let’s take a look at the specifications of the scanner.
| Accuracy | 0.05mm |
| Resolution | 0.1mm |
| Work distance | 150 – 400mm |
| Single capture range | 200 x 100mm |
| Minimum scanning | 15 x 15 x 15mm |
| Frame rate | 10 fps |
| Light source | NIR |
| Dimensions | 141 x 80 x 80mm |
| Weight | 390g |
| Color texture | Extended support |
| Output format | OBJ / STL /PLY |
Setup
The Mole arrived nicely packaged, wrapped up in cushioned plastic, and comes in its own rugged ABS carry case.
The case contains the scanner, power and data cables, a carbon fiber tripod, and a USB-powered turntable, along with a turntable platter. The instruction manuals for both the scanner and the scanner software (JM-Studio) are included on an 8GB USB stick.
Setting up the scanner is easy. Just plug the cables in to their obvious locations (use the manual if you can’t figure it out), plug the USB end into the computer, and wait for it to detect the hardware and it will automatically assign drivers accordingly.
Installing the JM-Studio software is similarly easy. Simply extract the file from the archive, and run it. There are versions for both PC and Mac on the USB stick.
Running the software, we were presented with an introduction/guide that explains the user interface, and give a few pointers on how to use the software.
With the software and scanner setup, it was time to see the Mole in action.
Test Driving The Mole
The Mole manual states that there are two ways of scanning objects.
The first method (scanning by hand) is named “Easy Mode”, and the second method using the turntable is dubbed “Table Mode”. We tried both methods, and also tried combining the two also by hand-scanning an object on the turntable.
The Mole also has two SLAM modes available, with the first (geometry) for scanning rougher objects, and the second (texture) for scanning objects with colors and finer textures.
Table Mode
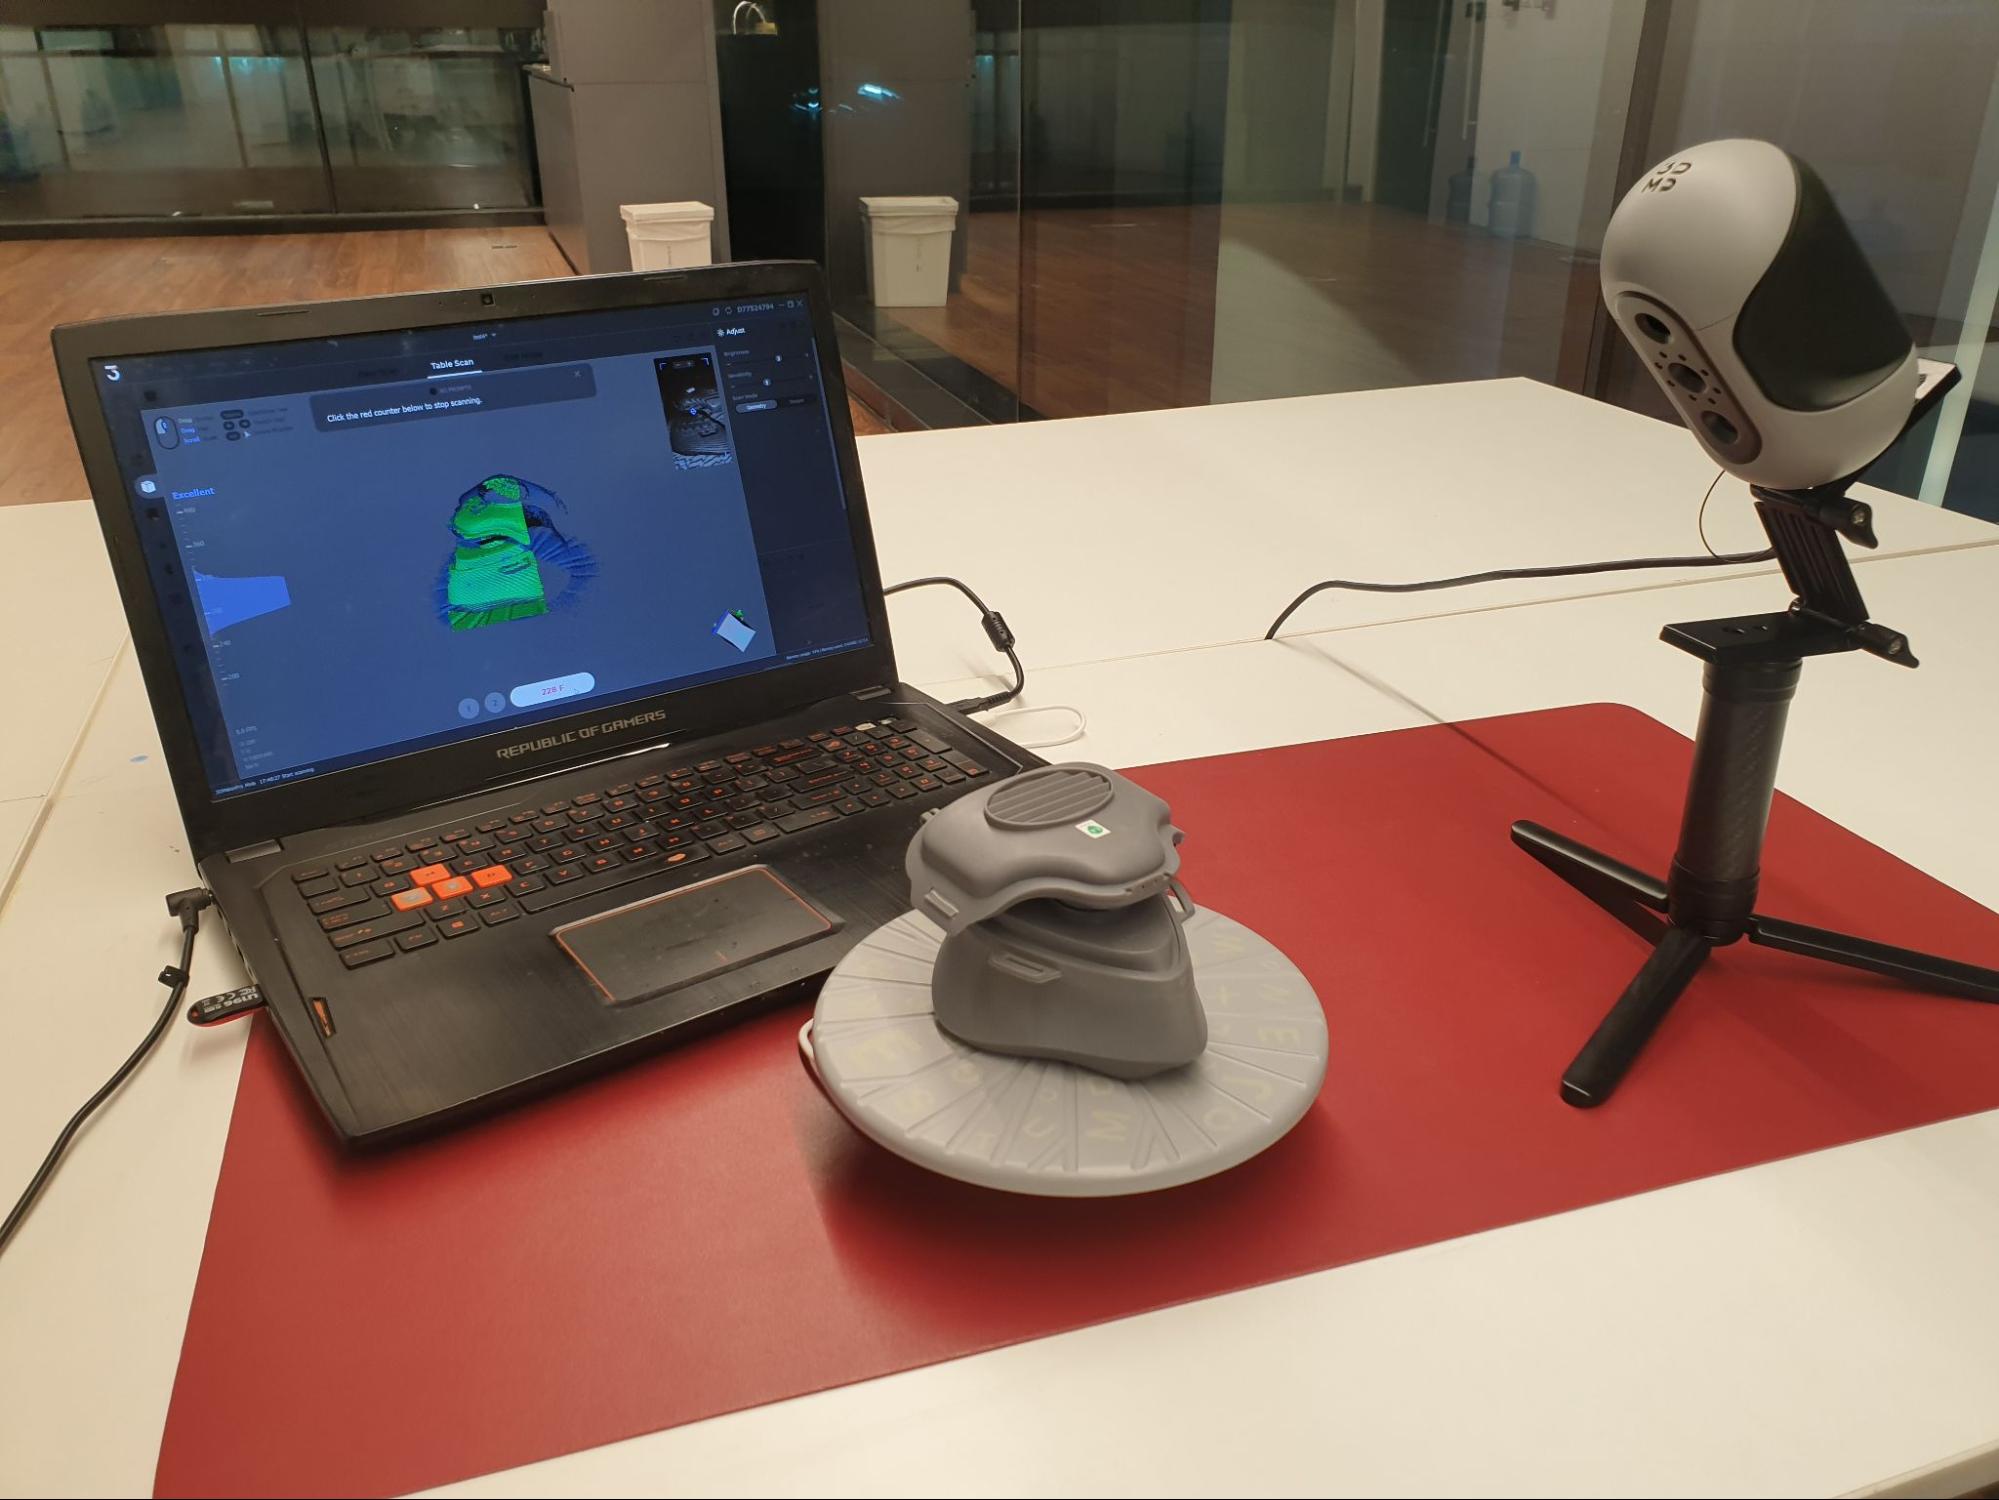
With Table Mode, the turntable is plugged into a USB power source (the laptop in this case) and it begins slowly turning at a constant rate. The Mole is mounted to the tripod, and pointed in the approximate direction of the turntable.
Selecting Table Mode in the software enables a Preview button, which when clicked allows positioning of the item to be scanned in the correct place relative to the scanner. Here, the brightness and sensitivity can be adjusted before commencing the scan.
Once the item was positioned to satisfaction, the preview ended and the process for masking/removing the turntable from the scan was initiated. This is achieved by removing the item from the turntable, and scanning the turntable so that the software can differentiate it from the proper scan. Once this process was complete, the item was placed back onto the turntable and the full scan was ready to begin.
For the Table Mode test, we used a dust mask that we found in storage, as you can see in the image below. We used this item, as it has a nice matt finish, isn’t too reflective, and has some interesting geometric features.
For this scan, we opted to scan the geometry only, by selecting “geometry” from the SLAM menu.
Naturally, the scan required several passes to get the complete shape, as parts of the mask were obscured when it was placed on the turntable.
Scan Alignment
Capturing the complete geometry of the part is no problem in Table Mode, as there are options to “Amend” the scan, and to “Align” multiple scans so they form the complete shape of the object.
Clicking Amend allows one to scan the item from different angles, by physically flipping the item over so the obscured features are now on top. The scan can be repeated as many times as needed, clicking Amend to add a new scan from a different angle each time. The Amend function can also be used to create scans of larger objects in Easy Mode.
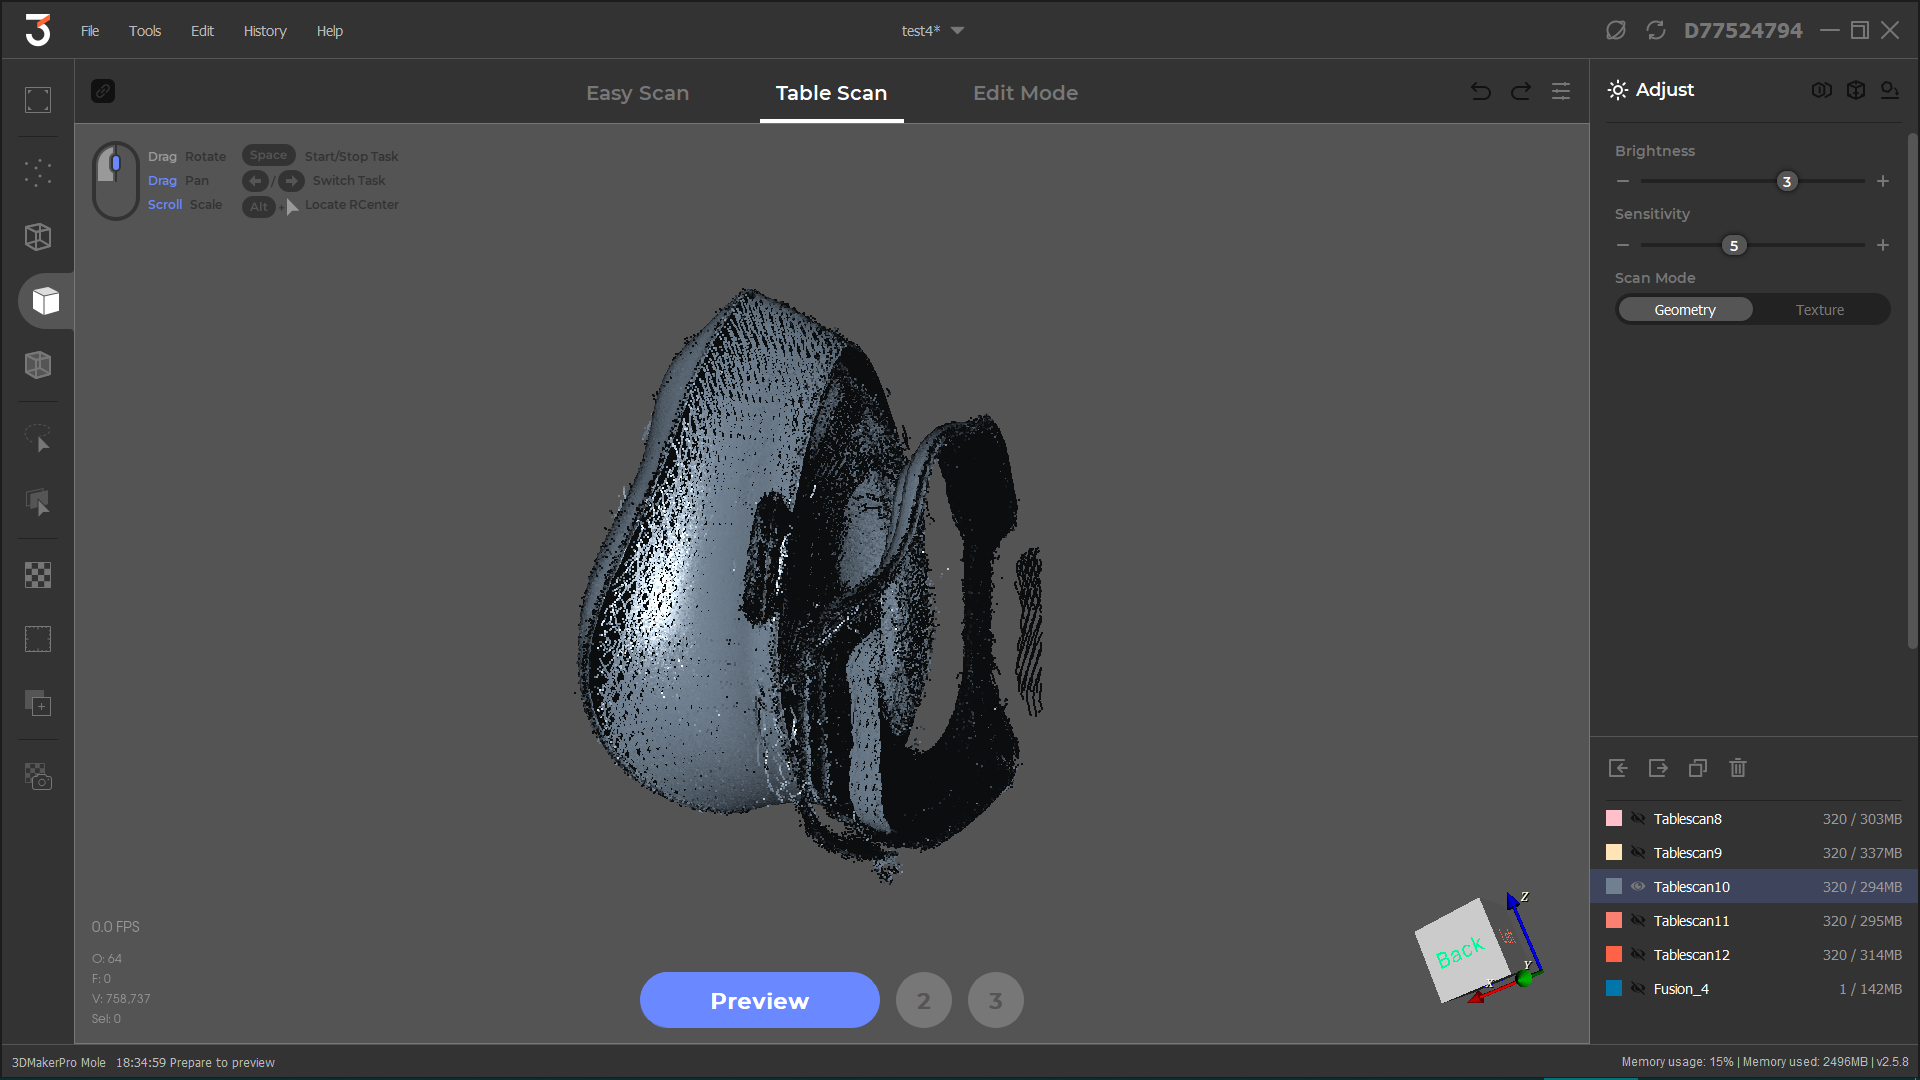
The image below shows the scan from the right hand side of the mask, with the left side obscured due to it resting on the turntable.

Overall, to build up the full geometry of the mask took 6 different scans. After the scans were completed, they were aligned with just one click, using the Align button.
The image below shows the item after it was flipped over on the turntable, and a second scan was added using the Amend function.
Alignment can be done both automatically or manually. With manual alignment, the user must select 3 points on each scan to use as a reference for alignment.
We didn’t need to do that, as the auto alignment worked just fine, bringing the different scans into one coherent shape.
Once the alignment was completed, the scan data was processed before converting it to a proper 3D part file. The processing stage includes fusion of the scans, noise removal, repair, and a simplify option, where the number of facets in the resulting 3D part can be reduced.
The resulting 3D “fusioned” model can be exported as an OBJ or STL file, for use in whatever application you need it for next.
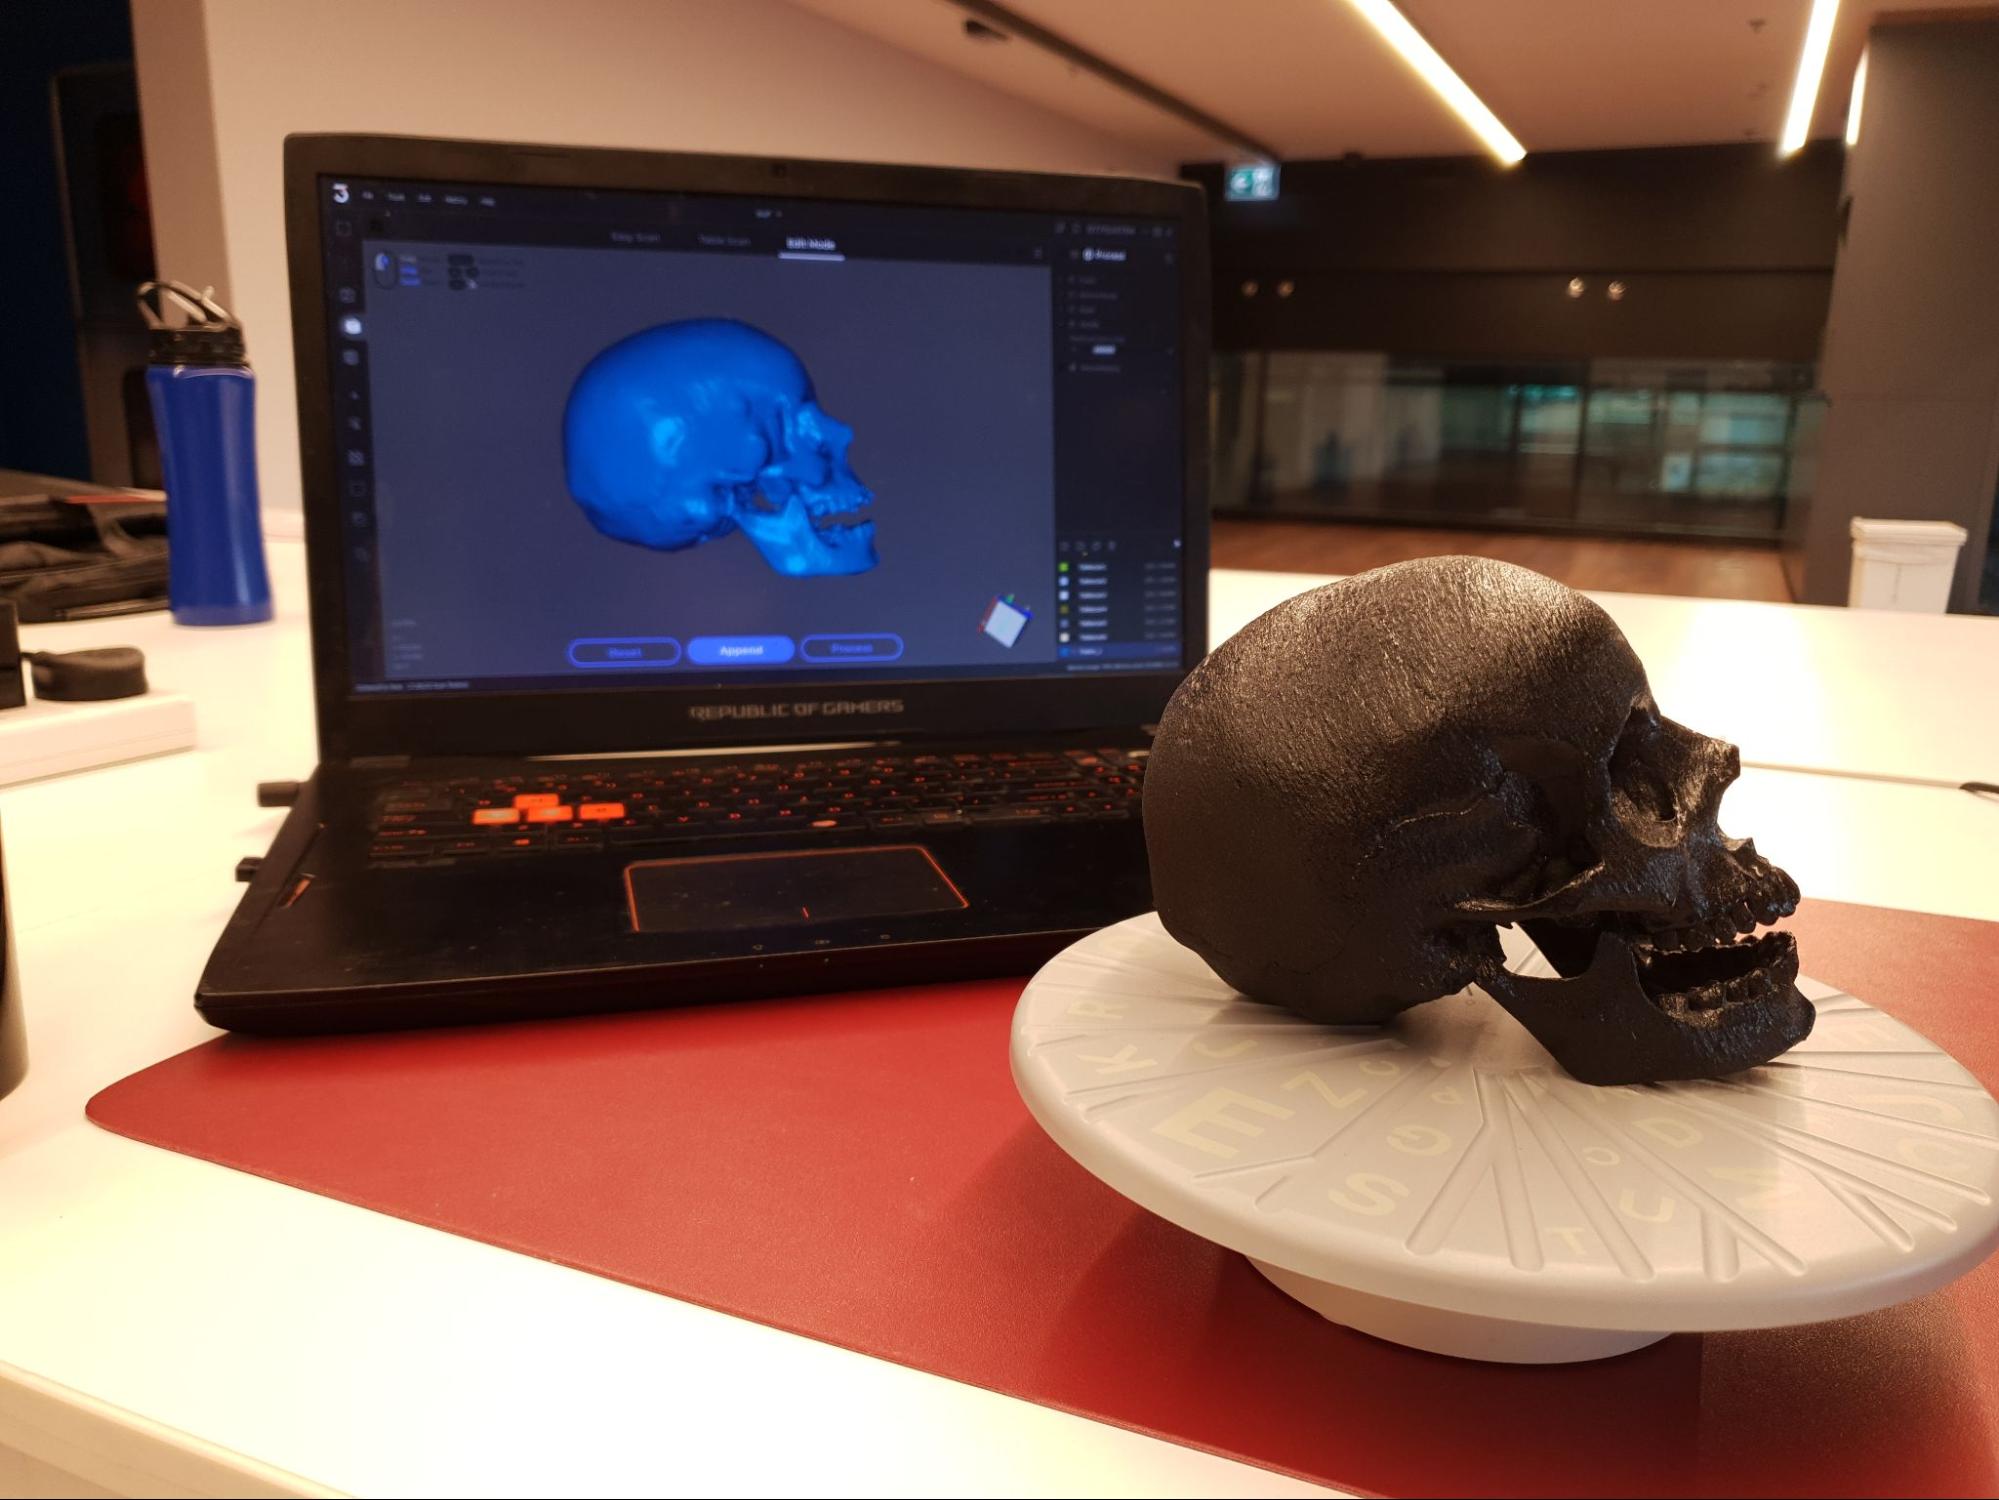
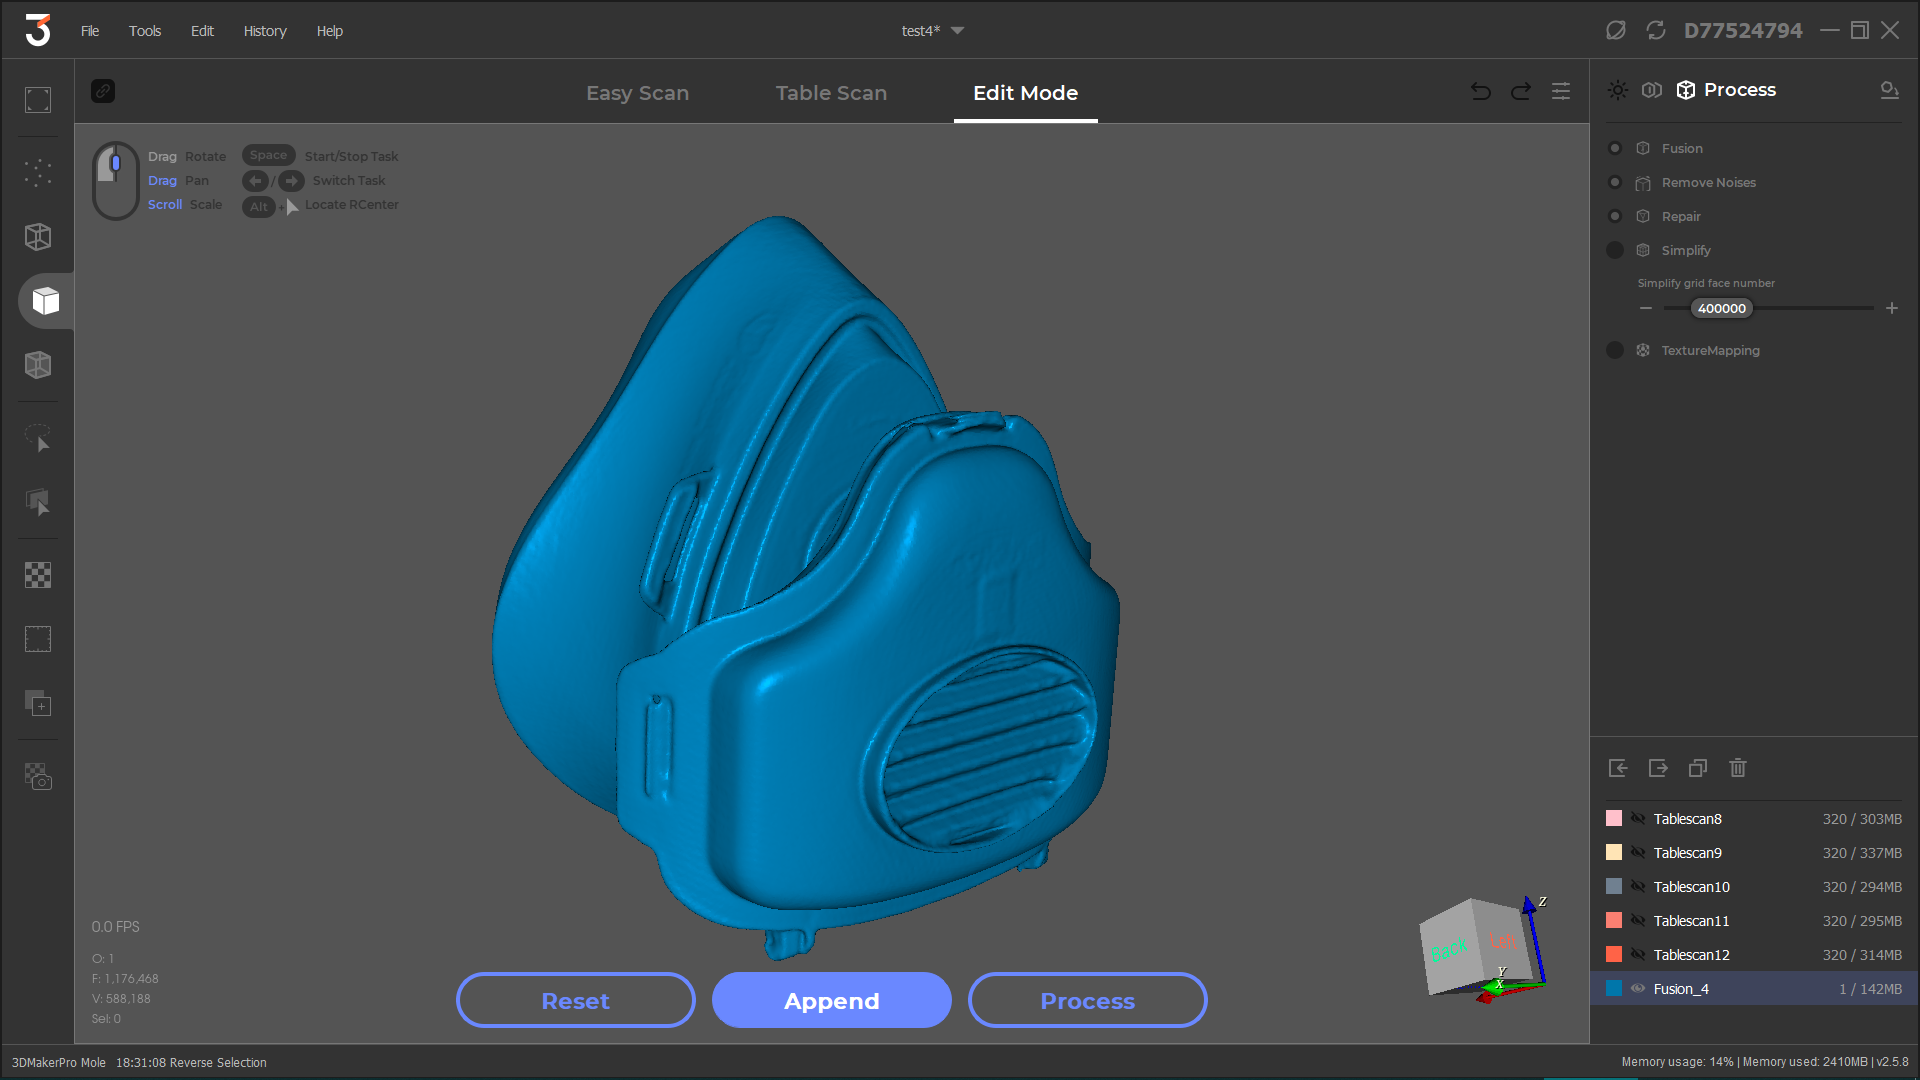
You can see the final result of our table-scanned mask model in the image below.
Not bad for a first attempt!
Overall, scanning with the Table Mode is pretty easy, and we were able to follow the workflow without any issues. Note, some items (especially reflective or transparent ones) will need some kind of coating in order to obtain a successful scan. This is all explained in the guide when you start the JM-Studio software up.
Texture Mode
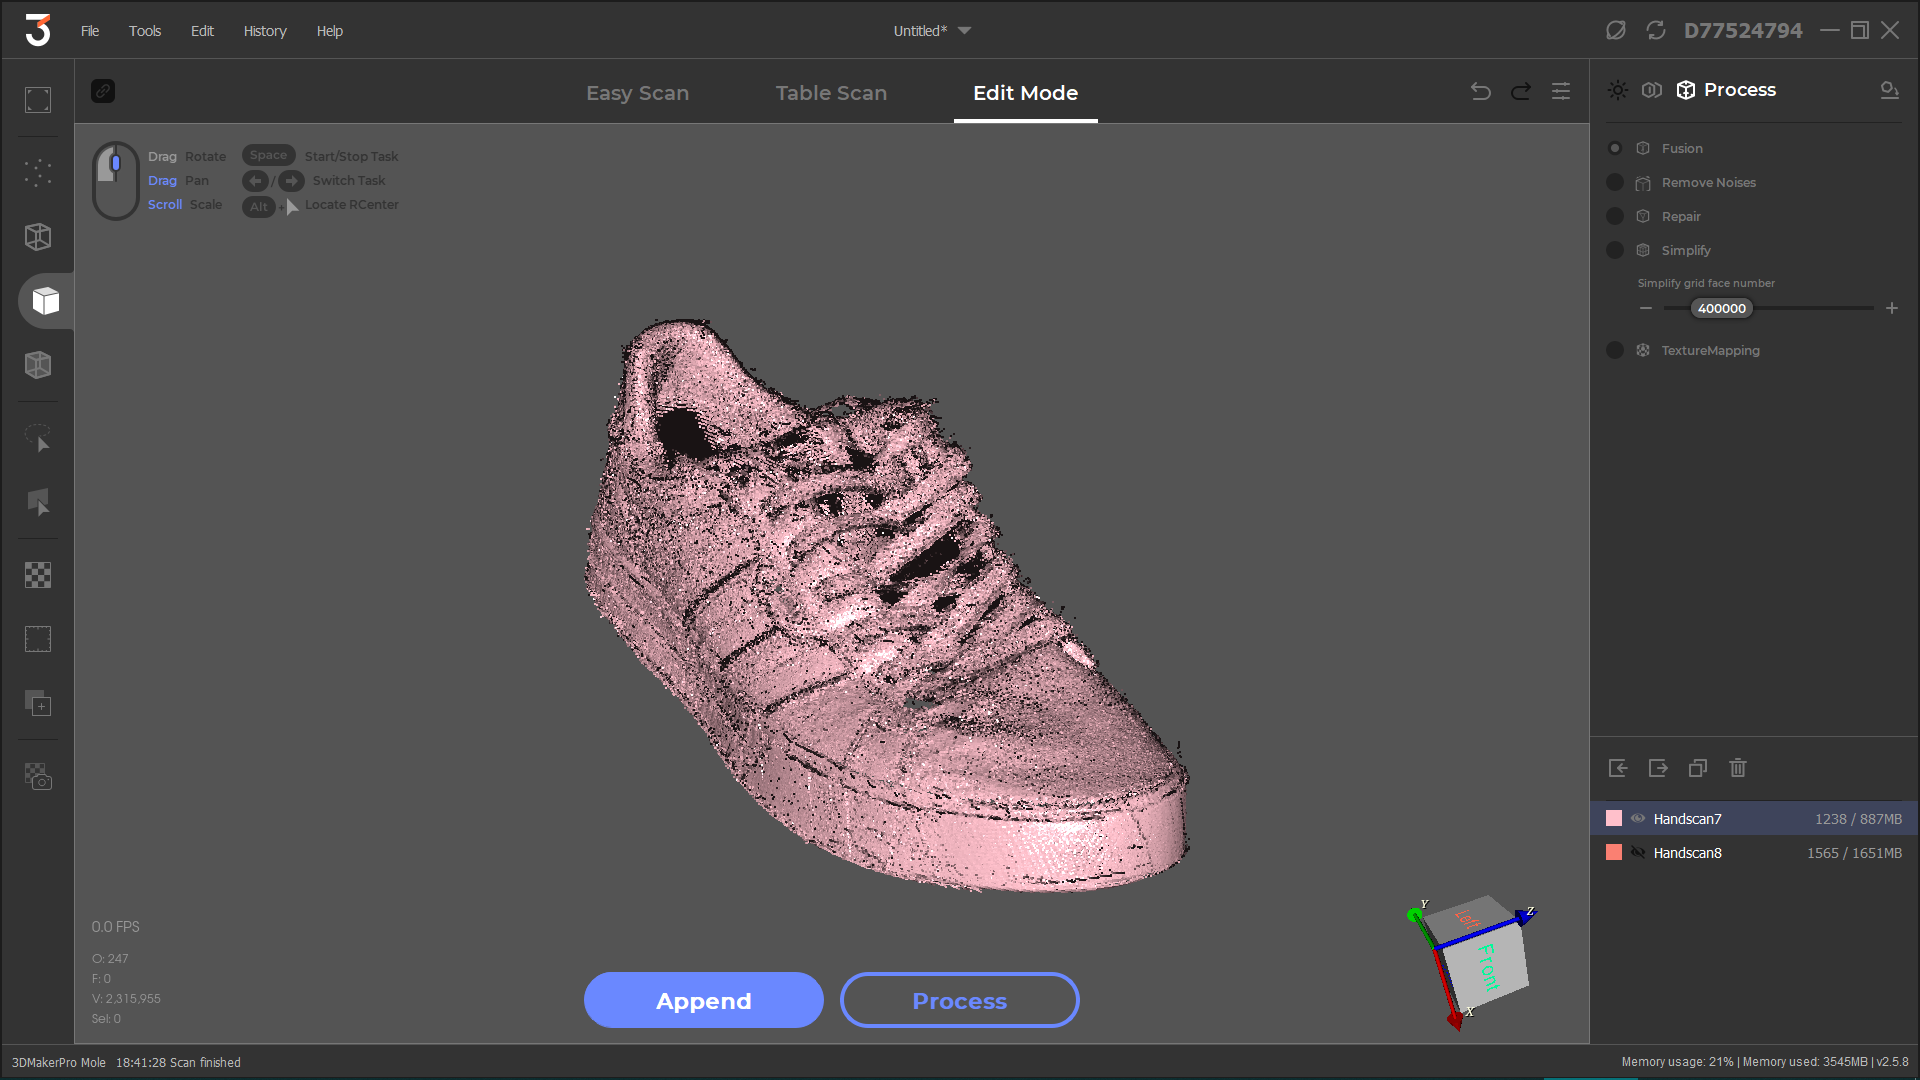
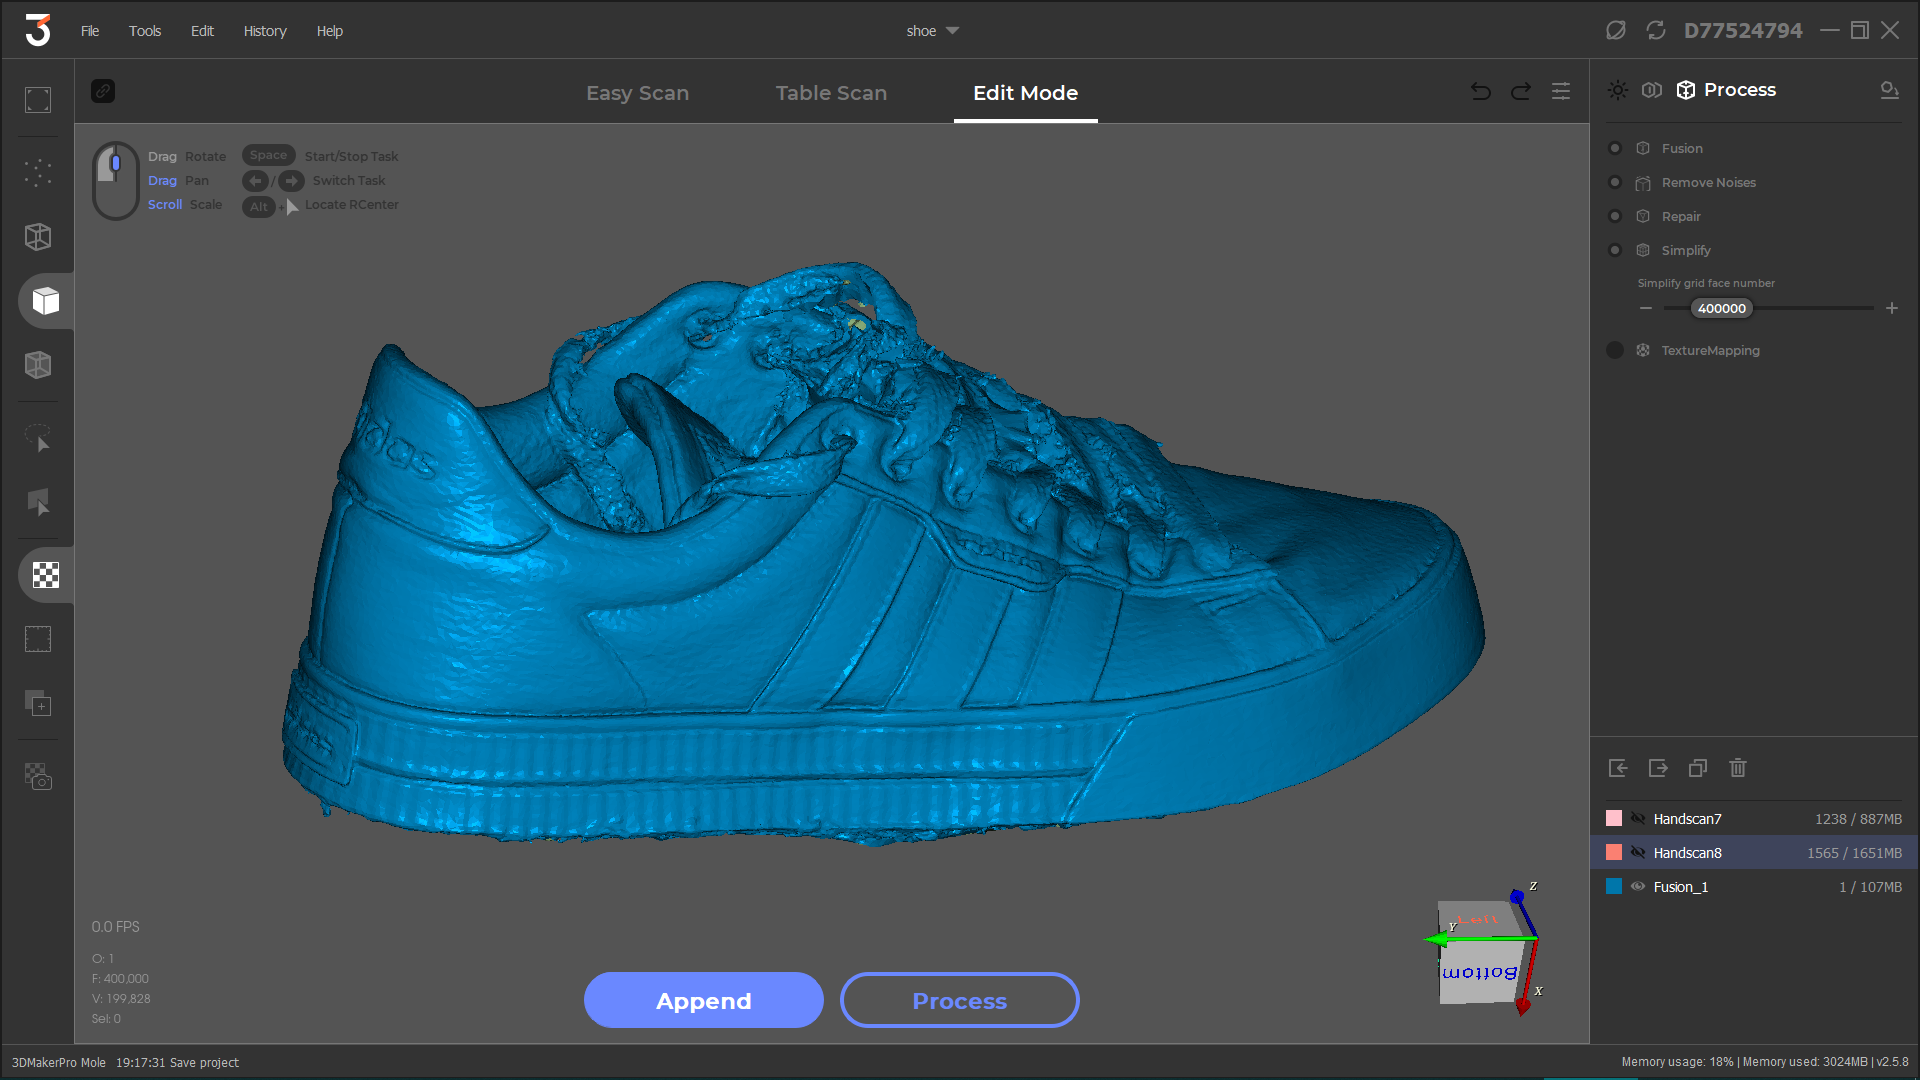
To try the Texture mode, a shoe was placed on the turntable, and Easy Mode was selected, so the scanner was operated by hand. This removed the need for flipping the shoe over and aligning the scans.
You can see the result of the geometric scan in the image below.
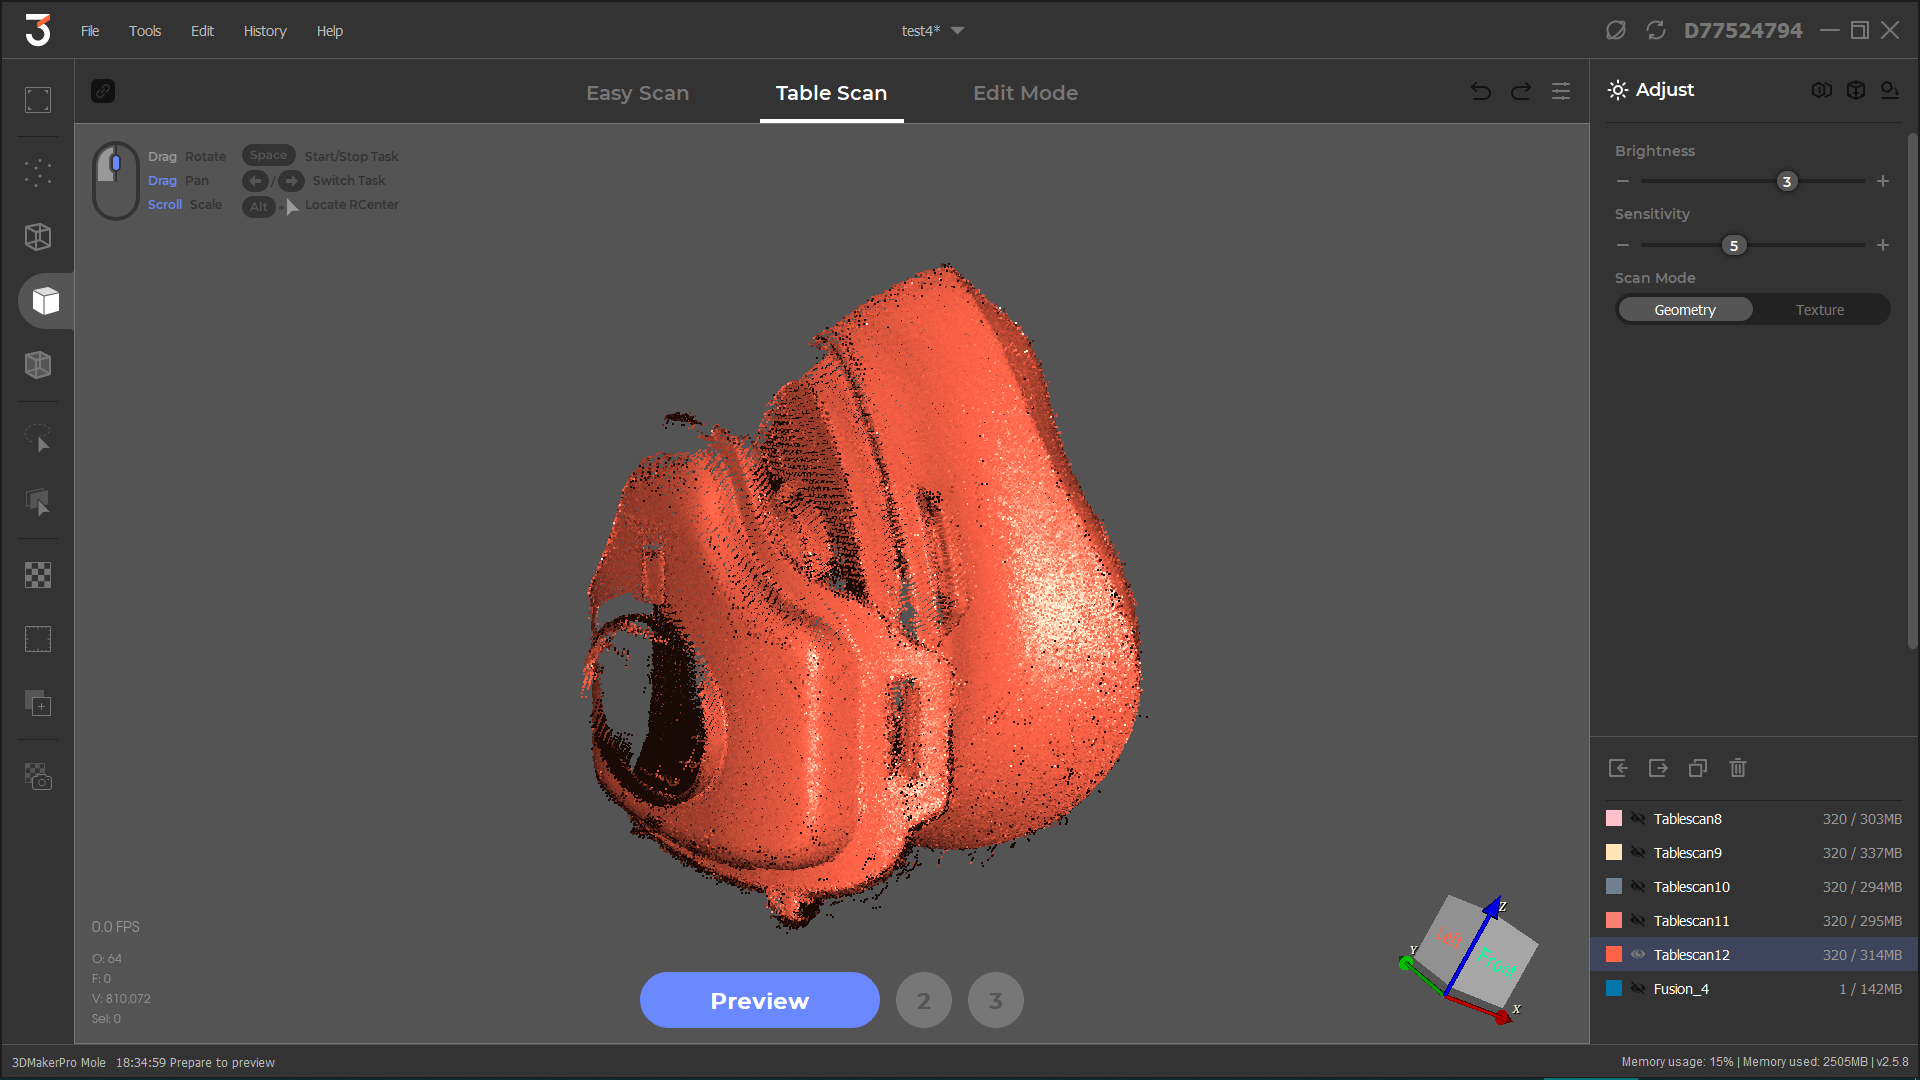
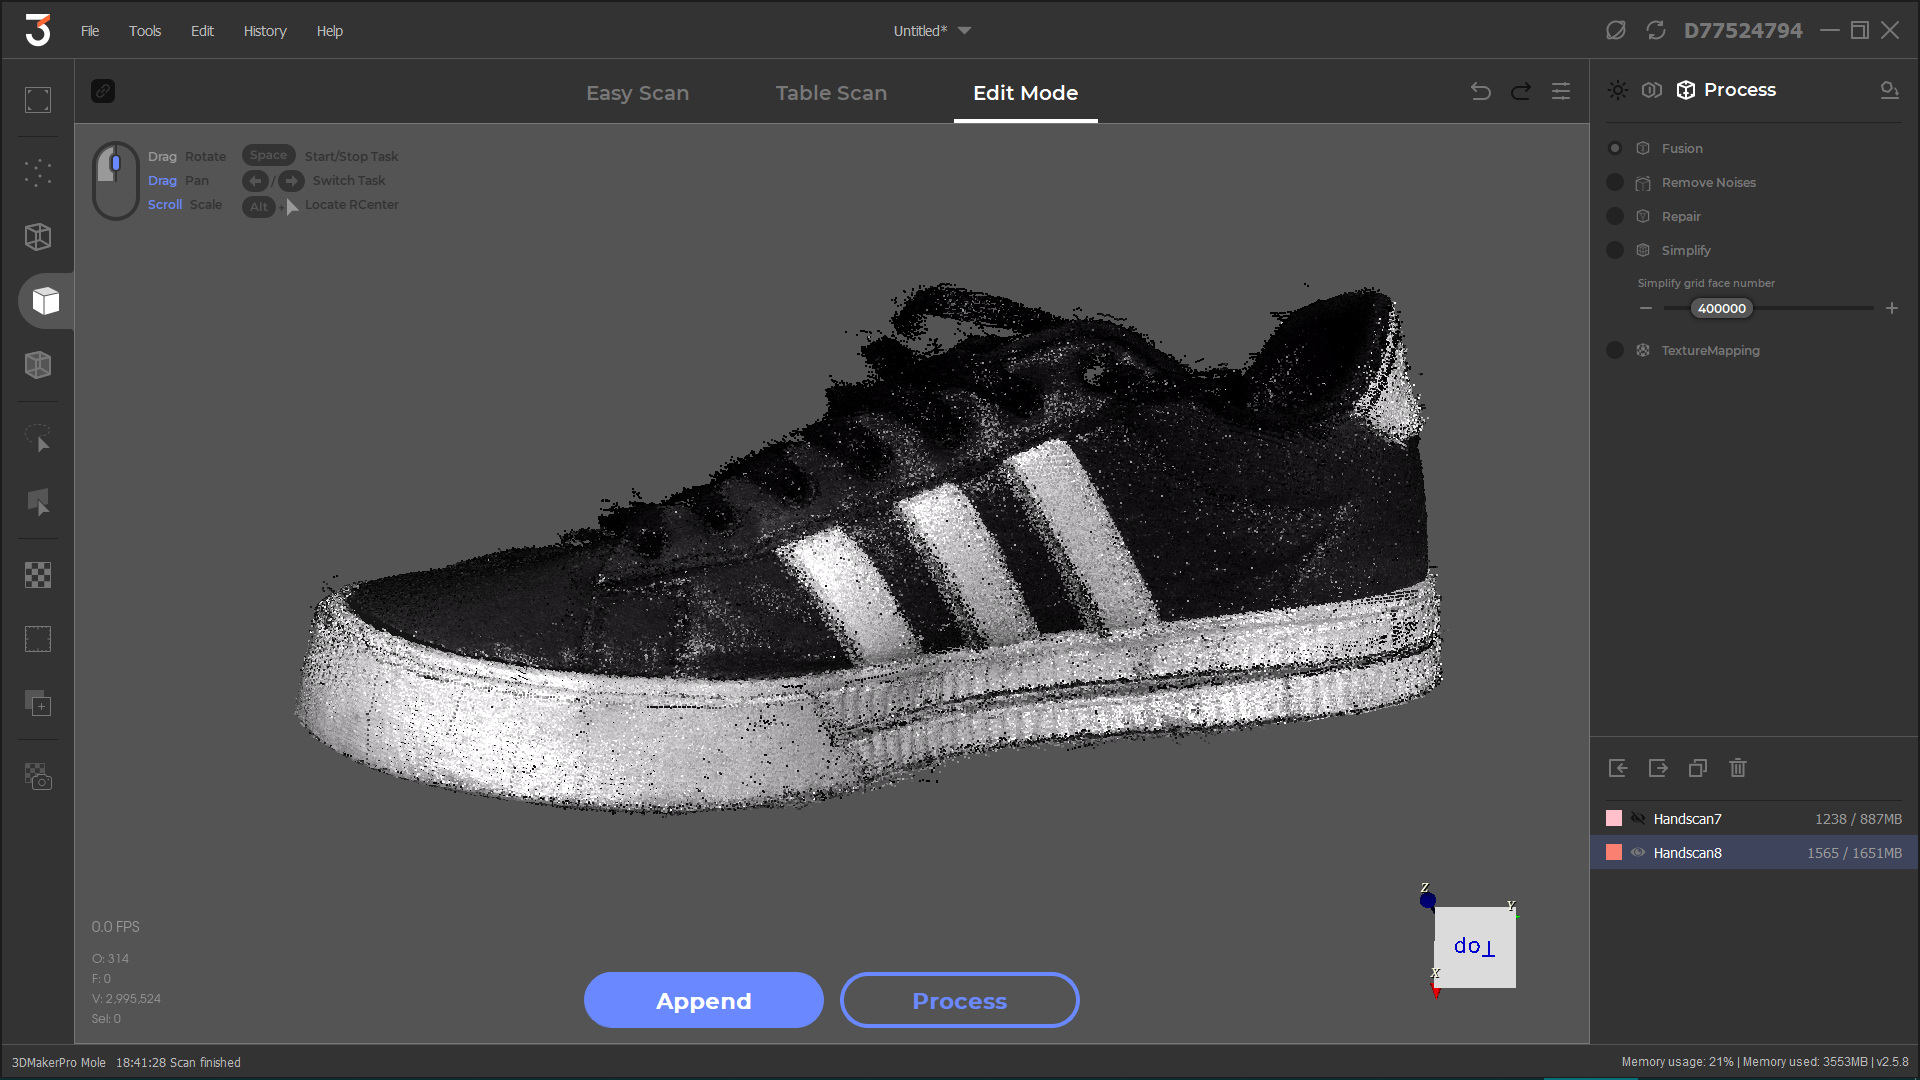
In order to capture color and texture detail, another scan was used and a Texture scan was selected from the SLAM menu.
The scanner captured the color and depth information and created the coloured point cloud that you can see in the image below.
The Mole also comes with a professional-grade color kit, and supports the shooting of complex colors and textures with DSLR and mirrorless cameras. The software will automatically map the colors to the models to achieve true color fidelity. We did not attempt this, as there was no DSLR camera available.
Instead, the sneaker was processed and converted into a 3D model. Again, not bad for a first attempt, as you can see below.
Easy Scan Mode
The first scan of the mask was completed with Table Mode, and the shoe was scanned with a combination of turntable and handheld scanner operations, but we decided to see how big we could scan. We attempted to scan the e-bike that you can see in the image below.
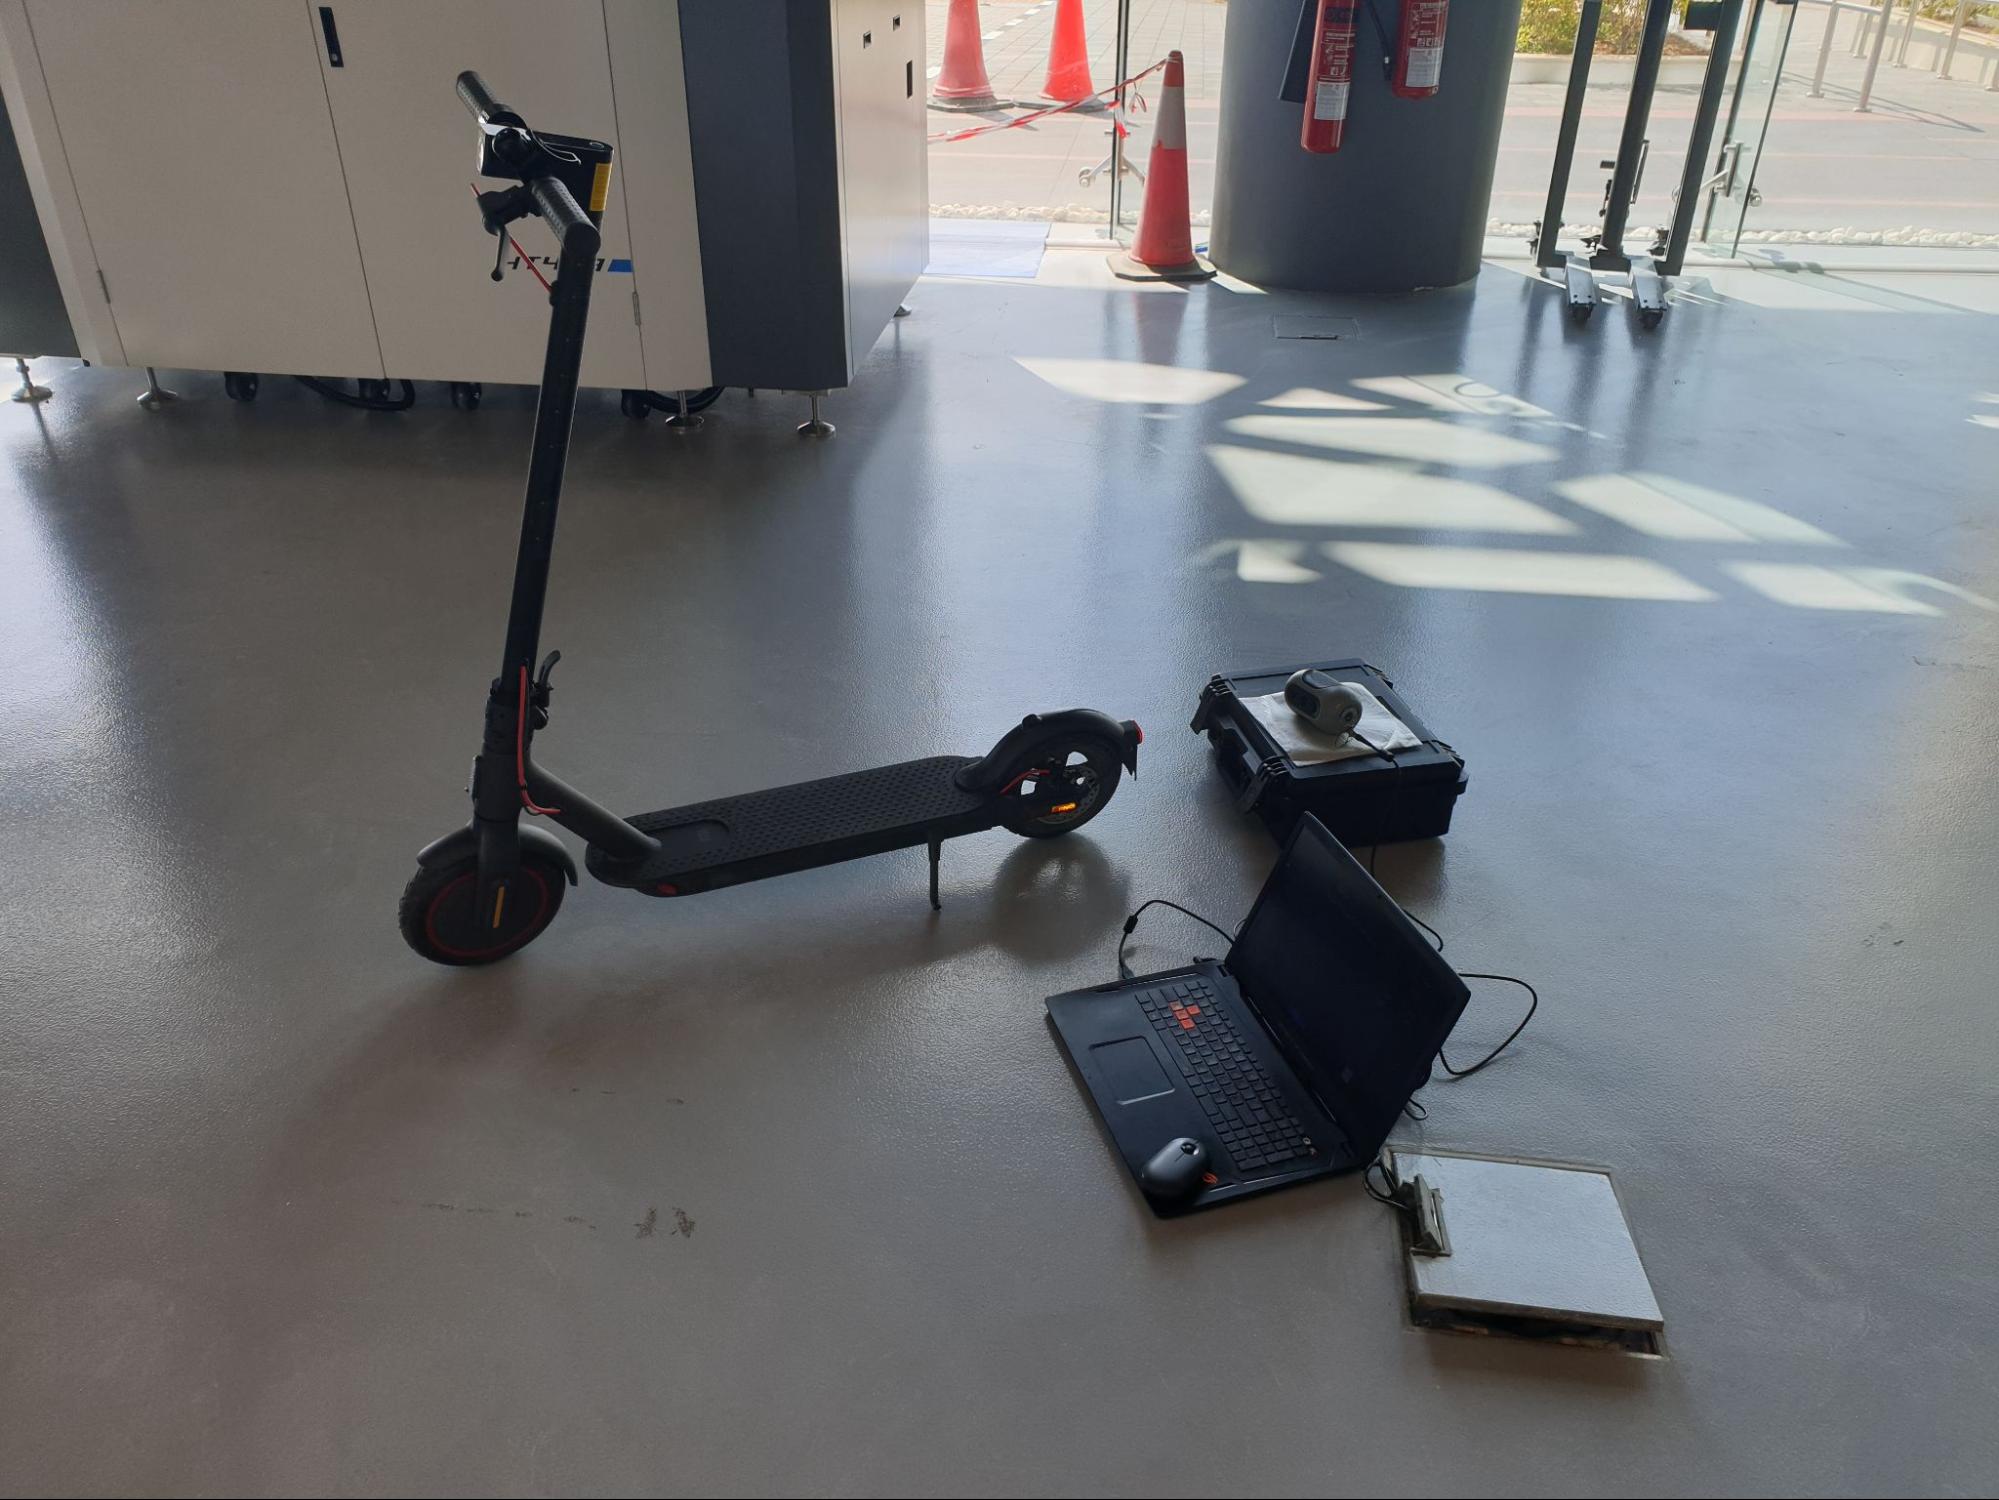
The e-bike has some interesting geometry, and it has a variety of different materials and textures on it.
We did not expect to be able to capture much of the bike without covering it with powder or paint (as recommended by the manual), and we didn’t fancy covering the bike with paint just to scan it.
But, we were pleasantly surprised at how much the scanner was able to capture without modifying the surfaces. As you can see in the image below, almost one complete side of the bike was captured with just a single scan.

Bear in mind that this scanner is for small to medium sized objects, so we didn’t do too badly in capturing the larger e-bike’s geometry.
Scanning larger objects with Easy Mode takes some practice, as there is a sweet spot in terms of the distance between the scanner and the item being scanned. The software shows a graph, guiding your distance to the sweet spot when scanning.
Conclusion
It was our first attempt at using a consumer-grade 3D scanner, and so there was a slight learning curve required to get the desired results. When we returned to the lab to scan things the second day, it was much easier, and by the end of the second day, lessons were learned in terms of the correct distance and the optimum light conditions needed to get the best scan.
The scanner itself is easy to use, and the instruction manual and guide in the software all makes operations a whole lot easier.
As mentioned, the Mole is designed for small to medium sized objects, so it performs optimally when scanning items in that range, and the best results were obtained on Table Mode, thanks to the turntable providing a constant and stable turning motion.
Overall, it’s a useful piece of equipment, especially once you master the basics of 3D scanning, and the quality and detail of the scans are definitely a selling point, especially for the price you pay for the Mole.
For more information about the Mole 3D scanner, head on over to the 3DMakerpro website, at this link.